Overview
An Actility ThingPark Wireless Network Server (LNS) can be integrated with ThingsHub to establish a seamless data flow between the two.
Process
-
Create a Network Connector in ThingsHub
-
Configure the Network Server
-
Set up Routing
Note: Actility ThingPark and Swisscom supports a lot of device manufacturer during the device on-boarding and registration. But from thingsHub, we will use the Generic device manufacturer for any devices we register them to either ThingPark or Swisscom through this network connector. So, devices will be registered as Generic manufacturer devices, not any vendor specific ones.
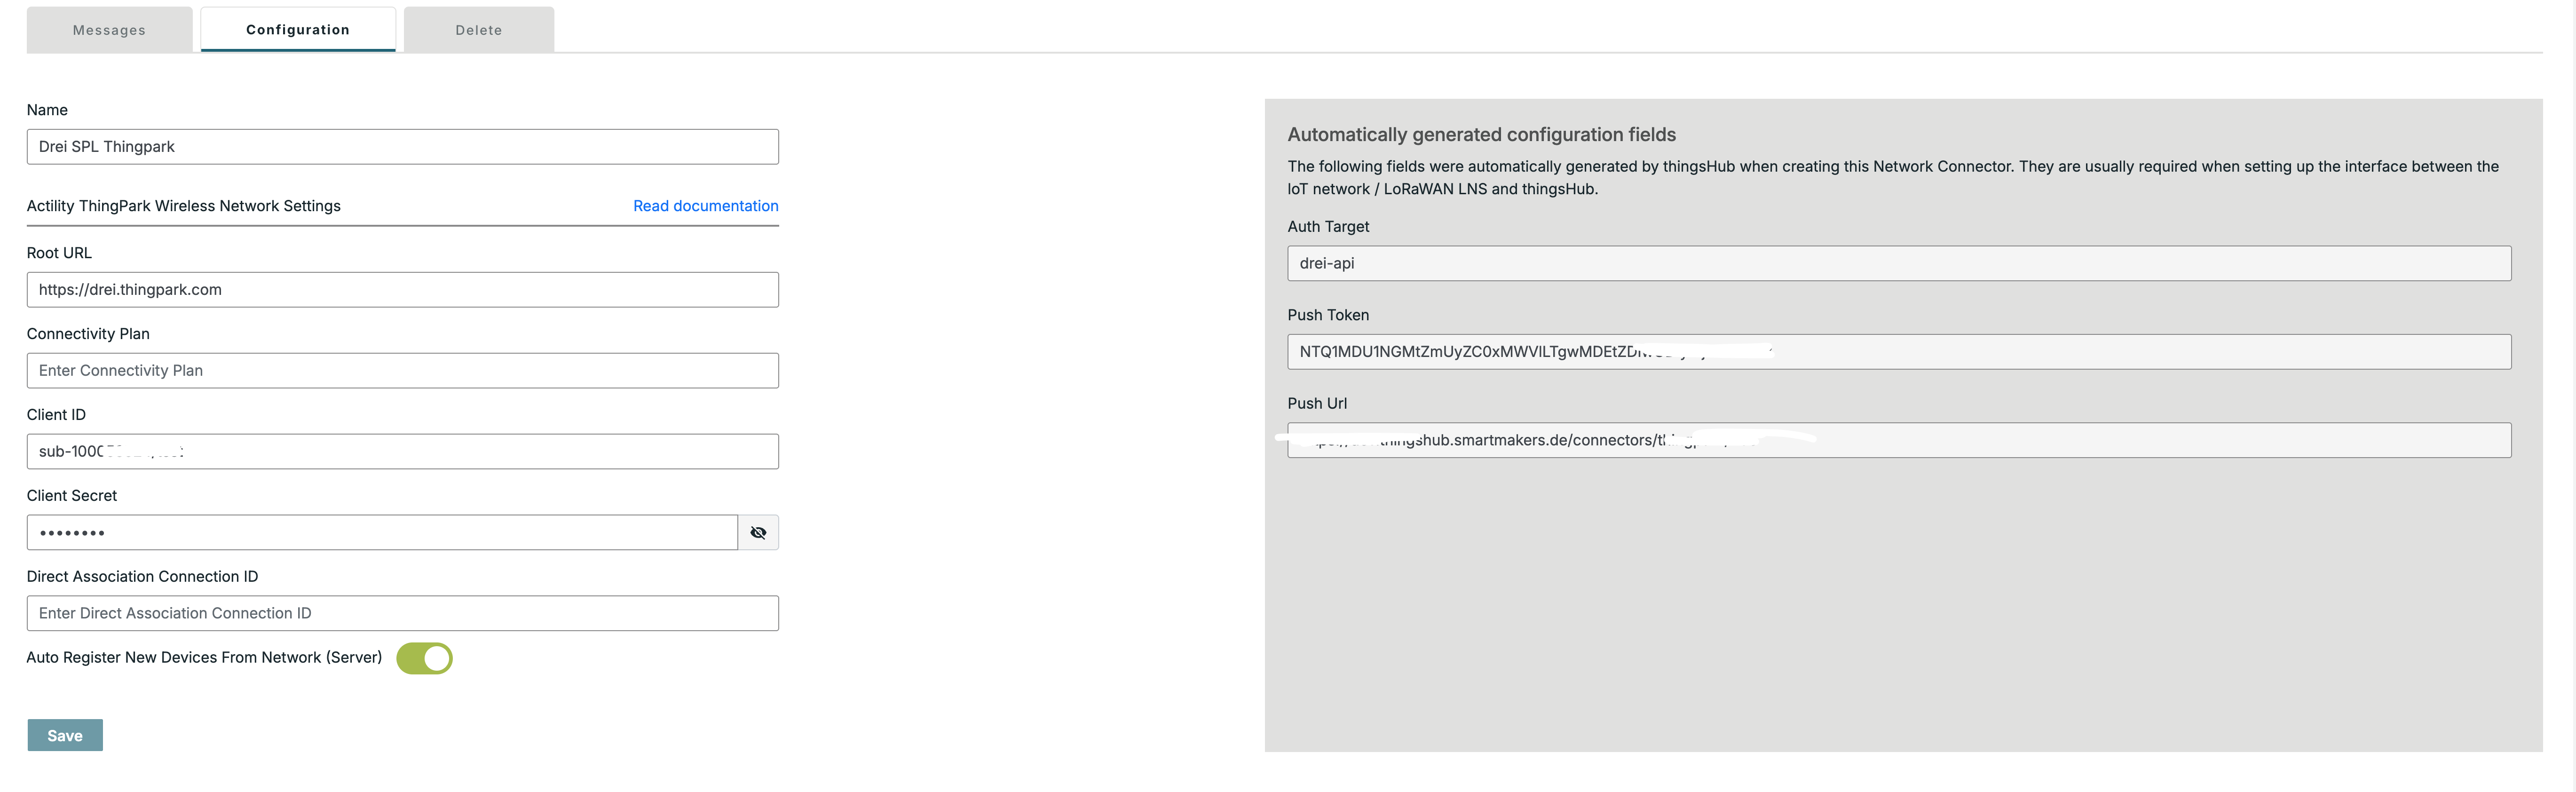
Step 1) Creating the Network Connector in ThingsHub
You need to be a tenant owner to access the tenant settings
-
Open your thingsHub tenant, go to Tenant Settings > IoT Network Connections, then select the New Connection button.
-
In the Connect to IoT Network dialog, enter information in the fields, as described in the parameters table below. Then press the Connect button.
The new network connection will first be validated, and if successful, it will be created.
|
Parameter |
Description |
|---|---|
|
Name |
Name of the network connector |
|
Network Connector |
Choose Actility ThingPark Wireless |
|
Root URL |
Put the root URL of the ThingPark or Swisscom platform. For example |
|
Connectivity Plan |
The Connectivity Plan ID for the devices that will be registered in the network server.
|
|
Client ID |
Client ID of the service account |
|
Client Secret |
Client Secret of the service account |
|
Direct Association Connection ID |
The direct connection ID where the devices will be associated in the network server platform |
|
Auto Register New Devices From Network (Server) |
Set this toggle switch to false if you want to manage the device on your network server via the thingsHub. Set this to true if there are already devices registered in this application or if you want to manage the application manually. If this is set to true, any device that’s already registered in the application will show up in the thingsHub automatically, when it sends data for the first time since creation of the Network Connection. |
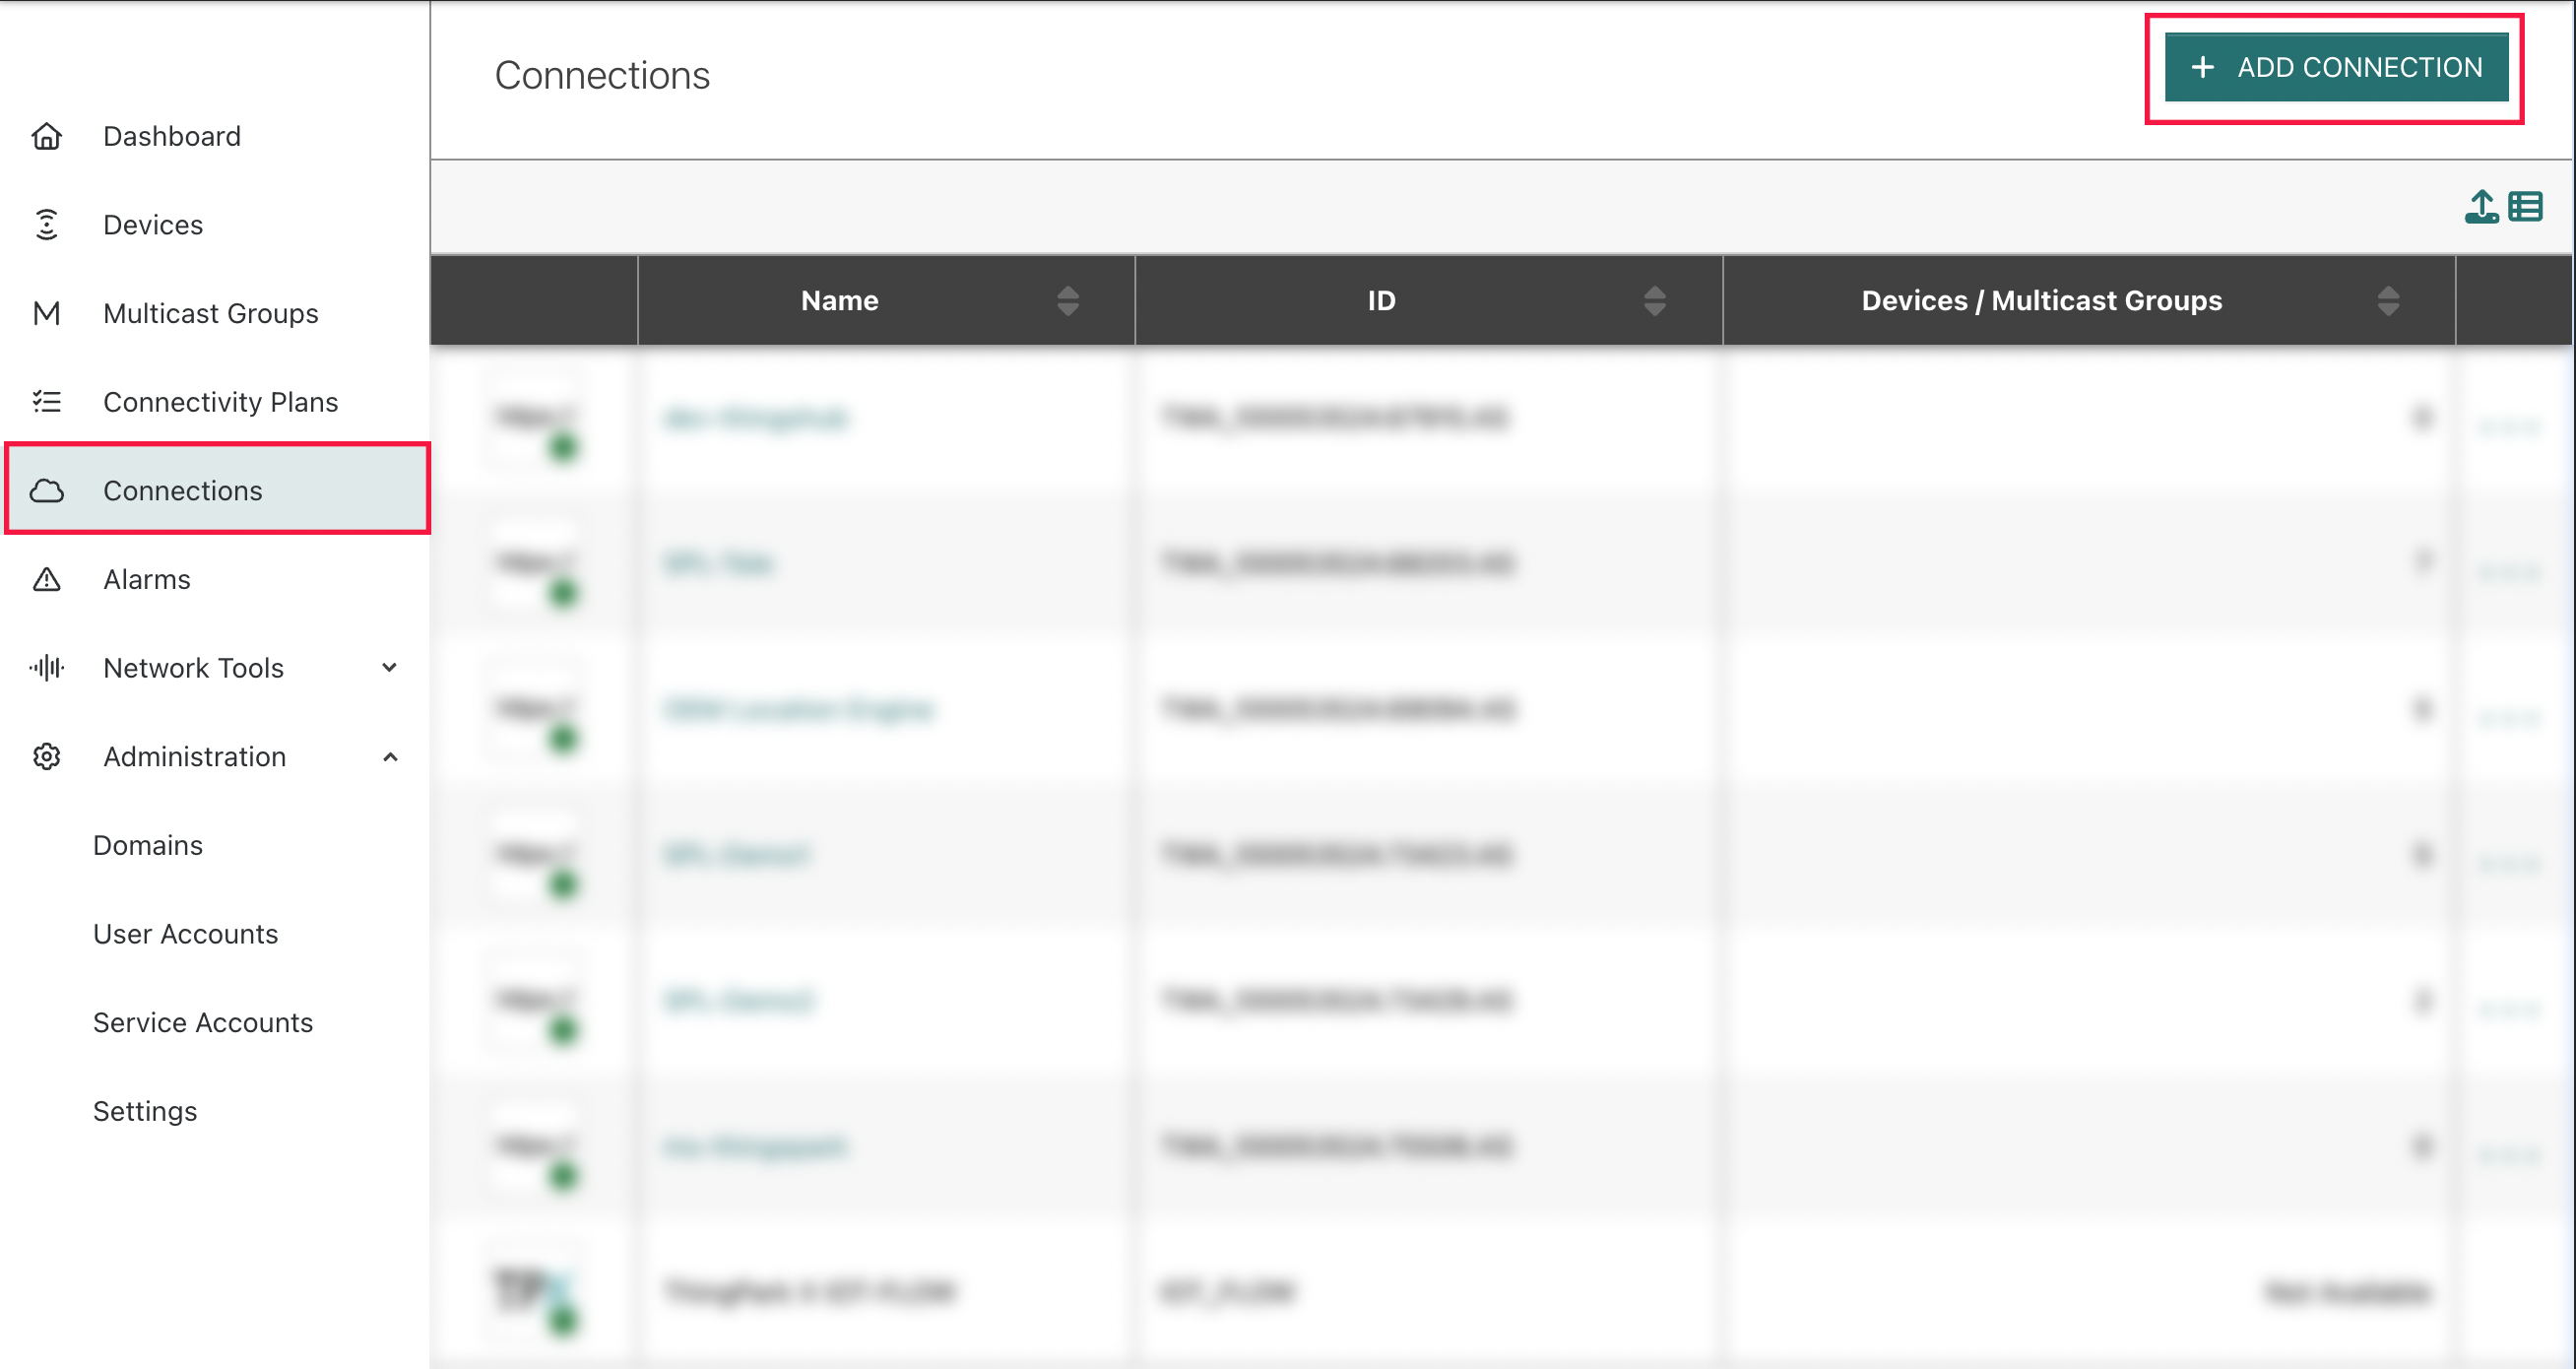
Step 2) Configuring the Network Server
Setting up the Application Server
-
Go to the dashboard page in the network server
-
In the sidebar go to the Connections menu and Add a new connection. Click the Save button.
Application Server Configuration settings:
-
Custom headers: Custom headers can be added to each POST request the network server sends to the application server. We need to add the Authorization header with the push token here as follows:
- Name → Authorization
- Value → Bearer {Your Connector’s Push Token}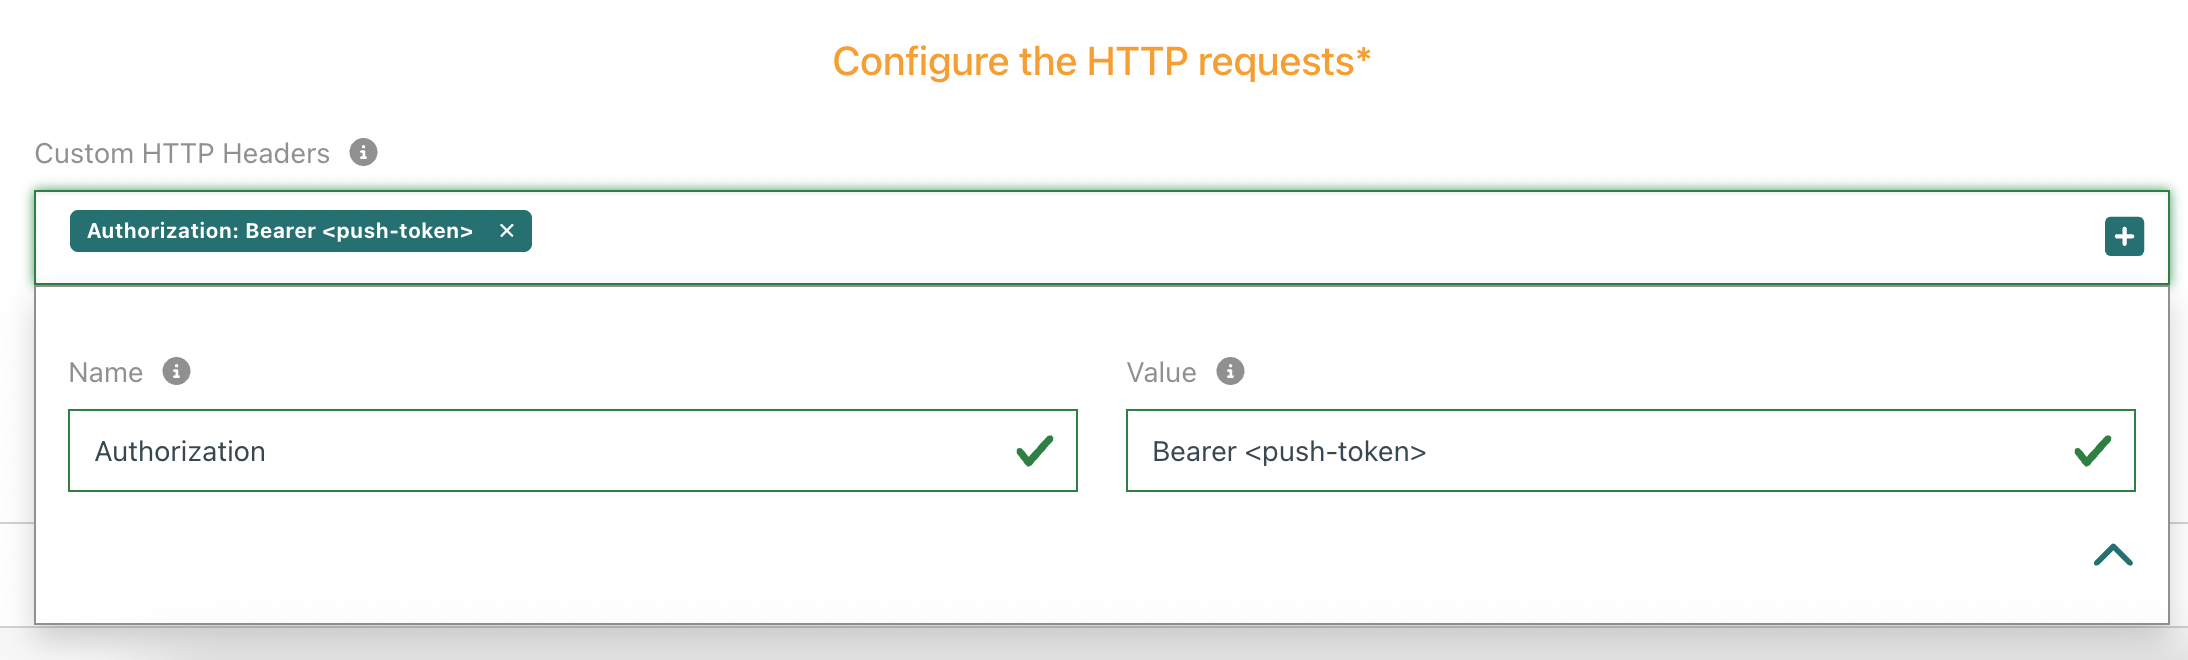
-
Uplink/downlink Security
-
[ESSENTIAL] Route:
This is essential and defines the destination address to which data from the device is ultimately sent. The value of this should be the webhook address generated in the network connector config.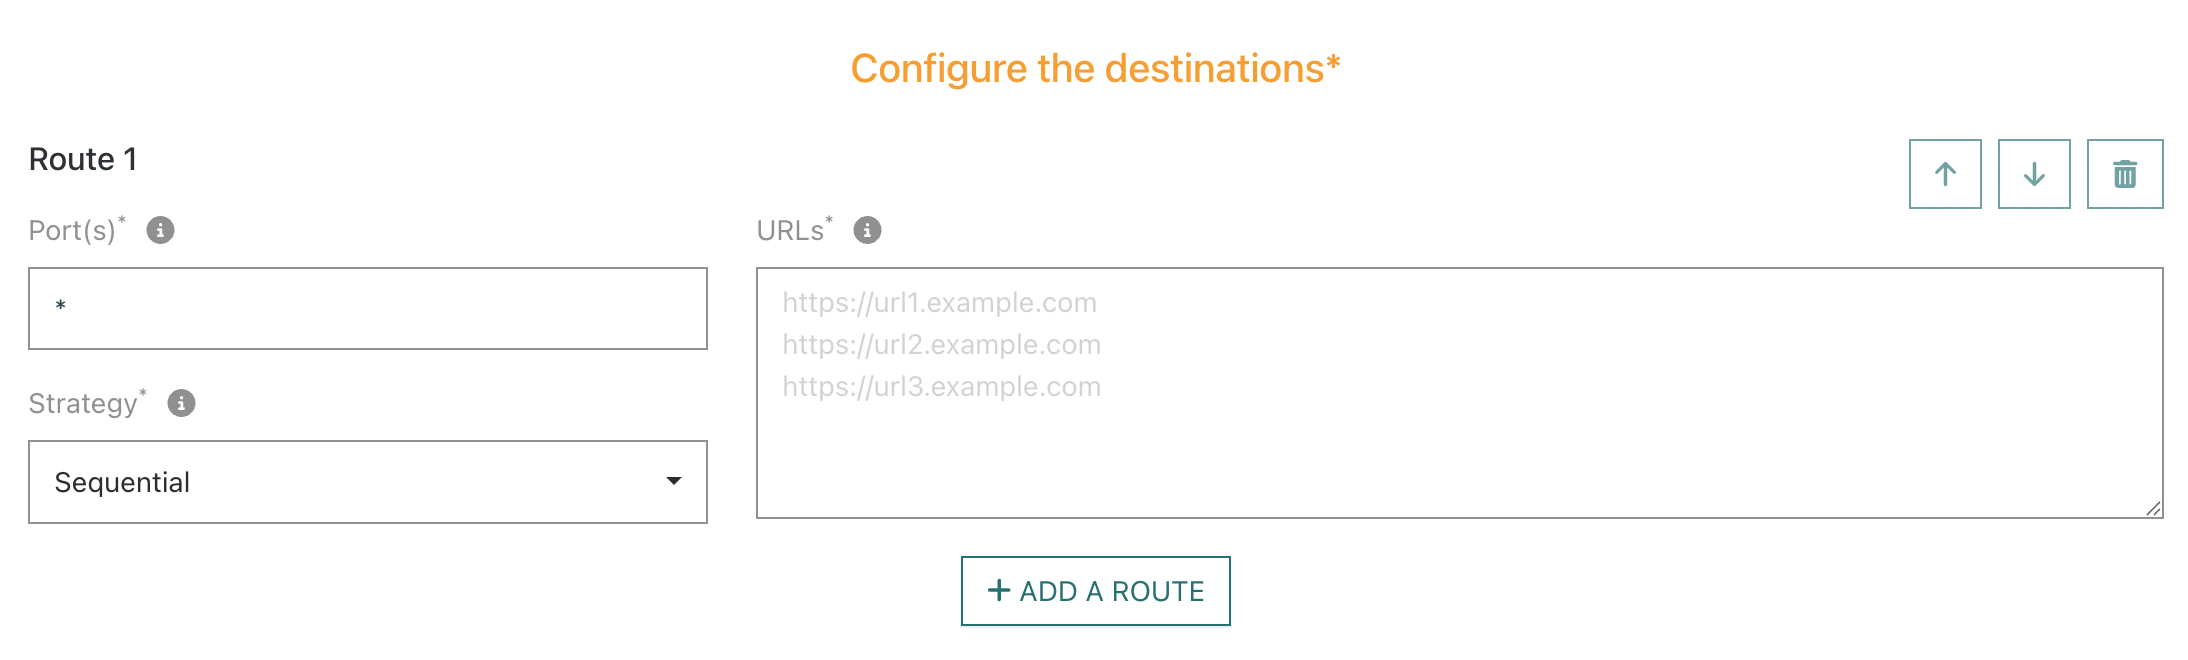
Adding multiple destinations
Multiple webhook destinations can be added to send data to. For this the routing strategy must be set to Blast.
-
The device is now connected to thingsHub.