Kerlink SPN - Small Private LoRaWAN Network
This article explains how Tenant Owners can connect the thingsHub to a Kerlink Small Private LoRaWAN network (SPN) server.
Overview
The Small Private Network is a LoRa network server that runs on a master gateway and allows other gateways to connect to it as slaves. SPN is developed by the French company Kerlink.
The server connection process
In the Kerlink SPN network server interface, retrieve server configuration data to be used in the thingsHub server connection configuration.
In the thingsHub tenant, use the Kerlink configuration data to connect to the network server. In addition, generate data to be used to complete the Kerlink SPN server configuration.
In the Kerlink SPN network server interface, use the generated data to complete the Kerlink SPN server configuration.
Setting up an SPN connection
Step 1) Prepare the SPN network server and retrieve network credentials & gateway ID.
Ensure that the SPN server is running and directly accessible to the thingsHub (not a private network).
In the Kerlink dashboard, retrieve and record the below information. This information will be entered in the thingsHub network connection fields.
Login credentials, including login name and matching password. These are the same credentials used to login to the SPN admin console.
Master gateway ID. This ID can be retrieved in the SPN admin console’s Overview page.
Step 2) In the thingsHub, connect to the network server.
1) Open your thingsHub tenant, go to Tenant Settings > IoT Network Connections, and then select the Connect IoT Network button.
2) In the Connect to IoT Network dialog, enter information in the fields as described in the parameters table below. Then press the Connect button.
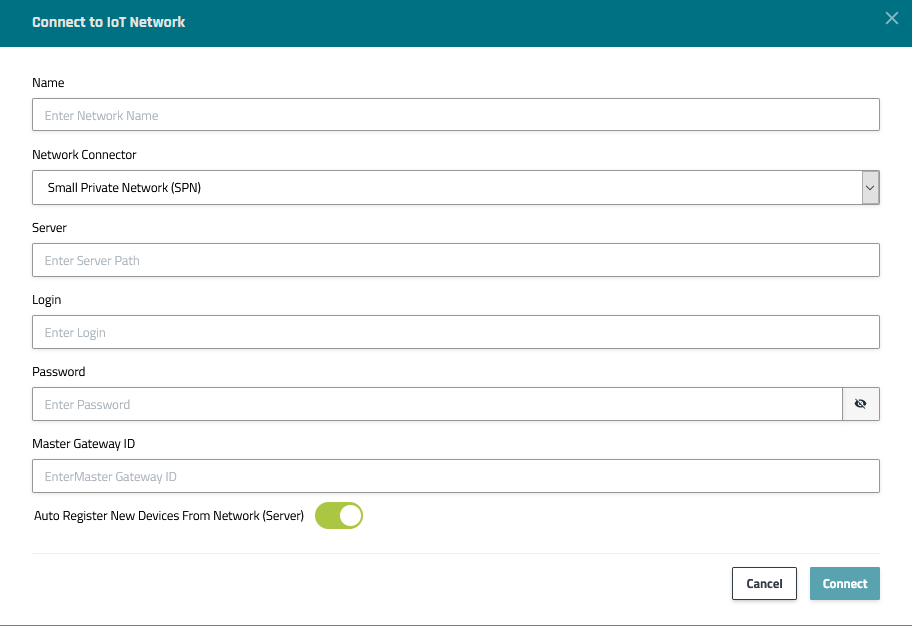
Parameter | Description |
|---|---|
Name | The display name of this Network Connection. |
Network Connector | Choose Small Private Network (SPN) |
Server | The SPN’s URL (including schema). |
Login | The username of the user as whom the thingsHub will use to manage the SPN. |
Password | The password of the user as whom the thingsHub will use to manage the SPN. |
Master Gateway ID | The master gateway's ID (identical to the gateway's EUI). |
Auto Register New Devices From Network (Server) | Set this toggle switch to false if you want to manage the device on your network server via the thingsHub. Set this to true, if there are already devices registered in this application or if you want to manage the application manually. If this is set to true, any device that’s already registered in the application will show up in the thingsHub automatically, when it sends data for the first time since creation of the Network Connection. |
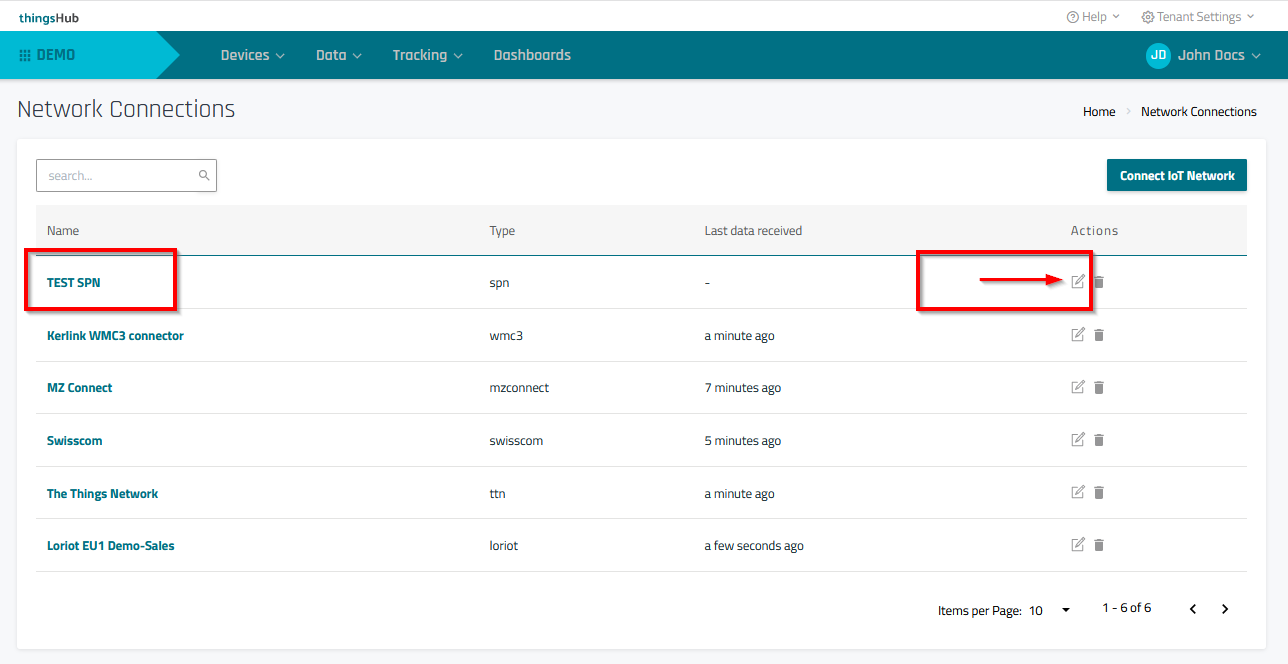
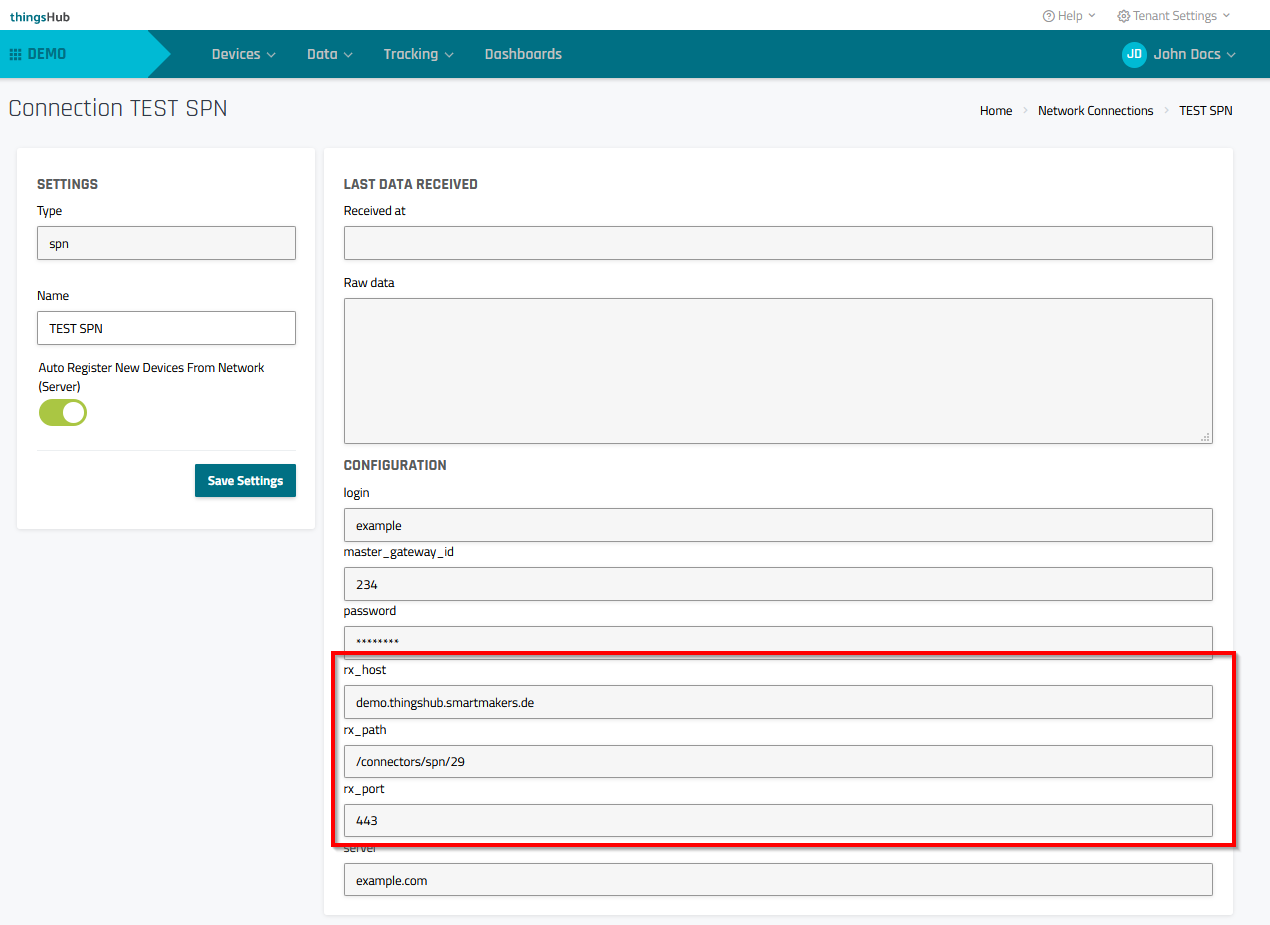
3) After the connection has been created, go to the connection details page to retrieve the below information. You will use it to complete the connection in the Kerlink SPN dashboard.
rx_host
rx_path
rx_port
Network Connections page
Network Connection Details page
Step 3) Establish the data connection from the SPN to the thingsHub.
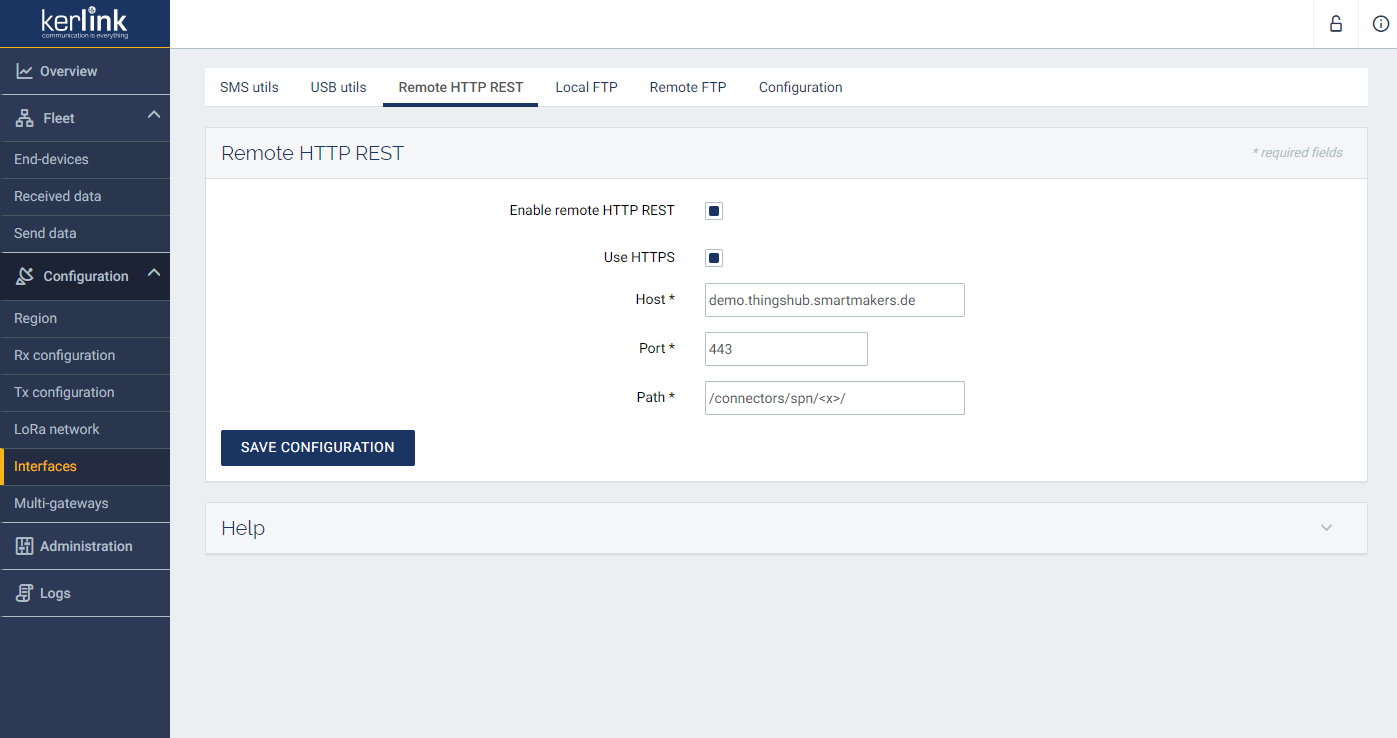
1) In the Kerlink SPN dashboard, go to the SPN admin console, select Interfaces, and then select the Remote HTTP REST tab.
2) Enter the rx_host, rx_port, and rx_path into the form fields.
3) Press the Save Configuration button to complete the connection.
Next steps
You can now connect your devices via this network connection with the thingsHub. You can either add a new device now and connect it during this process, or connect an existing device on the device’s Network tab.