Kerlink WMC3 / Wanesy Management Center
This article explains how Tenant Owners can connect the thingsHub to a Kerlink Wanesy Management Center server.
Overview
The Kerlink Wanesy Management Center (WMC3) is a LoRa Network Server implementation which is developed and provided by the French company Kerlink.
Prerequisites
This setup guide assumes that the following preconditions are satisfied:
A Kerlink LNS organization has been created
A user account in this organization has been created with Clusters, Endpoints, and Gateway management privileges and its credentials are known
A gateway is currently connected to the LNS
Optional: an
Endpoint(IoT device) is created, has joined the network, and is sending data regularly.
The server connection process
Create a Cluster in the Kerlink LNS UI
Begin the Kerlink LNS Cluster configuration
Create network connector in thingsHub
Complete the Kerlink LNS Cluster configuration
Setting up a Kerlink WMC3 network connection
Step 1) Create a Cluster in the Kerlink WMC3 LNS UI
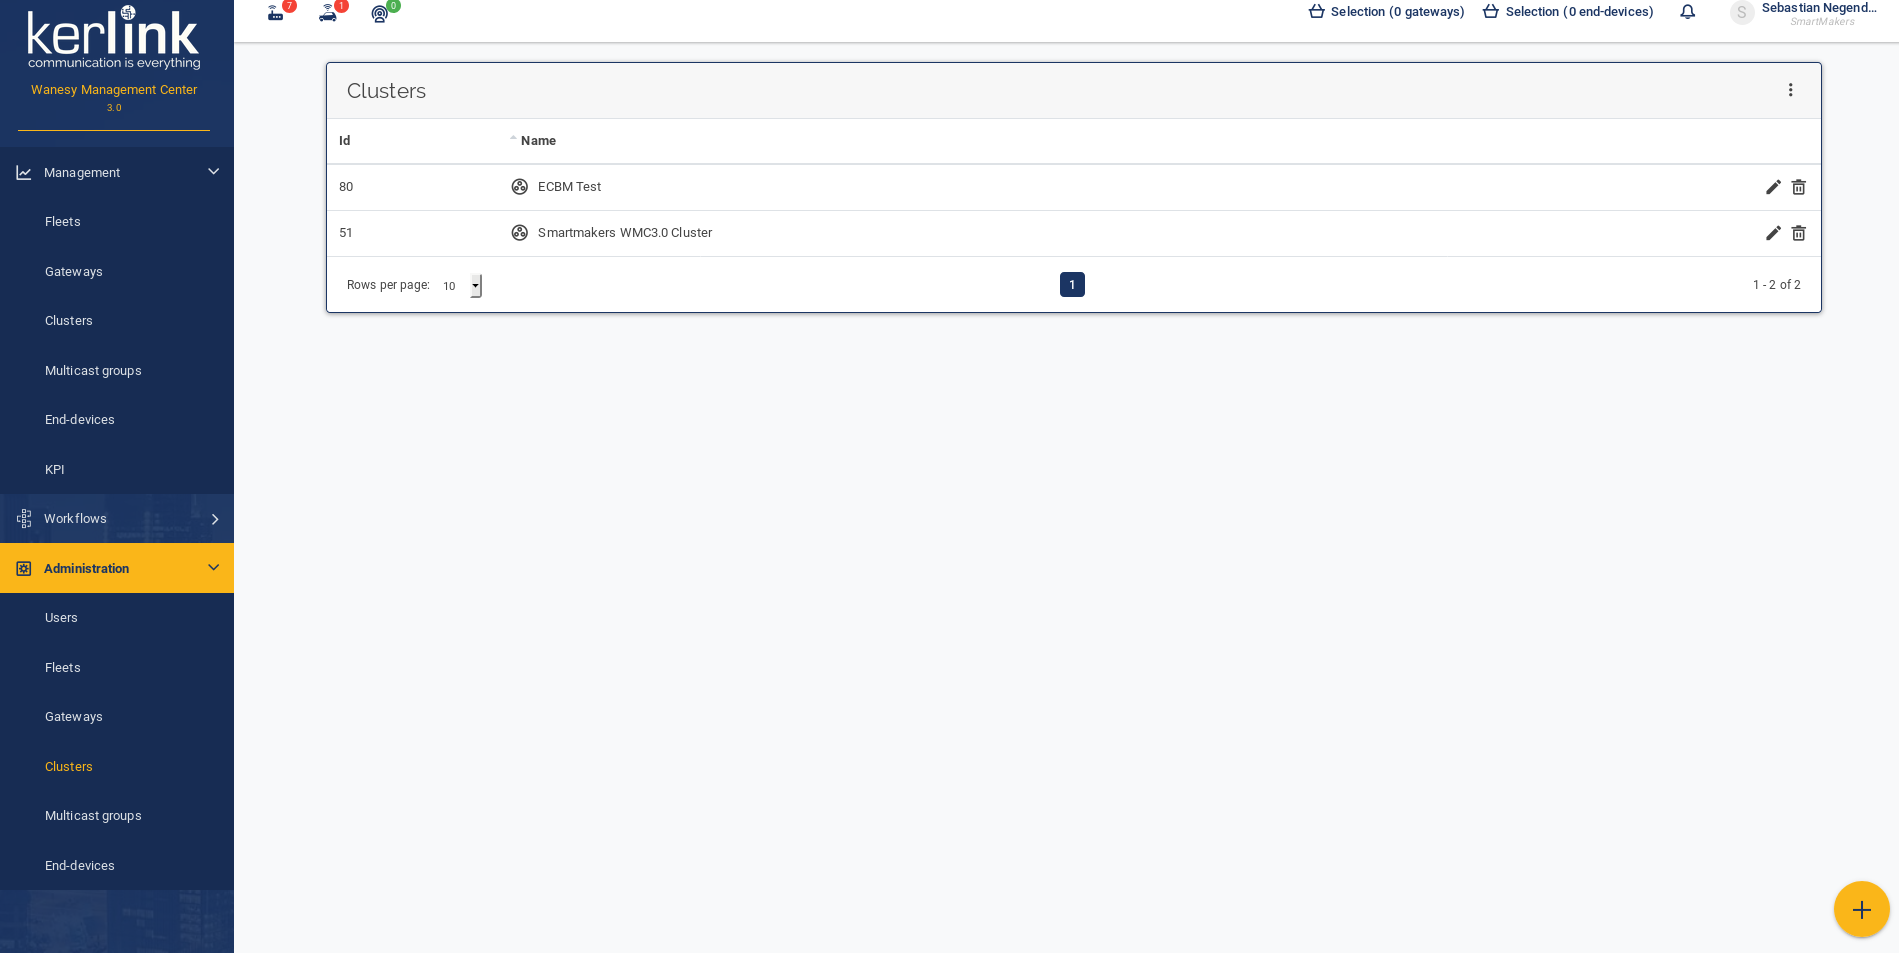
1) In the Kerlink LNS UI, go to Administration > Clusters and press the Add Cluster button (the big plus button located in the bottom right corner).
2) Enter the new cluster name and press VALIDATE.
Step 2) Configuring a Kerlink LNS cluster
1) Go to Administration > Clusters and press the Pencil icon to open the configuration form.
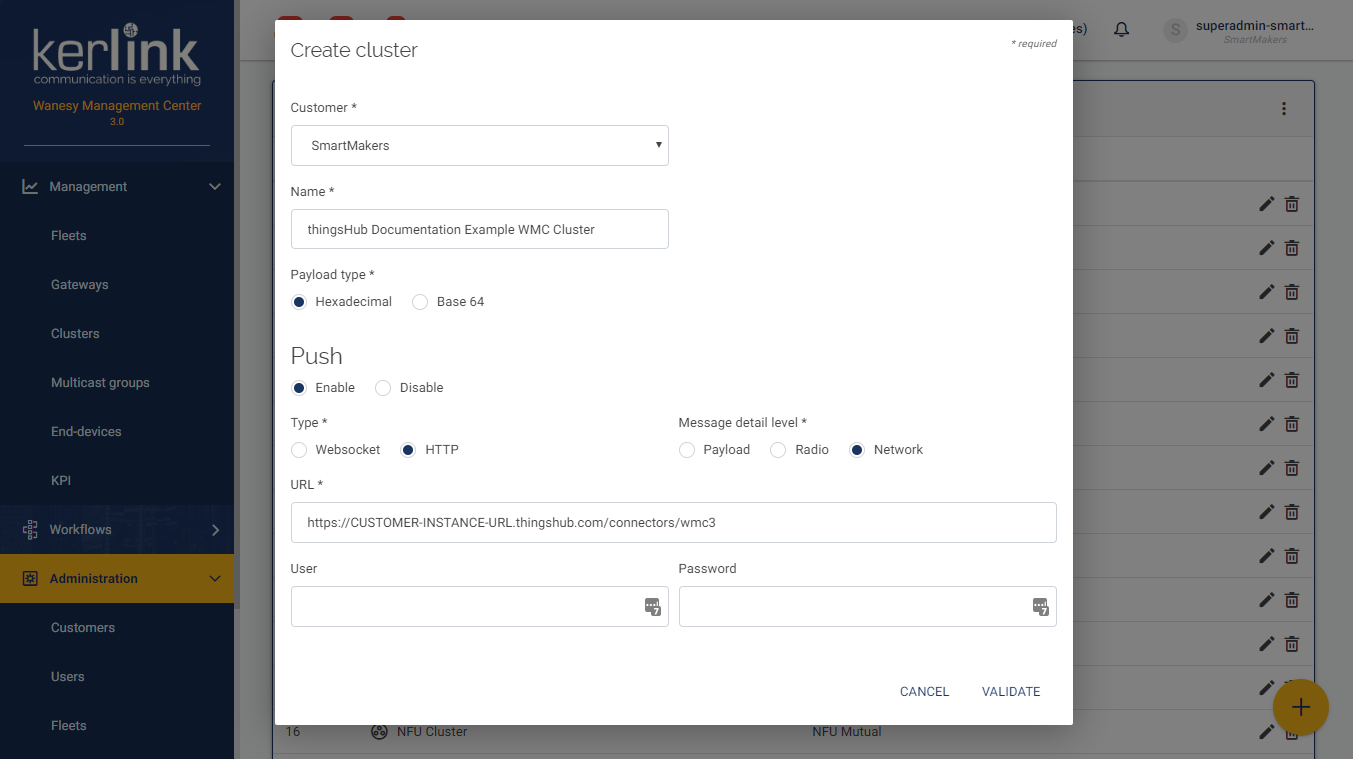
2) Complete the form per the below requirements and then press the Validate button.
Required configuration:
Customer: any
Name: any
Payload Type: select "Hexadecimal"
Push Section
Select "Enable"
Type: select "HTTP"
Message Detail Level: select "Network"
Username: leave blank, not used
Password: leave blank, not used
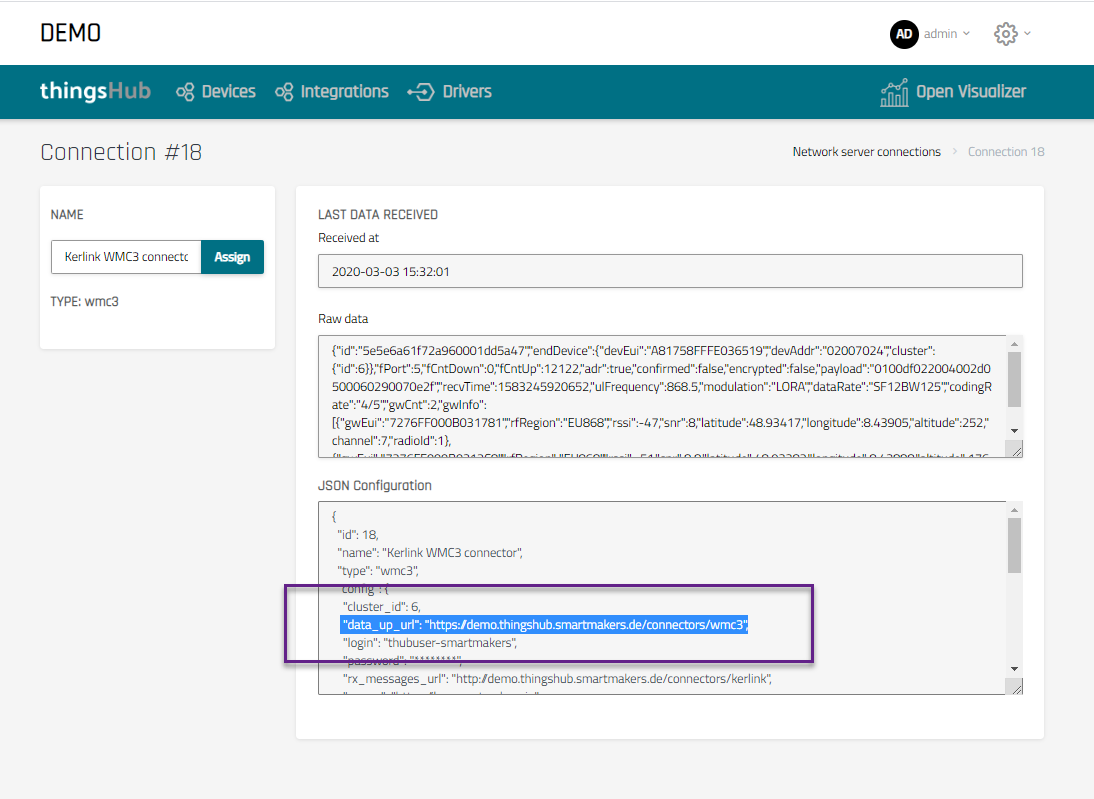
URL: set value to "data_up_url" from thingsHub connector configuration.
Tip
The correct setting for the URL parameter can be found in your newly created thingsHub Network Connector as "data_up_url" attribute:
Step 3) Creating a Kerlink LNS network connector in thingsHub
1) Open your thingsHub tenant, go to Tenant Settings > IoT Network Connections, and then select the Connect IoT Network button.
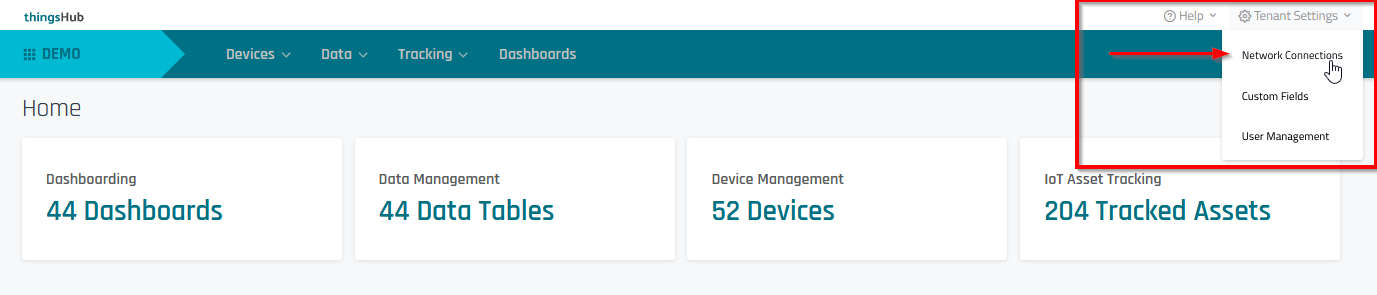
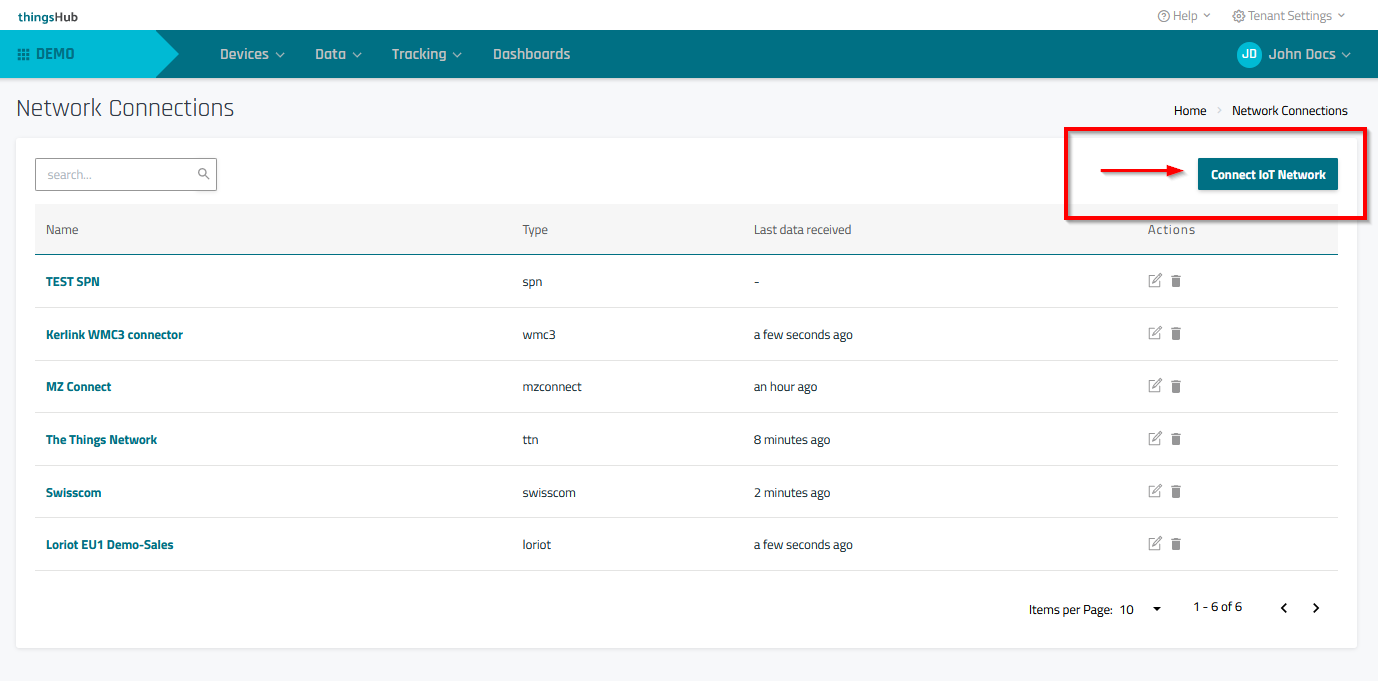
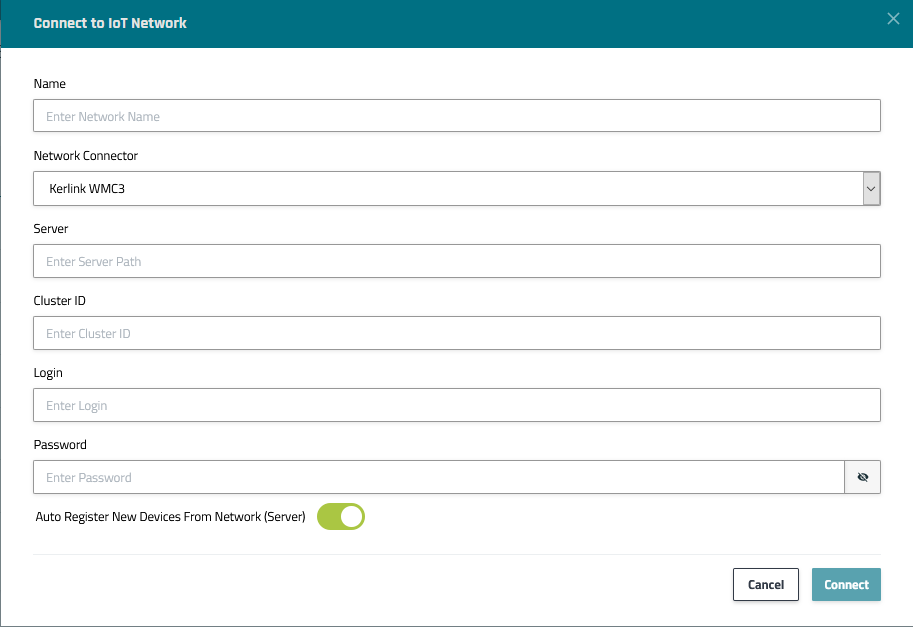
2) In the Connect to IoT Network dialog, enter information in the fields as described in the parameters table below. Then press the Connect button.
Parameters
Parameter | Description |
|---|---|
Name | The display name of this Network Connection. |
Network Connector | Choose Kerlink WMC3 |
Server | Kerlink LNS instance URL (typically, https://lns.smartmakers.io) |
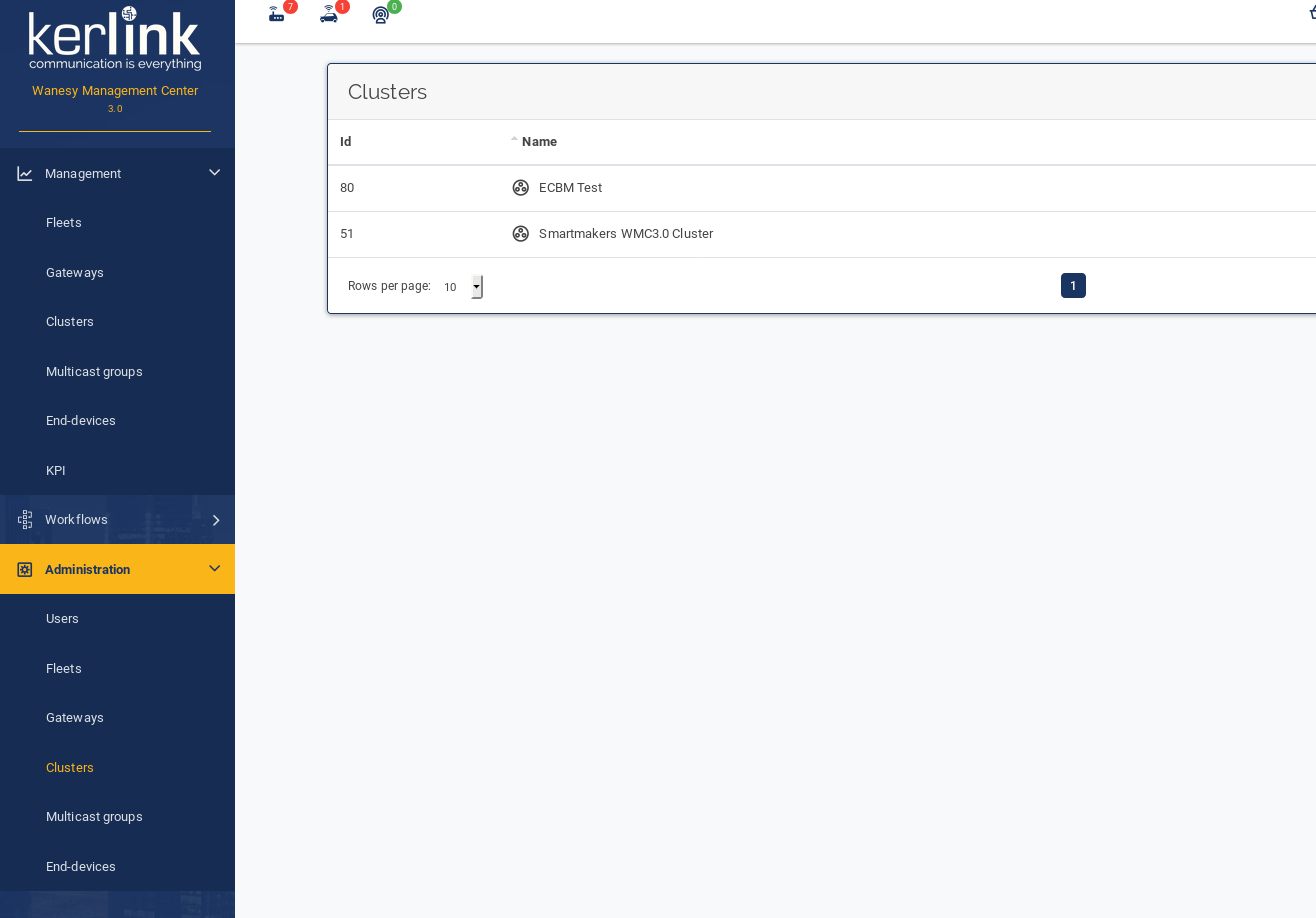
Cluster ID | ID of cluster (concept similar to Device Group in thingsOS) to receive data from. See image below to retrieve value: |
Login | The username of the user as whom the thingsHub will use to manage the SPN. |
Password | The password of the user as whom the thingsHub will use to manage the SPN. |
Auto Register New Devices From Network (Server) | Set this toggle switch to false if you want to manage the device on your network server via the thingsHub. Set this to true, if there are already devices registered in this application or if you want to manage the application manually. If this is set to true, any device that’s already registered in the application will show up in the thingsHub automatically, when it sends data for the first time since creation of the Network Connection. |
Step 4) Complete the Kerlink Cluster configuration
1) In the Kerlink LNS UI, go to Administration >Clusters and select Copy Cluster ID value.
Results: When the connector object is created, thingsHub will attach a data_push_url read-only parameter to config section.
Next steps
You can now connect your devices via this network connection with the thingsHub. You can either add a new device now and connect it during this process, or connect an existing device on the device’s Network tab.