Data Exporter
This article describes how to export data contained a data table to an external server.
Using the New Integration wizard to set up the Data exporter
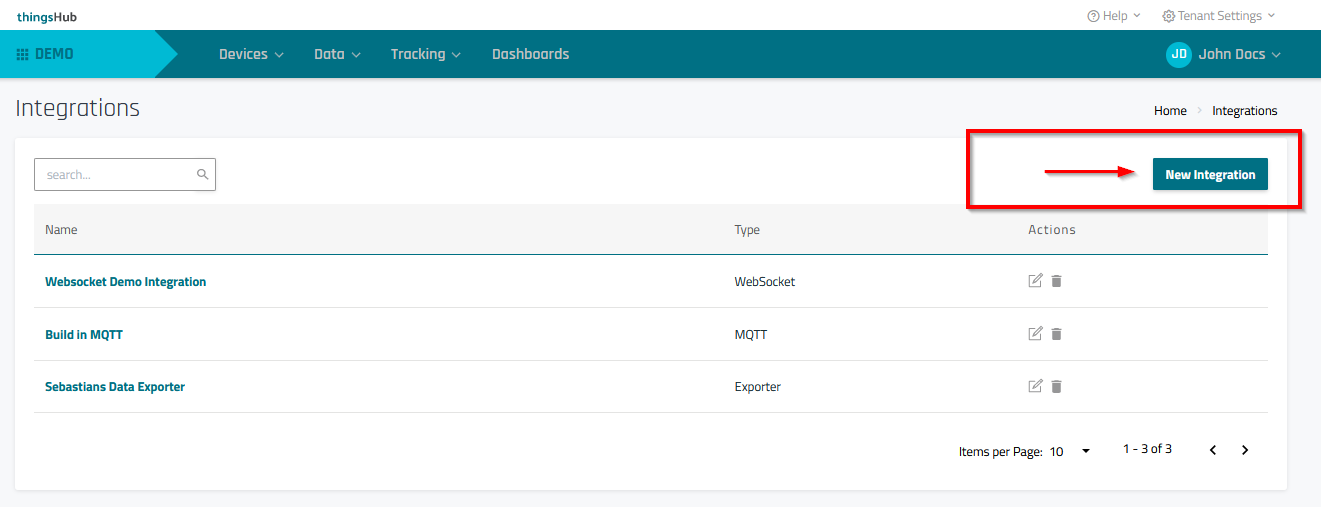
Step 1) Go to Data > Integrations and select the New Integration button.
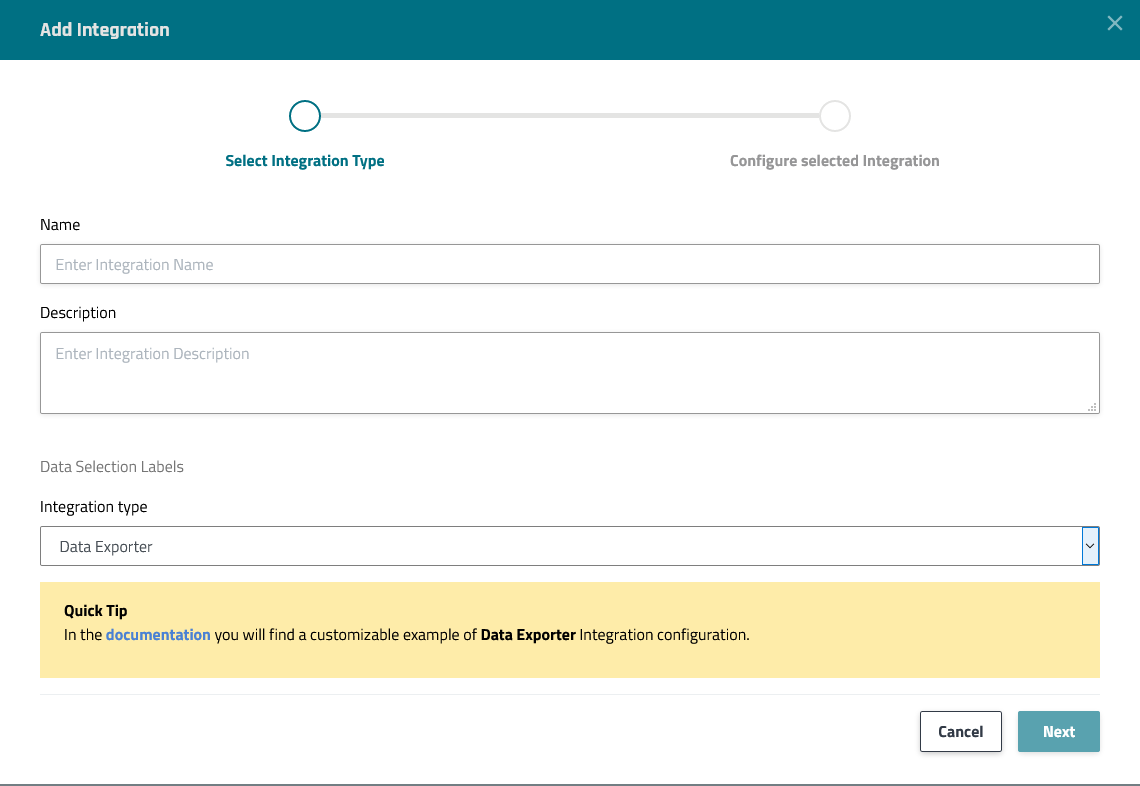
Step 2) In the Select Integration Type step of the Add Integration wizard, enter the configuration information as described in the below parameters table. Then press the Next button to continue to the next step, Configure selected Integration.
Parameter | Description |
|---|---|
Name | Enter a name for the integration. |
Description | Optional field used to describe the integration. |
Data Selection Label | Selection labels are not required applicable to the Data Exporter. This is because the exporter is drawing data from Data Tables, which have already been created using device labels. |
Integration type | Select Send to external MQTT Broker |
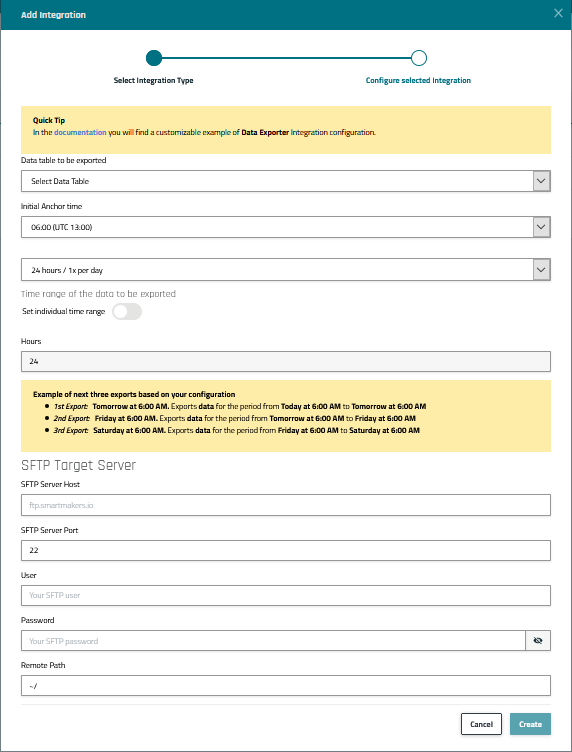
Step 3) In the Configure selected Integration step, enter the configuration information as described in the below parameters table. Then press the Create button to complete the process and return to the Integrations page.
Parameter | Description |
|---|---|
Data table selection and scheduling parameters | |
Data table to be exported | Select the data table from the drop-down list. This data will be exported on a recurring basis, with the intervals and frequency determined by the below fields. |
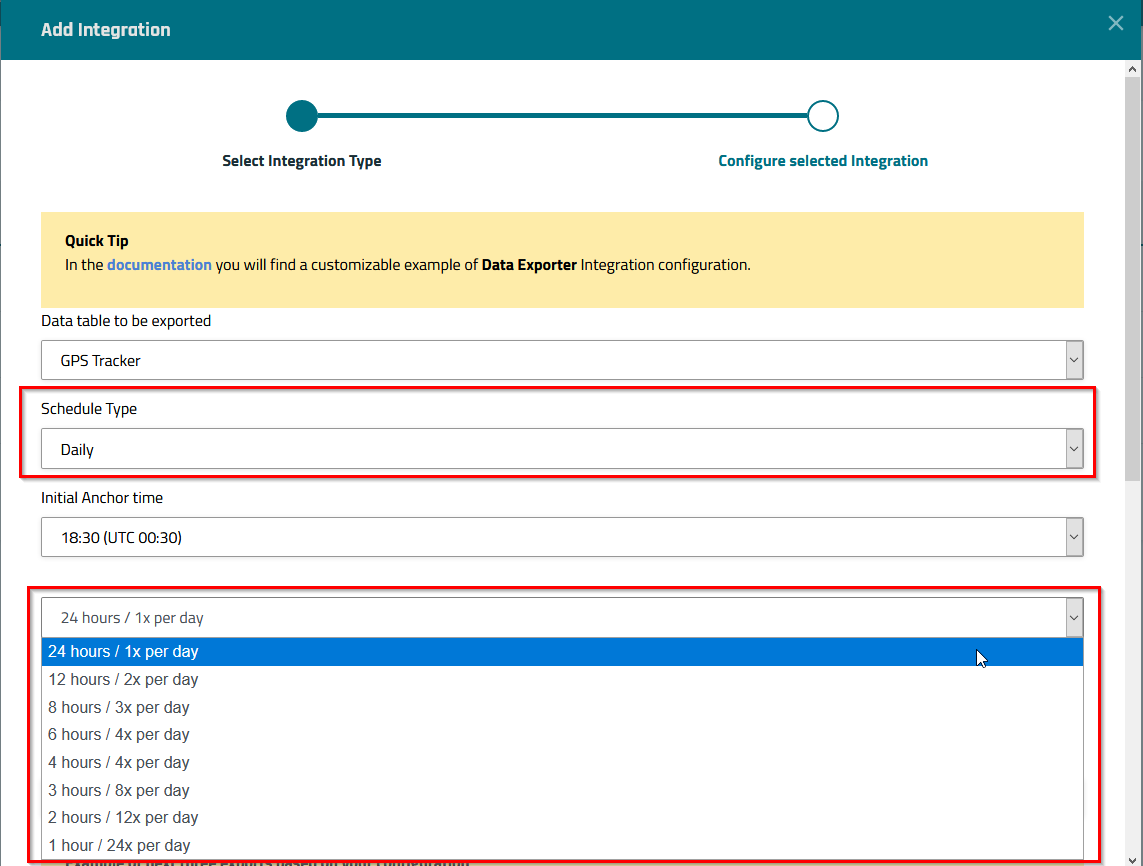
Schedule Type | This setting determines how often the data is exported. You can select between Daily or Monthly intervals.
|
Initial Anchor time | Determines when the data will first be exported. |
Time range of the data to be exported | This setting applies only to the Daily schedule type. Only data recorded within this past time frame will be exported. |
Set individual time range | By default, the time range of the data to be exported is automatically set; it is determined by the daily schedule frequency. However, this toggle switch allows you manually set the time range via the Hours field. This optional can be useful to allow for overlapping time ranges, so that data that is added to a time interval after that interval has already been exported, will be exported with the following export. |
Hours | Time range of recorded data to be exported. Example: 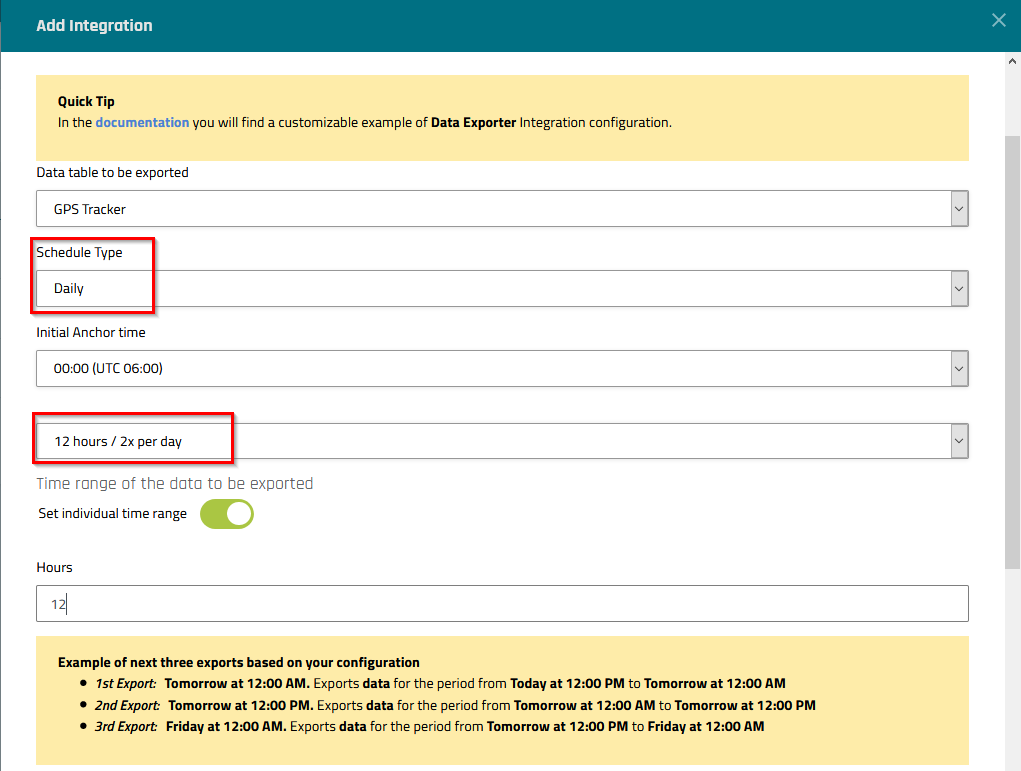 |
SFTP Target Server parameters | |
SFTP Server Host | SFTP server address. Consult the SFTP server administrator to retrieve this information.
|
SFTP Server Port | Remote server port. Consult the SFTP server administrator to retrieve this information. |
User | Remote server user name. Consult the SFTP server administrator to retrieve this information. |
Password | Remote server password. Consult the SFTP server administrator to retrieve this information. |
Remote Path | Folder path used to store files on the remote server |
Data Exporter Status Logs
The Data Exporter will have two types of status logs:
When there’s an export run happens in the given time period specified in the Data Exporter Integration
When there’s new data comes to the device labels specified as selectors in the Data Exporter Integration.
Note: These second status logs will not be present:If there’s no device selected in the Labels selector
The devices selected through the labels selector are not sending data