Loriot Network Server
This article explains how Tenant Owners can connect the thingsHub to a Loriot Network Server. The Loriot Network Server is a LoRaWAN Network Server developed by the Swiss company, Loriot (loriot.io).
Overview
The server connection process
Perform the following tasks in the Loriot server dashboard:
Create a new API Key
Record the associated Application ID
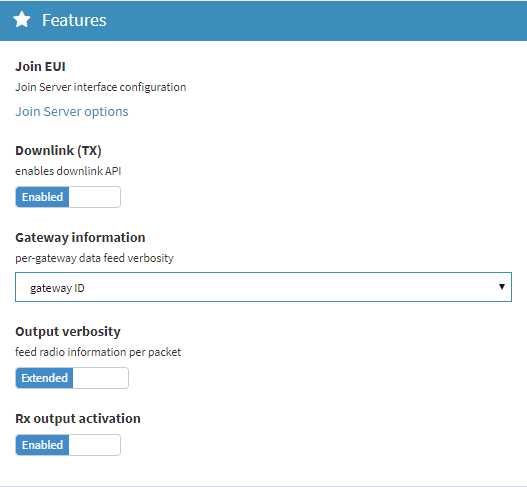
Ensure that the Output verbosity it set to gateway ID, at a minimum.
In the thingsHub, create a new IoT connection, which will include the Loriot Server API Key and Application ID.
Connect to a Loriot Network server
Step 1) Go to your Loriot Network Server dashboard (e.g. eu1.loriot.io) and log in to your account.
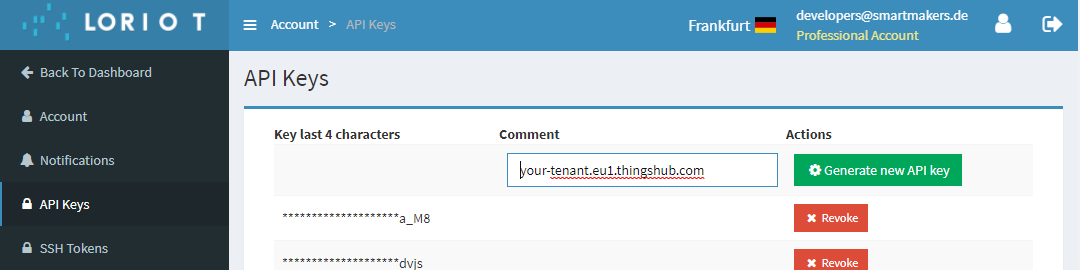
Step 2) Go to Account > API Keys, and create a new API Key.
Notes:
It is strongly recommended that you add a comment to the key, such as the domain name of your thingsHub tenant. Doing so will make it much easier to identify the key in the future, such as when you need to revoke the API key.
You will need to enter the API Key in the thingsHub as described in Step 5, below.
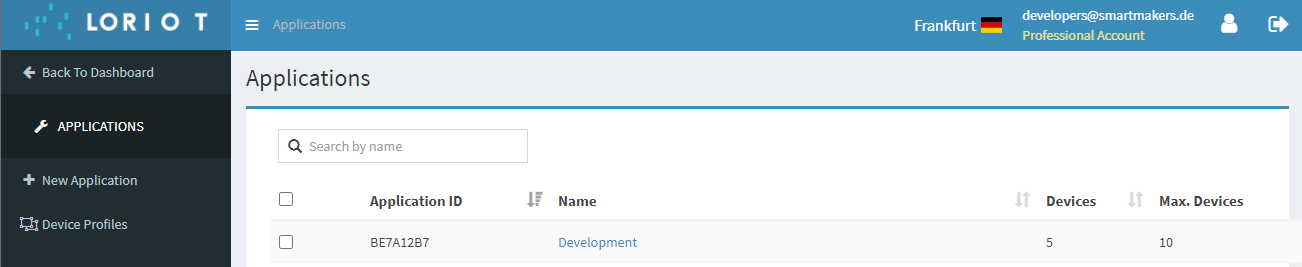
Step 3) In the Loriot dashboard, navigate to the application that will be connected to the thingsHub and record its Application ID.
Notes:
The Application ID starts with BE and is followed by six numbers or letters.
You will need to enter the Application ID in the thingsHub as described in Step 5, below.
Step 4) In the Applications page in the Loriot dashboard, ensure that the Output verbosity is set to contain at least the gateway ID. The thingsHub will not receive any data if the Output verbosity is set to Disabled.
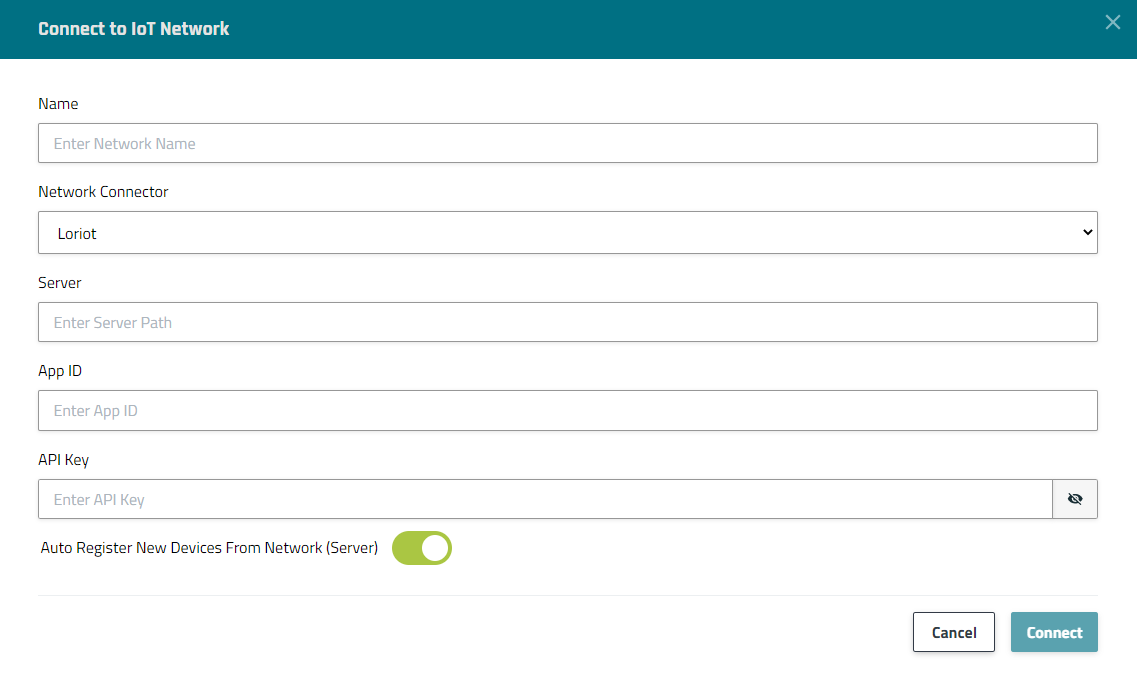
Step 5) Open your thingsHub tenant, go to Tenant Settings > IoT Network Connections, and then select the New Connection button. In the Connect to IoT Network dialog, enter the name, network connector (Loriot), server, App ID (from Step 3, above), and API Key (from Step 2, above) per the below parameters description table. Then press the Connect button. The new network connection will first be validated, and if successful, it will be created.
Parameters
The following parameters need to be set when creating a Loriot Network Connector:
Parameter | Description |
|---|---|
Name | The display name of this Network Connection. |
Network Connector | Choose Loriot |
Server | The name of the LNS to connect to, e.g. eu1.loriot.io for Loriot’s European community offering. |
App ID | The ID of the Application to connect to. This is a string that looks like BE010203. |
API Key | The API key used for authentication. The account with which this API key was generated must have access to the above application. You can generate an API key in the Loriot Dashboard on the Account page. Note that the Loriot Network Connector requires an API key, not an application access token. This is because the connector must be able to use the REST-API for registration/de-registration and sending downlinks, not just receive uplinks through the application. |
Auto Register New Devices From Network (Server) | Set this toggle switch to false if you want to manage the device on your network server via the thingsHub. Set this to true, if there are already devices registered in this application or if you want to manage the application manually. If this is set to true, any device that’s already registered in the application will show up in the thingsHub automatically, when it sends data for the first time since creation of the Network Connection. |
Automatically Assign Device Driver | This will let you to select the default driver that you want to assign to the devices that are getting auto registered to the system Note that this option is only available when you enable the auto registering of the devices |
WebSocket Ping Pong
The underlying protocol of Loriot is WebSocket, which is a long-running connection over TCP. That means, the connection from either could be dropped and the other party might not be aware of that, which can result in a half-open connection.
To handle this scenario, a bi-directional Ping-Pong mechanism is working to keep the connection alive:
Loriot is sending PING and thingsHub is responding PONG. Hence the connection is kept alive from Loriot’s POV
thingsHub is sending PING, and Loriot is responding PONG. Hence the connection is kept alive from thingsHub’s POV
This can be observed through the DEBUG logs
...
DEBU[2023-12-06T11:55:52+06:00] connected to Loriot server successfully
DEBU[2023-12-06T11:56:22+06:00] >> PING: received from peer
DEBU[2023-12-06T11:56:22+06:00] PONG >>: responded to peer
DEBU[2023-12-06T11:56:46+06:00] PING >>: sending to peer
DEBU[2023-12-06T11:56:46+06:00] >> PONG: received from peer
...
To see the logs, make sure the log level is set to debug from the tenant configuration, you can view the logs on the engine service pod itself
Next steps
You can now connect your devices via this network connection with the thingsHub. You can either add a new device now and connect it during this process, or connect an existing device on the device’s Network tab.