Provisioning asset trackers/tags
This article describes how Asset Tracking Owners can provision asset trackers and tags in the thingsHub platform.
Overview
In order to begin using an asset tracker/tag to track an asset, it must first be provisioned, which includes adding it to the thingsHub Asset Tracker/Tag Inventory.
There are different requirements for provisioning asset trackers and asset tags.
The process to provision asset trackers:
1) Add them to the thingsHub device database.
2) Add them to the Asset Tracker/Tag Inventory.The process to provision asset tags:
Add them to Asset Tracker/Tag Inventory.
The thingsHub supports the following tracking device types:
Asset Tags:
Eddystone
iBeacon
Asset Trackers:
Abeeway
Digital Matters Yabby
Provision Eddystone type asset tags
Prerequisites
You will need to know the device MAC address. Note that many devices use multiple MAC addresses, frequently one per protocol, e.g. one MAC address for iBeacon and a different MAC address for Eddystone advertisements. Make sure to select the correct MAC address.
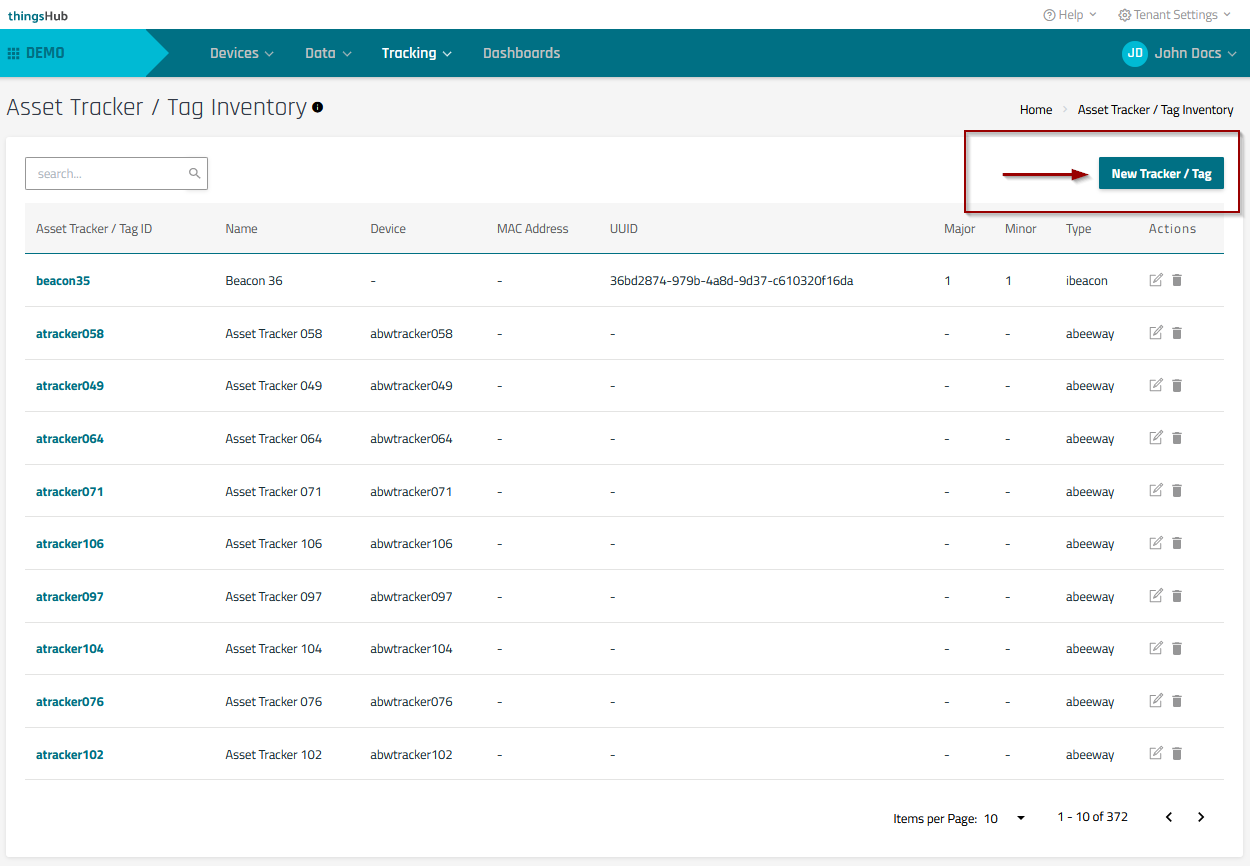
Step 1) Go to Tracking > Tracker & Tag Inventory and press the New Tracker/Tag button.
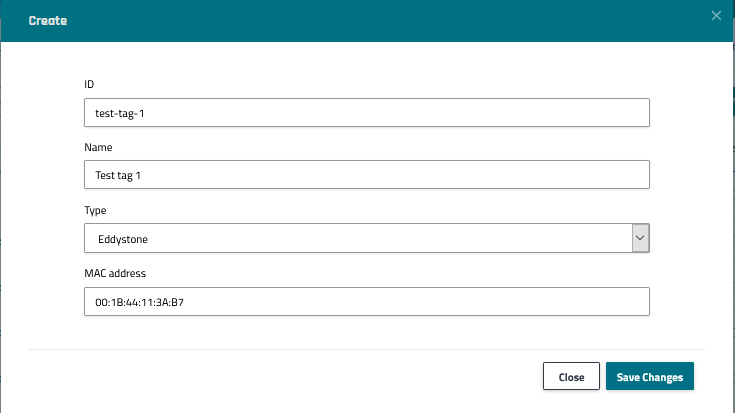
Step 2) In the Create dialog, enter the Asset Tag ID, Name, Type, and MAC address per the below requirements. Then press the Save Changes button to complete the provisioning process and return to the Asset Tracker page.
Asset Tag ID. This ID must be unique to the tenant.
Asset Tag Name. It is recommended to simply use an existing ID, such as the existing device ID or MAC address.
Types. Select Eddystone.
MAC address. Enter the device MAC address. See below the example.
Next steps:
Provision iBeacon type asset tags
Prerequisites
Most beacons can be configured with a mobile app provided by the beacon manufacturer. Download this app and have the associated cellular phone or tablet ready to enter the iBeacon profile which will be generated by the thingsHub later on.
Step 1) Go to Tracking > Tracker & Tag Inventory and press the New Tracker/Tag button.
Step 2) In the Create dialog, enter the Asset Tag ID, Name, and Type per the below requirements. Then enter the generated iBeacon profile in the mobile app. When finished, press the Save Changes button to complete the provisioning process and return to the Asset Tracker page.
Asset Tag ID. This ID must be unique to the tenant.
Asset Tag Name. It is recommended to simply use an existing ID, such as the existing device ID.
Type. Select iBeacon.
The thingsHub automatically generates the iBeacon profile. Below is an example profile that would be entered into the app:
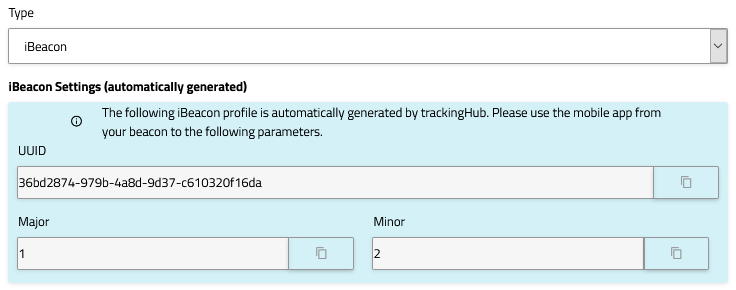
Step 3) Use the mobile app to configure the beacon according to these values
Notes: The configuration of Asset Tags depends on the manufacturer and model of the tags.
In all cases, tags must be set to send advertisements in the iBeacon standard.
The UUID must be set to the one provided by SmartMakers,
The Minor number must be set on the device. The minor number will be used by the system to uniquely identify the Asset Tag.
Next steps:
Provision Yabby asset trackers
Prerequisites
Add the tracker to the thingsHub device database with the following driver and label:
Required Driver | smartmakers/digitalmatter-yabby |
Required Label | trackinghub |
Step 1) Go to Tracking > Tracker & Tag Inventory and press the New Tracker/Tag button.
Step 2) In the Create dialog, enter the Asset Tag ID, Name, Type, and ThingsHub device per the below requirements. Then press the Save Changes button to complete the provisioning process and return to the Asset Tracker page.
Asset Tag ID. This ID must be unique to the tenant.
Asset Tag Name. It is recommended to simply use an existing ID, such as the existing device ID.
Types. Select Digitalmatters Yabby
ThingsHub device. Select the associated thingsHub device.

Next steps:
Provision Abeeway asset trackers
Prerequisites
Add the tracker to the thingsHub device database with the following driver and label:
Required Driver | smartmakers/abeeway-all-devices |
Required Label | trackinghub |
Step 1) Go to Tracking > Tracker & Tag Inventory and press the New Tracker/Tag button.
Step 2) In the Create dialog, enter the Asset Tag ID, Name, Type, and ThingsHub device per the below requirements. Then press the Save Changes button to complete the provisioning process and return to the Asset Tracker page.
Asset Tag ID. This ID must be unique to the tenant.
Asset Tag Name. It is recommended to simply use an existing ID, such as the existing device ID.
Types. Select Abeeway Micro Tracker
ThingsHub device. Select the associated device.
