The thingsHub REST-API is the foundational interface designed to seamlessly integrate data from your tracked and remote monitored assets—including the location, status, and condition of those assets, as well as the underlying IoT device data—directly into any third-party system across your IT landscape. By connecting this real-time asset intelligence with your existing business processes, you can unlock powerful automations and achieve greater efficiency in your everyday work.
This API is a RESTful, resource-oriented interface that allows you to programmatically provision devices, create and modify device drivers, and configure integrations.
Each endpoint uses standard HTTP verbs like GET and POST, and will return standard HTTP response codes to indicate request status or errors.
We built the API to accept and return JSON in all responses, including errors.
Overview / Important links
-
Swagger documentation for all available API endpoints
-
Learn how to Authenticate against the REST-API
-
Read about Breaking Changes
-
How to retrieve locations from tracked asset via the API
-
How to synchronize / import assets for tracking
Authentication
To make a call to the thingsHub REST API, you need an API token. There are basically two different ways to create this API token:
-
You can create a permanent API key via the user interface in thingsHub.
-
By logging in to the API with a username and password, you can generate an API token in your scripts that is valid until the end of a user session.
In the examples in this documentation, we use bearer auth:
curl -X GET "https://demo.thingshub.smartmakers.de/api/v3/devices"
     -H "Authorization: Bearer <ACCESS_TOKEN>"
All requests must be made over HTTPS or they will fail. API requests that don’t contain authentication will also fail.
1) Generate a permanent API Key via the thingsHub web-ui
Follow these steps to generate an API Key in the user interface of thingsHub:
1.1. Access the API Keys Management Page
-
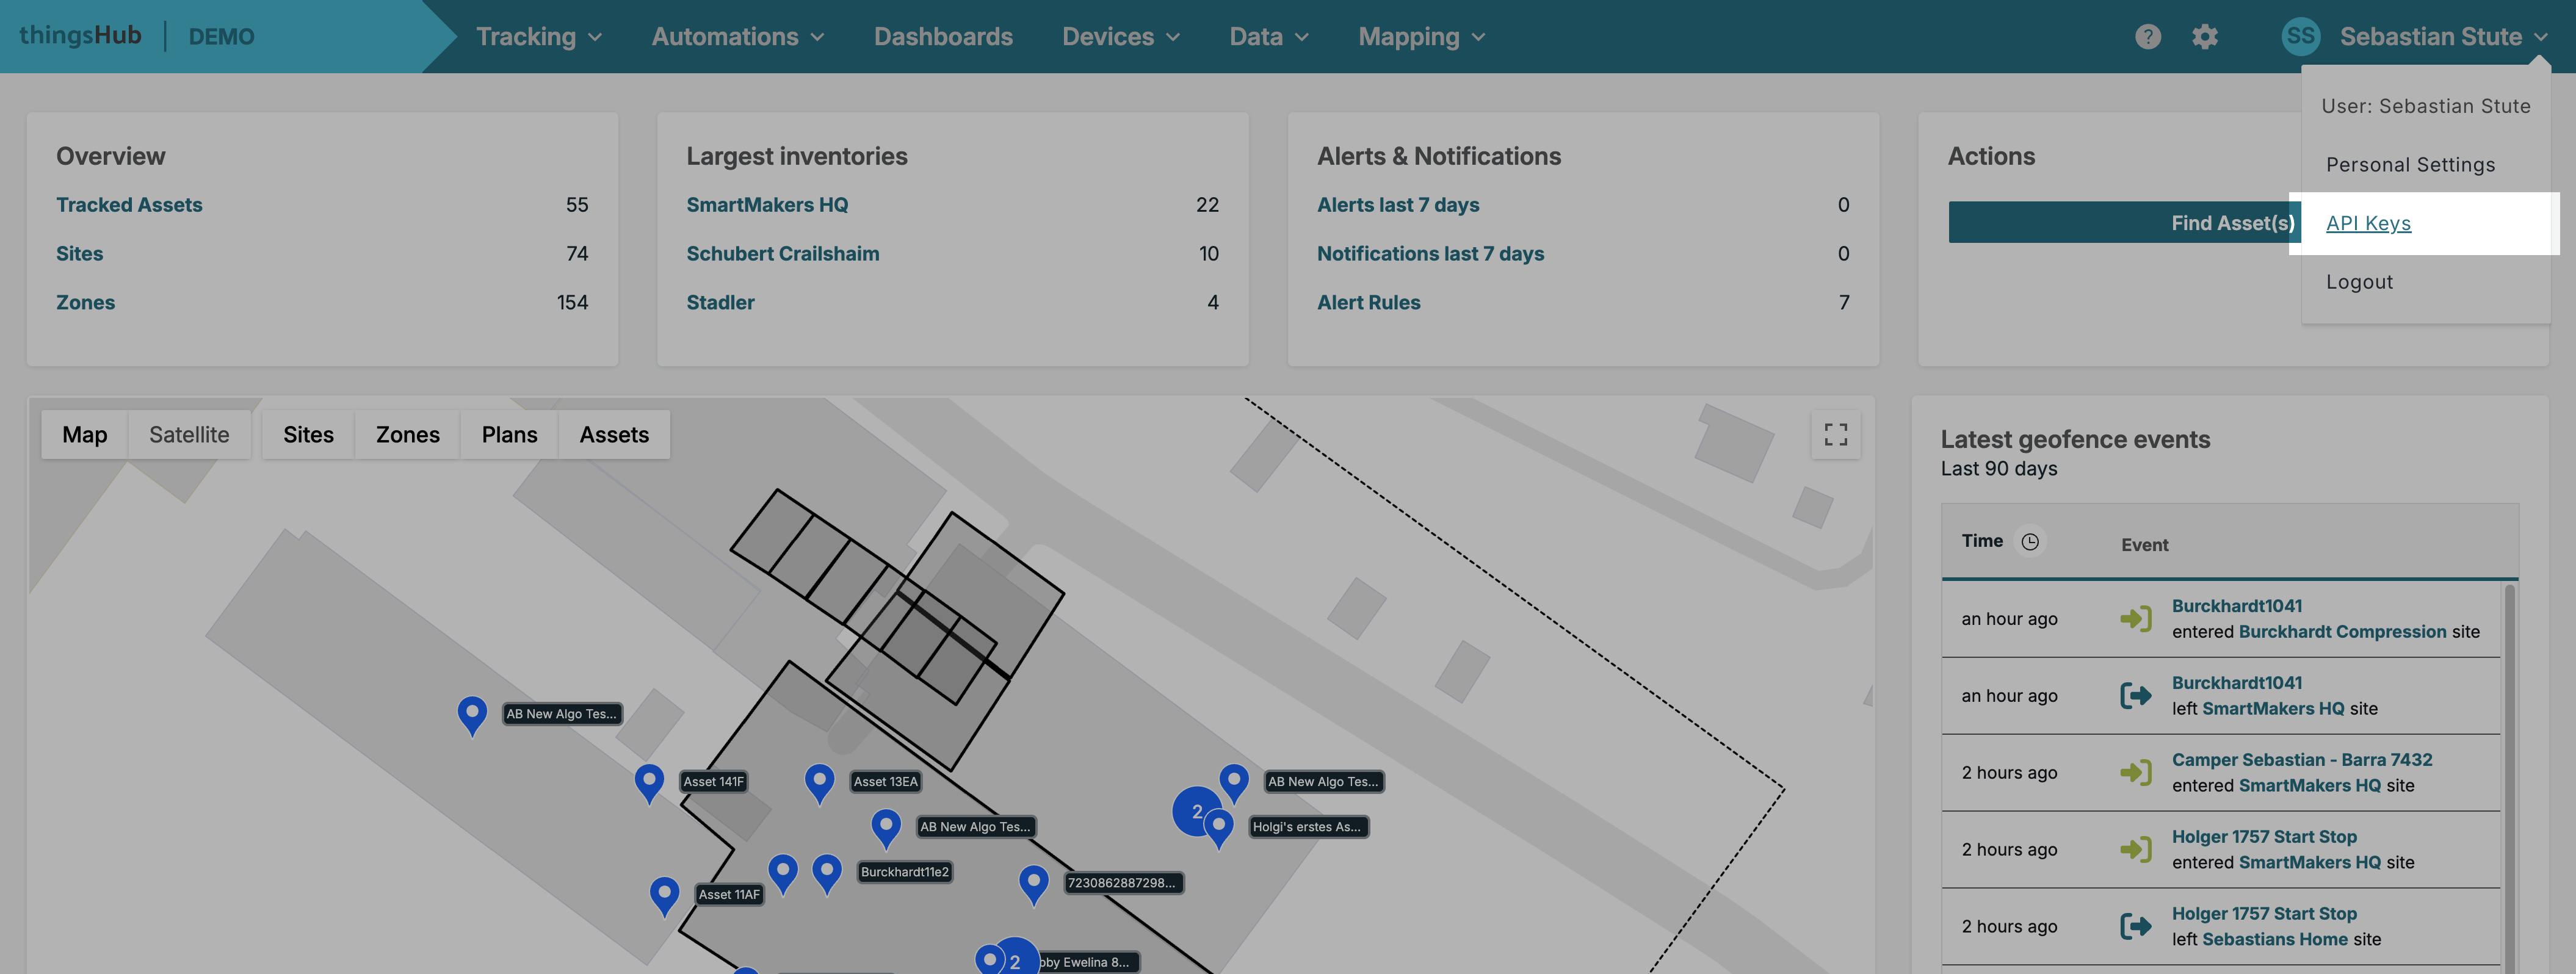
In the thingsHub web interface, locate your user profile in the top right corner (where your name/avatar is displayed).
-
Click on your user profile to open the dropdown menu.
-
Select API Keys from the menu.
1.2. Start the Key Generation Process
-
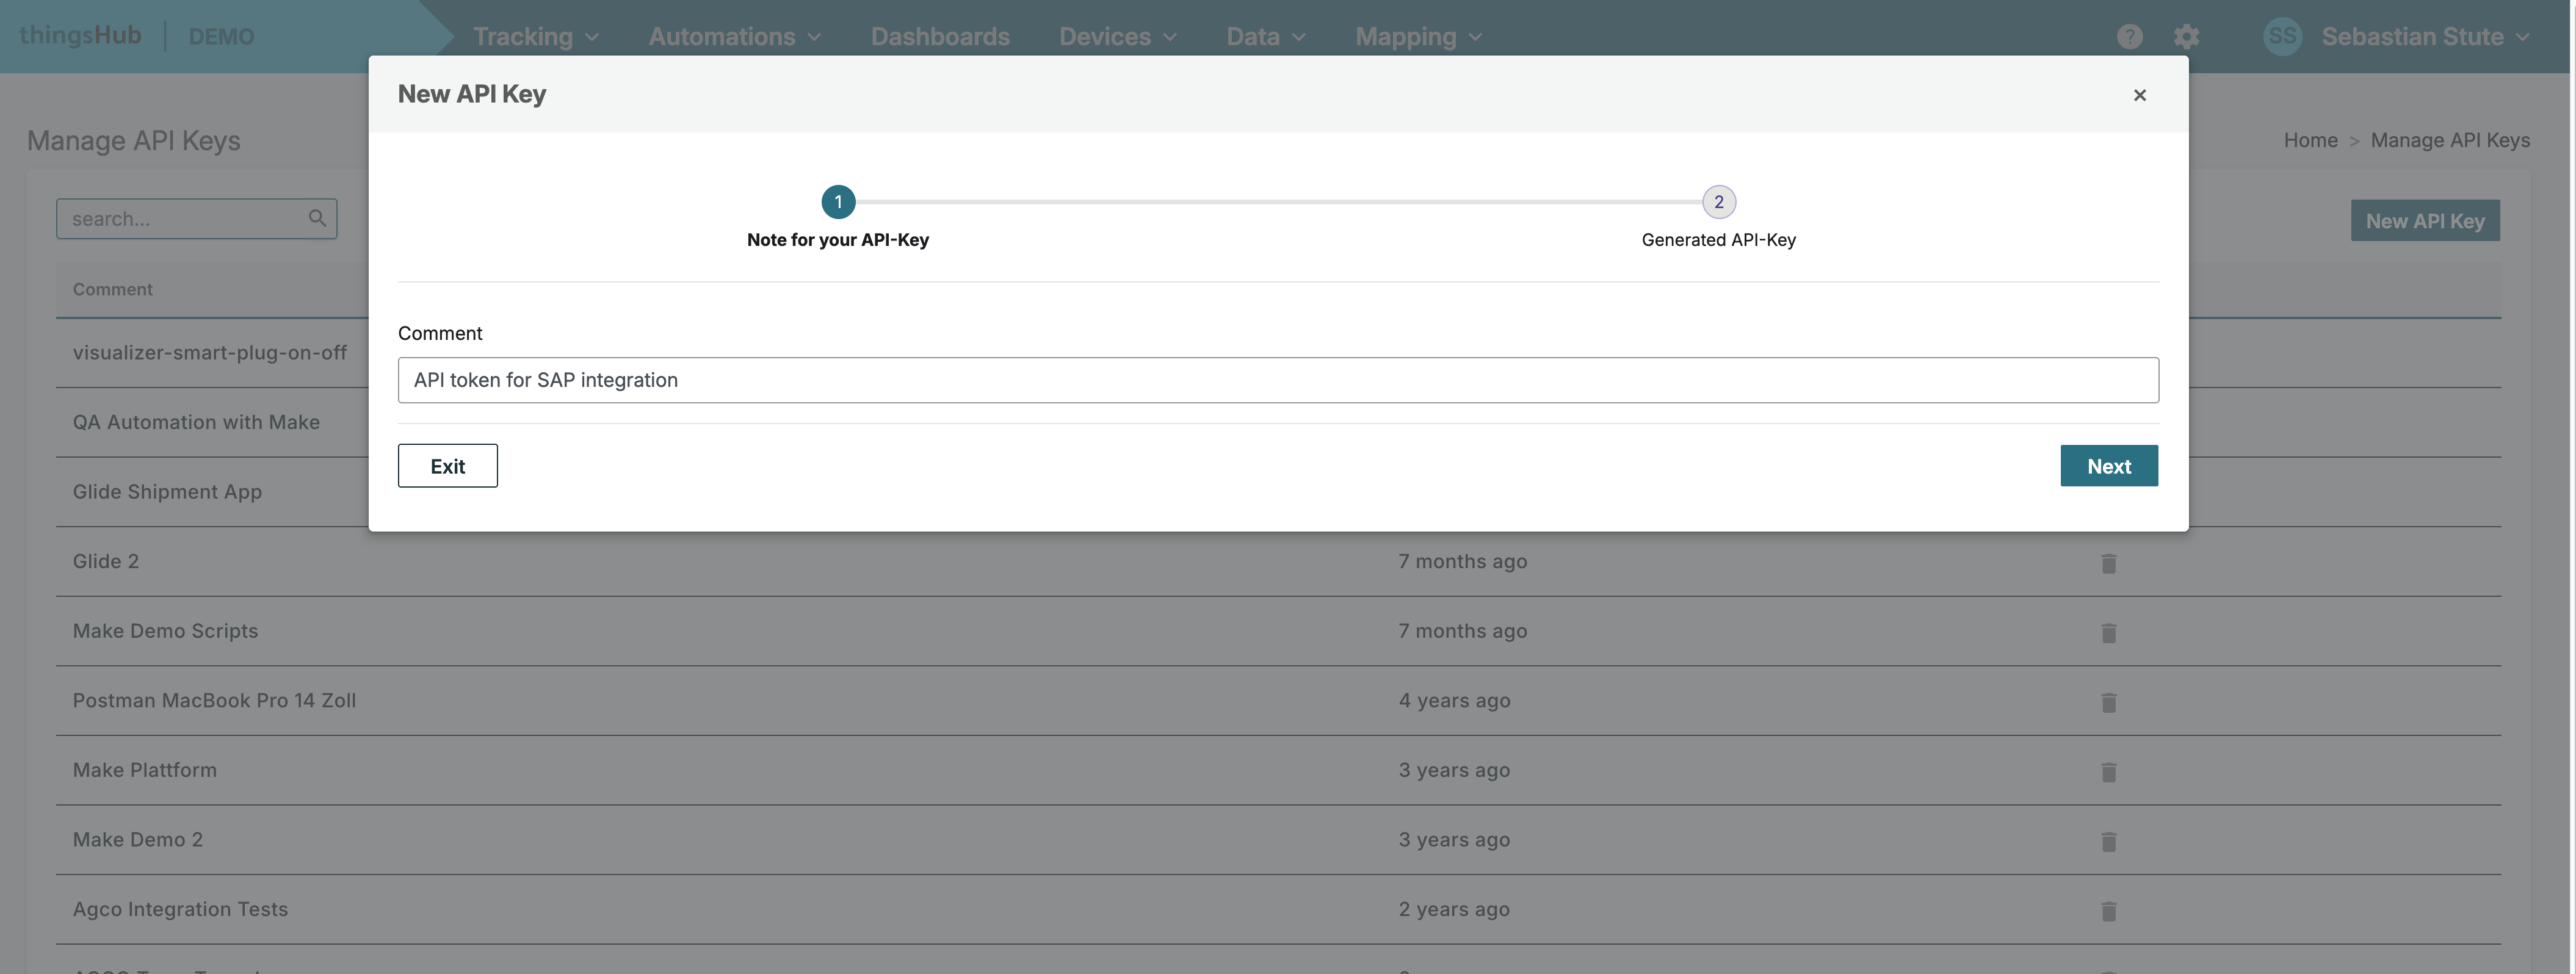
On the Manage API Keys page, click the New API Key button, typically located on the right side of the screen.
-
The New API Key creation dialog will appear. You will be on the first step: Note for your API-Key.
-
In the Comment field, enter a descriptive name or purpose for your API key (e.g., "API token for SAP integration" or "Integration Key for Make Scripts"). A clear comment is strongly recommended for easy identification and management later.
-
Click Next.
1.3. Retrieve and Store the Generated API Key
-
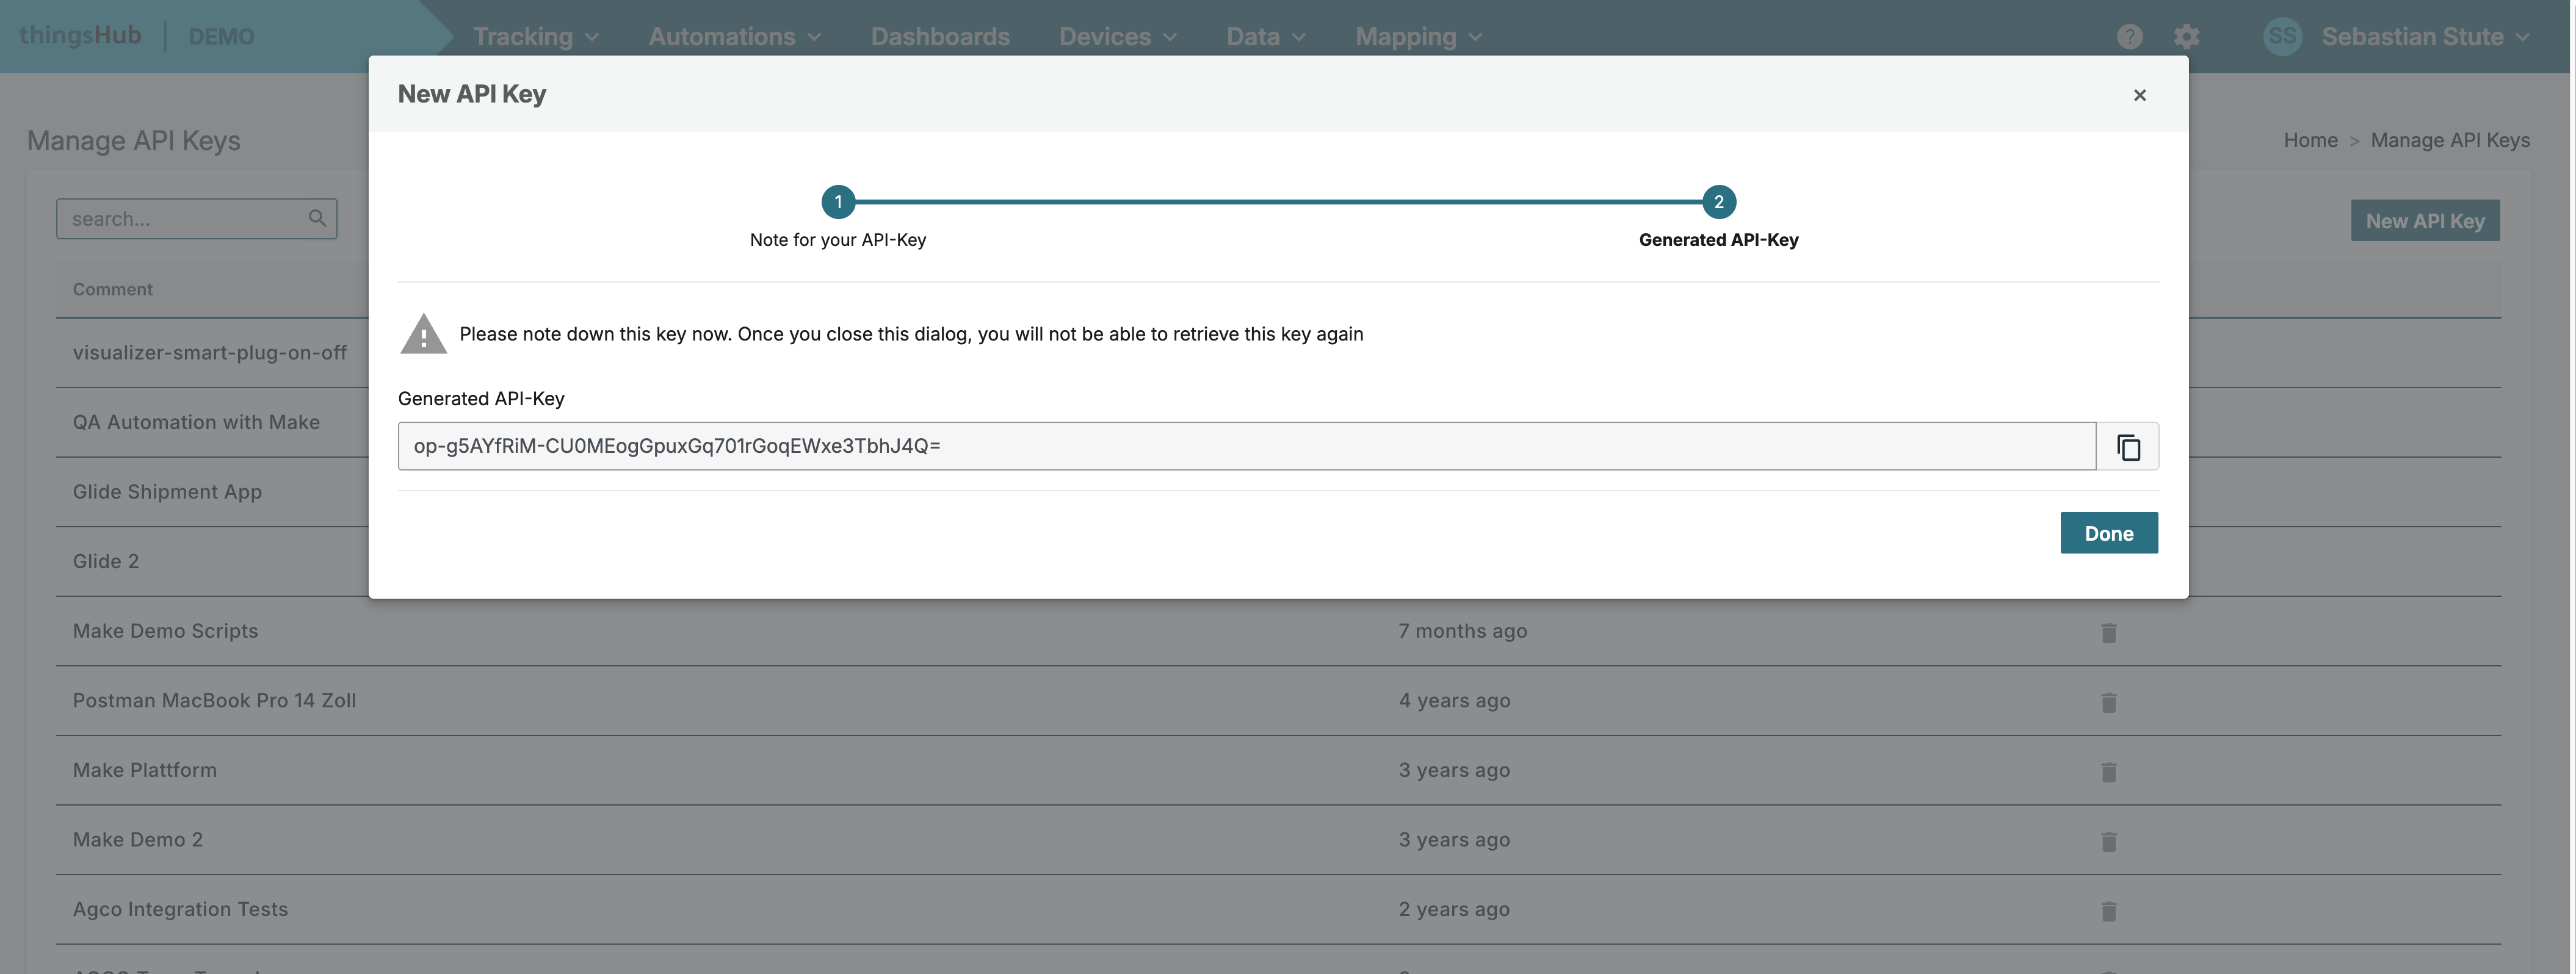
The dialog will advance to the second step: Generated API-Key.
-
Your unique Generated API-Key will be displayed in the text field.
-
Critical Step: Immediately copy this key and store it securely. You can click the copy icon next to the key field to copy the value.
⚠️ Warning: Please note down this key now. Once you close this dialog, you will not be able to retrieve this key again. For security purposes, the key is only visible once upon generation. If you lose it, you will have to generate a new key and revoke the old one.
-
Once you have copied and safely stored the key, click Done to close the dialog.
The new API Key is now active and can be used as a Bearer Token for authentication in your API requests to the thingsHub platform.
2) Generating a user session-based access token via the API
Access tokens are obtained by performing an authorization using the "auth/token" endpoint:
curl -X POST 'https://demo.thingshub.smartmakers.de/api/v3/auth/token'
     -H 'Content-Type: application/json'
     -d '{"password":"<YOUR_USERS_PASSWORD>","username":"<YOUR_USERS_NAME>"}"
When successful, this endpoint return a status of 200 OK and the generated access token as field "token":
{
    "User": {
        "country": "",
        "created_at": "2018-10-12T14:22:34.796848Z",
        "email": "",
        "full_name": "",
        "id": 1,
        "last_login_at": "2018-11-15T21:28:10.517042266Z",
        "password": "",
        "updated_at": "2018-11-15T21:28:10.51943005Z",
        "username": "admin"
    },
    "expires": "2018-11-22T21:28:10.505019278Z",
    "token": "f4maabU0behdKcMTOPX_1BB08RpEfM0fcfdkZYNEaIc="
}
Error Codes and Messages
Response Codes
The API will attempt to return HTTP status codes for every request.
|
Code |
Text |
Description |
|---|---|---|
|
200 |
OK |
The request was completed successfully. |
|
201 |
Created |
The resources was created as requested. |
|
400 |
Bad Request |
The request is invalid, contains malformed data, or otherwise cannot be served. The reasons for invalid requests can vary by endpoint. An accompanying message will provide detail about the reason for failure. |
|
401 |
Unauthorized |
The request doesn’t have a valid API access token. Verify your token is correct and re-try the request. |
|
403 |
Forbidden |
The user is correctly logged-in, but the requested operation is not allowed for this user. |
|
404 |
Not Found |
Potential causes:
|
|
500 |
Internal Server Error |
An error happened inside one of the services that is unexpected and could not be handled appropriately. |
|
503 |
Service Unavailable |
This error will be returned if one if the thingsHub’s internal services is unavailable. |
Error Objects
If an request cannot be handled successfully (indicated by an HTML response code in the range of 4xx or 5xx), along with the response code itself in the response header an error object is returned in the response body. The error messages as JSON objects of the following structure:
{
    "code": 400,
    "error": "invalid credentials"
}
The code is always equal to the the HTML return code, while error gives a user-readable explanation of the cause of the error. The text in error messages will vary by root cause and endpoint. Each endpoint section contains a roll-up of the errors specific to that endpoint. Refer to the documentation for the endpoint for specifics on errors, their possible causes, and the messages the API will return. Note that the list of error messages is not exhaustive and can be parametric, so prefer not do not check for the specific spelling of an error message.