Overview
A data table is used to store and display telemetry data from devices that have been grouped according to assigned labels (common characteristics such as a business process or a location).
In the Data Tables page, you can view a list of all data tables, with some tables created automatically by thingsHub and some tables created manually by users. These lists only provide basic information. However, by clicking the table's Edit button you can view detailed information, including all device telemetry data received since the table was implemented.
When we refer to data tables in this document, we will mostly refer to user-created data tables.
Managing data tables
View all data tables
Step 1) Go to Data > Data Tables.
See the below descriptions of data table properties.
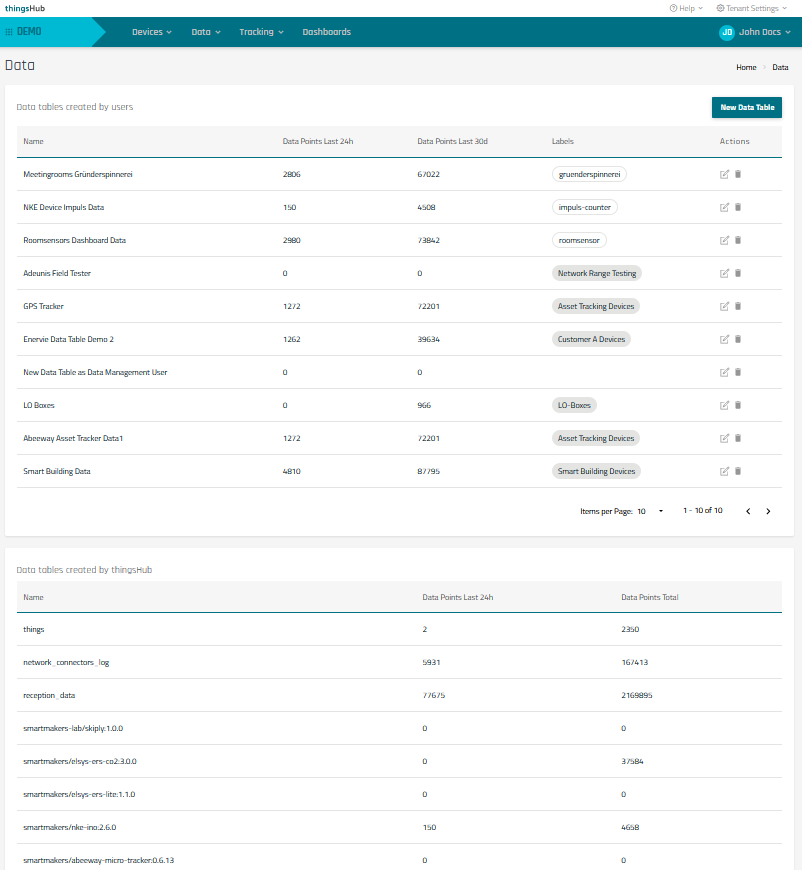
Description of table properties
-
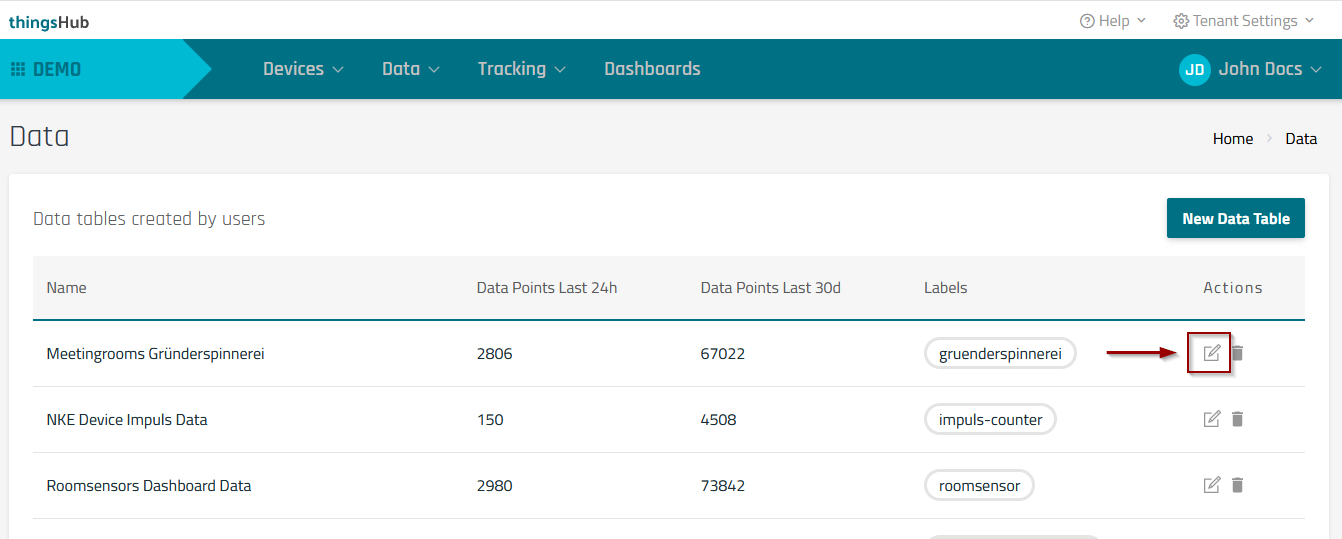
Data tables created by users. The overview list of user-created data tables includes basic information regarding recently received data points and device labels. It also provides access to create a new table, or edit or delete existing tables.
-
Name.
-
Data Points Last 24h. The total quantity of data points received in the previous 24 hours from devices with the assigned label(s).
-
Data Points Last 30d. The total quantity of data points received in the previous 30 days from devices with the assigned label(s).
-
Labels. Specific characteristics that are used to logically group different devices.
-
Edit button. Click to open the table details page of the corresponding data table.
-
Delete button. Click to delete the corresponding data table.
-
New Data Table button. Click to create a New Data Table.
Data tables that have been created automatically by thingsHub. The overview list of tables created by thingsHub includes information regarding recent and total received data points. These tables are managed by the thingsHub and can therefore not be edited. They are for example used as a backing store for the Data tab on the Device Details page or the Network tab on the same page.
-
Name. Auto-generated by thingsHub.
-
Data Points Last 24h. The total quantity of data points received in the previous 24 hours from devices with the assigned label(s).
-
Data Points Total. The total quantity of data points received since the table was created and implemented.
View a specific data table
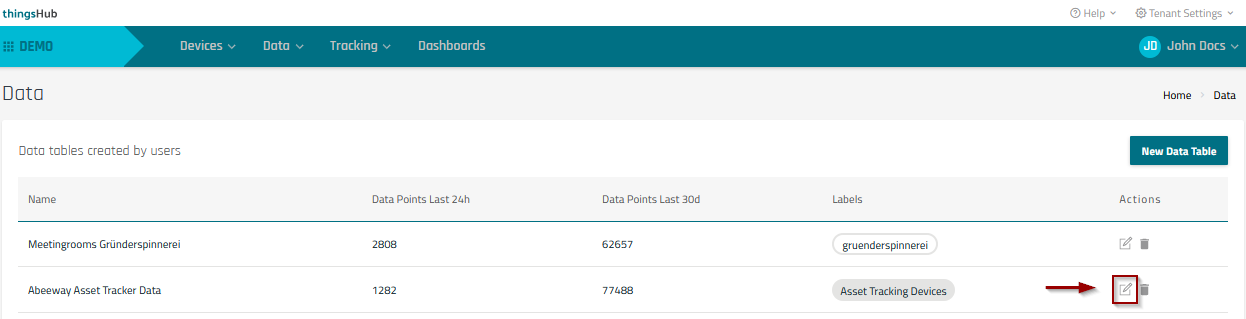
Step 1) Go to Data > Data Tables and click the data table's corresponding Edit button.
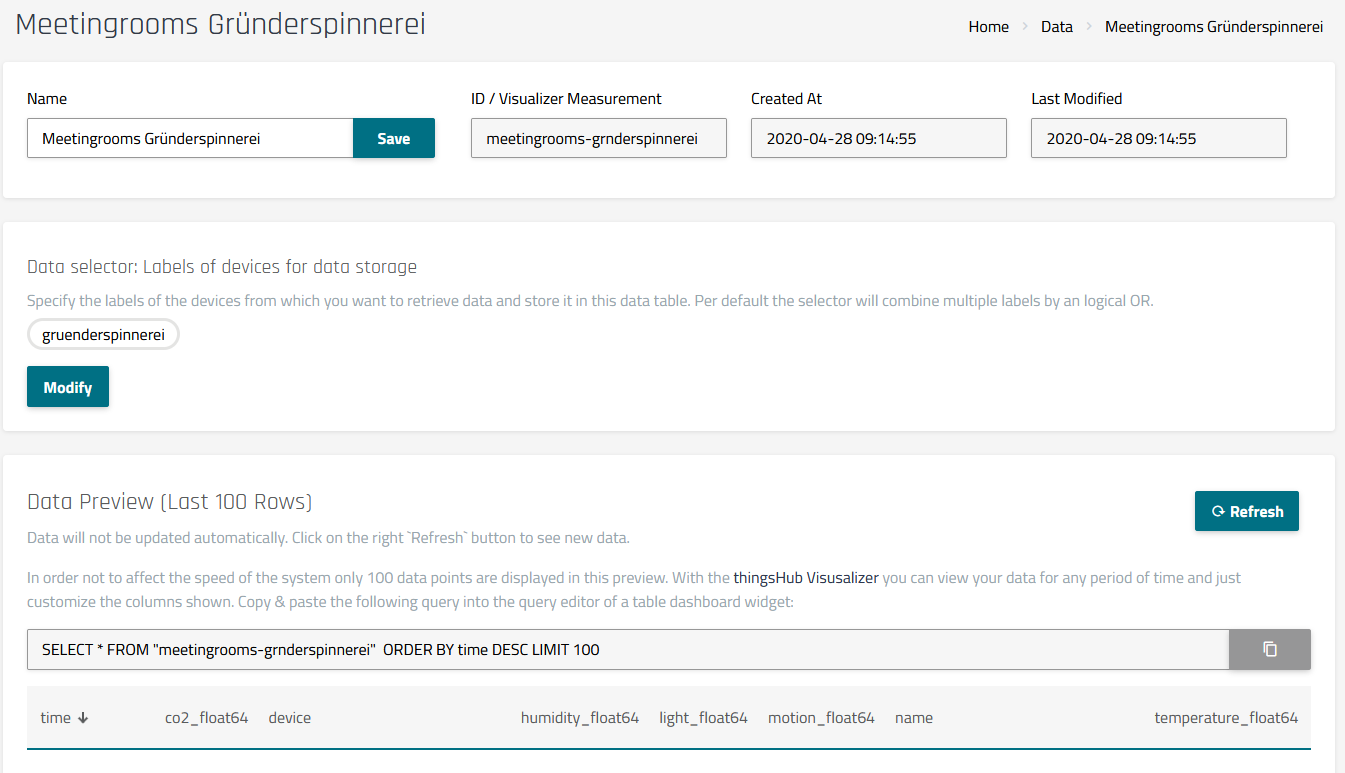
Step 2) View the table details. See below description of properties.
Description of Properties:
-
Name. The table name can be edited by typing in the field and clicking Save.
-
ID/Visualizer Measurement. Non-editable field displaying assigned visualizer measurement.
-
Retention Policy. The data retention period for this table. This is set during creation and cannot be changed afterwards. Available options depend on the operator configuration.
-
Created At. Non-editable field displaying date and time of the table creation.
-
Last Modified. Non-editable field displaying date and time of the last time the table was modified.
-
Data selector: Labels of devices for data storage. Use this section to view and specify the labels of the devices from which data is retrieved & stored in this data table. By default, the selector will combine multiple labels by a logical OR.
-
Click on a label to view all devices assigned to the label or to remove the label from the table.
-
Click modify to add or remove data from devices assigned to different labels.
-
-
Data Preview (Last 100 Rows). Displays the 100 most recent data points.
-
Refresh button. The data is not updated automatically. Click Refresh to update data.
-
Query. To display the data in the Visualizer, copy the query and paste it into the Visualizer query editor.
-
Table Fields. Includes data for time received, device measured values, and the device status.
-
Create a new data table
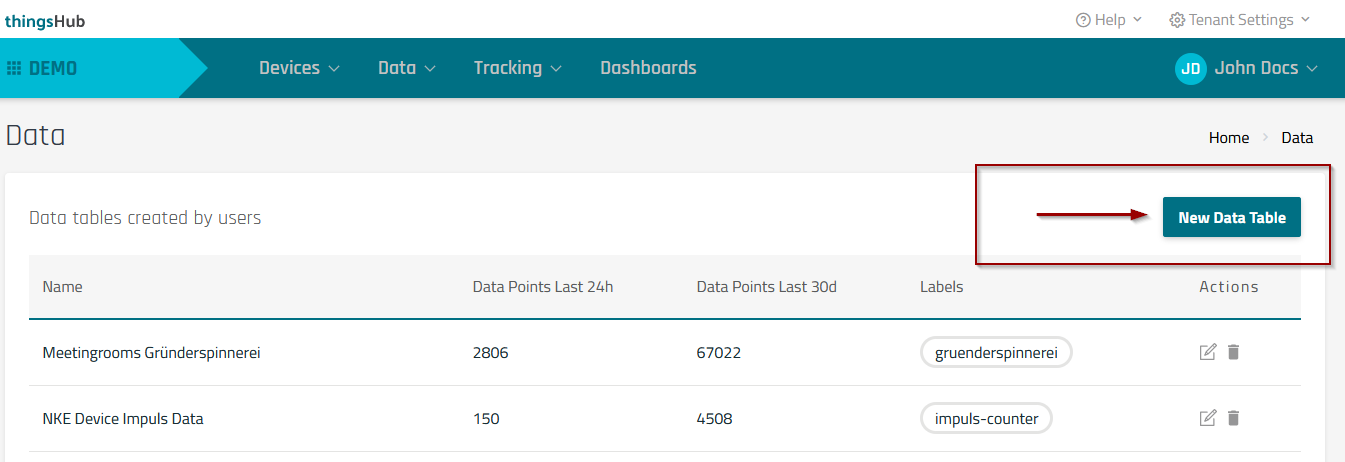
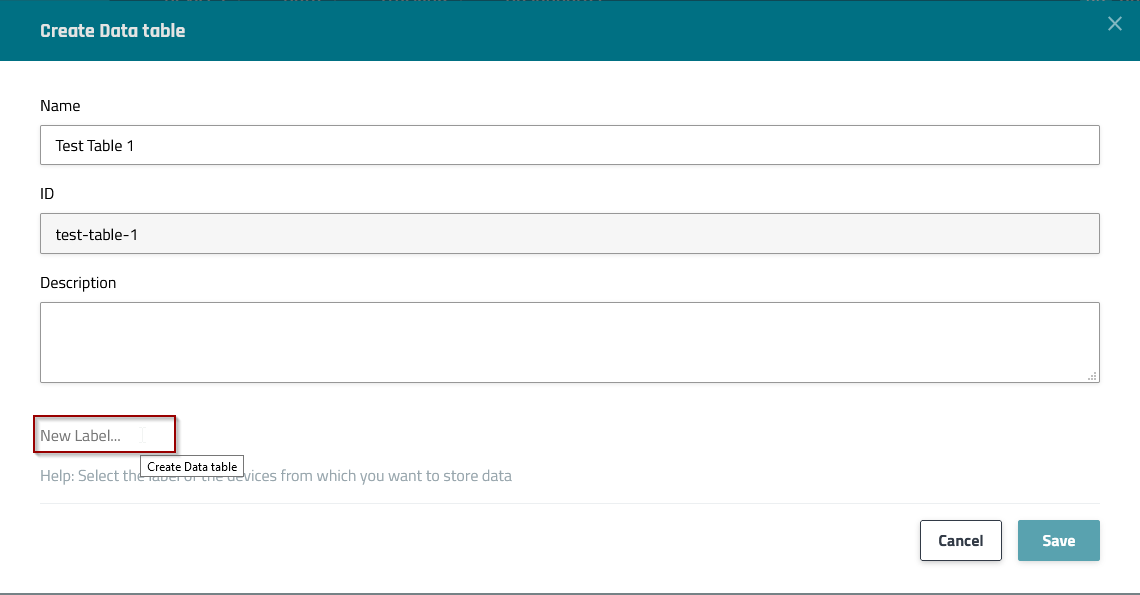
Step 1) Go to Data > Data Tables and choose the New Data Table button.
Step 2) In the Create Data table dialog, enter the Name, Description (optional), Retention Policy, and Labels. Then click Save.
-
Notes:
-
A unique table ID will be automatically generated based on the entered table name.
-
Click next to the words New Label to open the label selection drop-down menu.
-
The available retention policy options depend on the operator configuration. If no selection is made, the default policy (3 months) is applied. Once set, the retention policy cannot be changed.
-
Edit an existing data table
Step 1) Go to Data > Data Tables and select the table's Edit button to open the Table Details page.
Step 2) Edit the table.
To change the table name:
-
Enter the new name in the name field and click Save.
To add or remove labels:
-
Click the Modify button to open the Edit Labels dialog**.**
-
You can delete labels by clicking the x next to the label name. You can add new labels by clicking within the words New Label to open the label drop-down selection.
-
Click the Save button to save changes and return to the table details page.

Delete a data table
Step 1) Go to Data > Data Tables and select the table's Delete button.
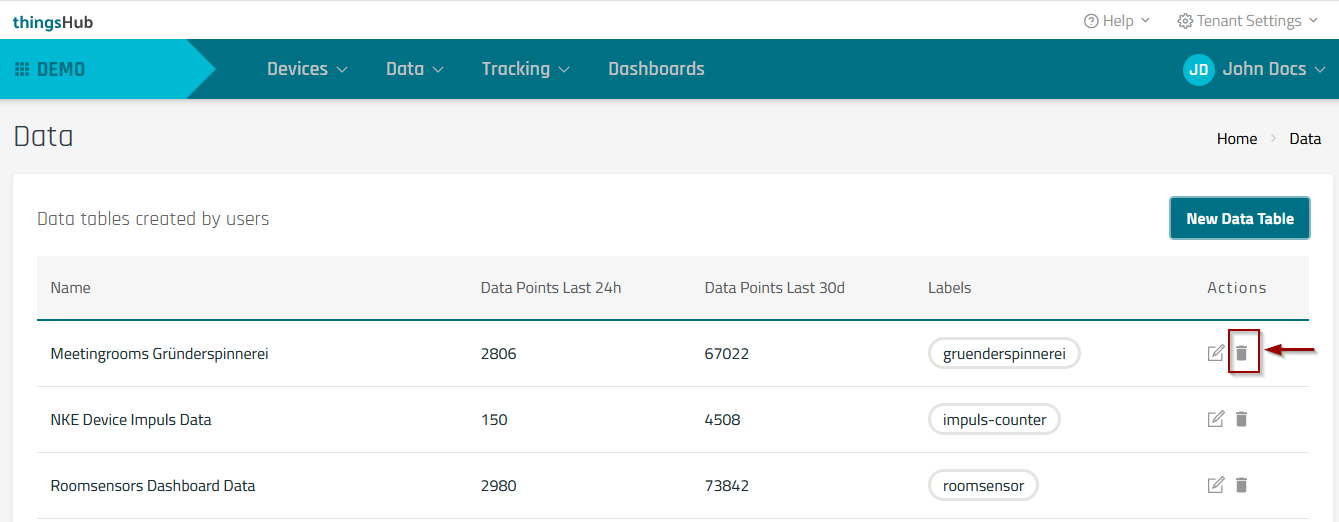
Step 2) Click the Ok button to confirm the deletion.

Exporting data to external systems
The same data that is stored in the Data Tables can also be sent to a wide range of external applications/servers. See Integrations for more details on this.