This article describes how Device Management Owners can add devices using a device wizard, edit device settings, and delete devices.
How the thingsHub connects to and manages IoT devices
IoT devices are connected to the thingsHub via external IoT networks. This enables two-way communication between IoT devices and the thingsHub platform, with IoT devices transmitting measured data to the thingsHub, and the thingsHub able to send device configuration commands to IoT devices.
Add a new device using the New Device wizard
Use the New Device wizard to easily add new devices to the tenant.
Asset Scanner type devices must be added with the following requirements:
-
Include the label trackinghub.
-
Include the device driver that was entered by the Tenant Owner in the thingsHub configuration file.
Step 1) Complete the following prerequisites:
-
Establish Network Registration. Ensure that the active Tenant has as an appropriate IoT connection.
-
Gather Required Device Information:
-
Device EUI (DevEUI). Locate this information in the product documentation or by asking the device vendor or manufacturer.
-
Application EUI (AppEUI). Locate this information in the product documentation or by asking the device vendor or manufacturer.
-
App Key. Locate this information in the product documentation or by asking the device vendor or manufacturer.
-
Device Driver. Locate this information in the Device Driver page. You can find the device by Searching by manufacturer, model, series, author, device name and more. See Managing device drivers for more information.
-
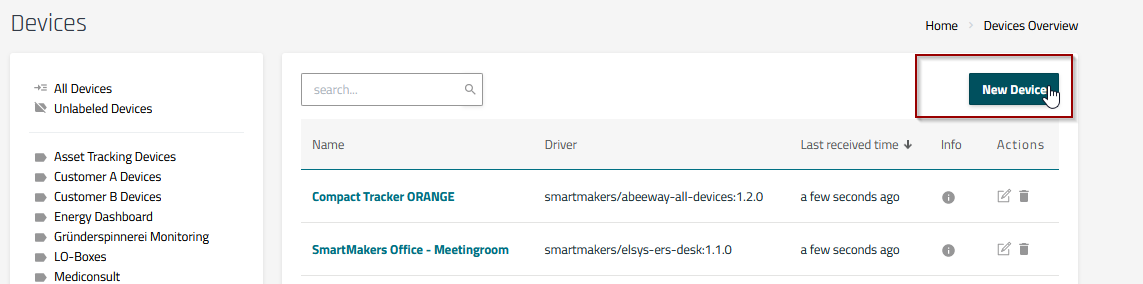
Step 2) Start the New Devices wizard by selecting the New Devices button in the Devices Overview page.
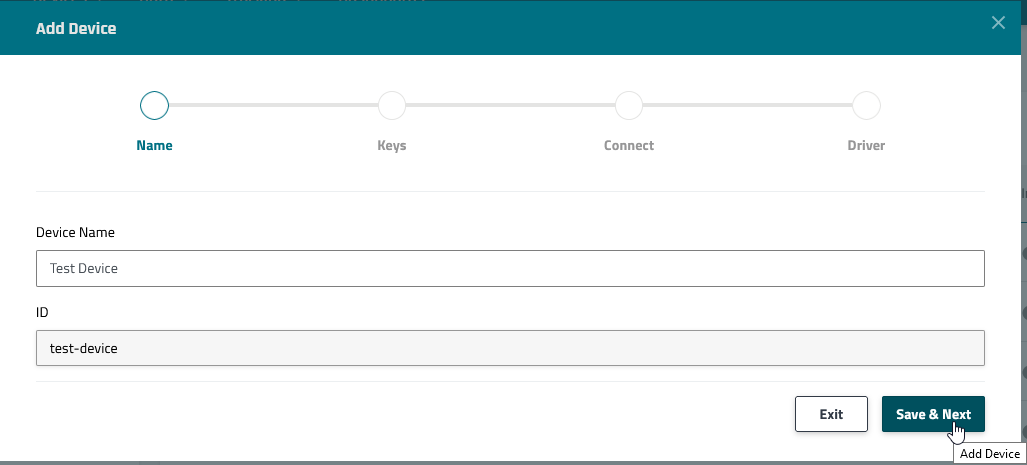
Step 3) Name. Enter a unique name for the device per the below notes. Then press the Save & Next button to continue.
-
Device naming notes and recommendations:
-
It is highly recommended that you use the DevEUI as the device name--this will ensure that the device name is unique and adaptable to different installation locations.
-
The (Device) ID is created automatically, corresponding to the device name. This is a unique ID that cannot be changed later.
-
ThingsHub will warn you if it finds a duplicate device name.
-
Any data that is written into the wizard form will be saved immediately. This means that a device can be created in the device list even if you exit the wizard without saving.
-
Device Wizard, Name
Step 4) Keys. Enter the device OTAA keys per the following notes. Then press the Save & Next button to continue.
-
Notes:
-
To find device key information, consult the device documentation or request info from the device vendor or manufacturer.
-
It is important to keep the AppKey secured. This is because it is often hard-coded to the device and cannot be changed. Leaking the information can make the device permanently unsecured.
-
Device Wizard, Keys

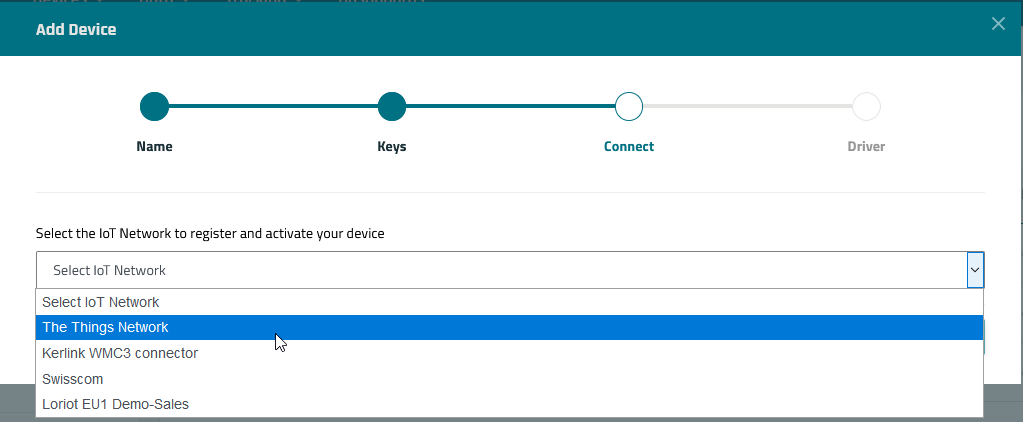
Step 5) Connect. Select the IoT Network connector. The thingsHub will automatically register the new device on the selected network.
-
Note: If you haven´t yet established a network connector, see IoT network connectors
Device Wizard, Connect
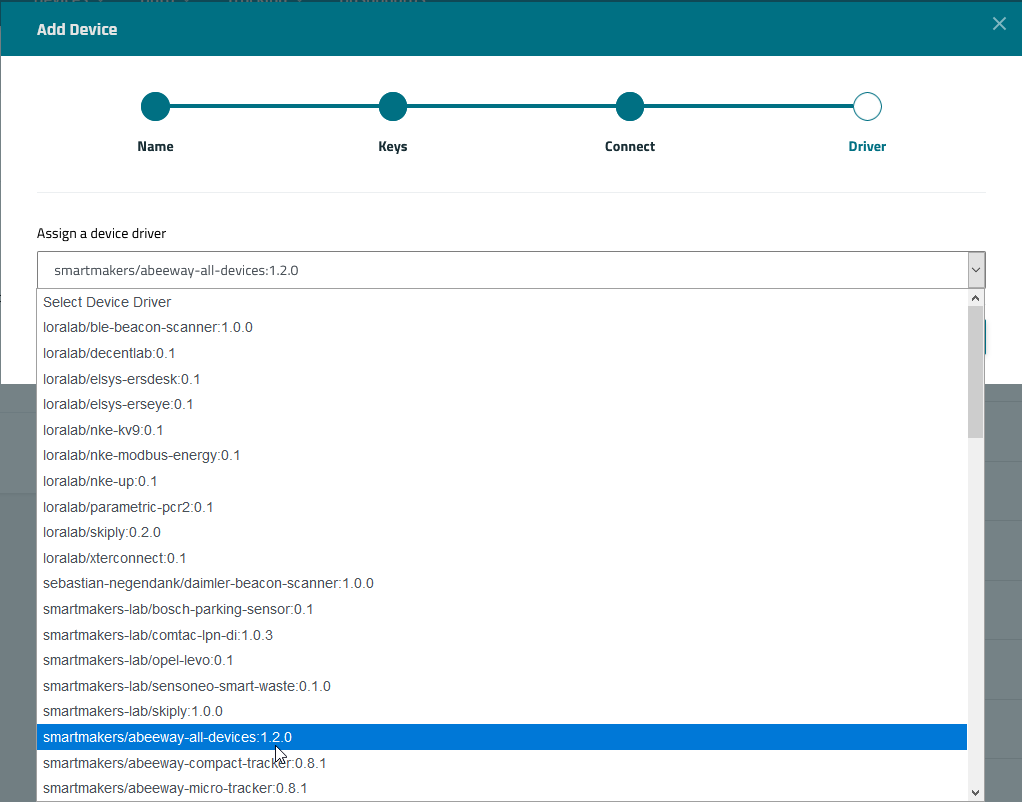
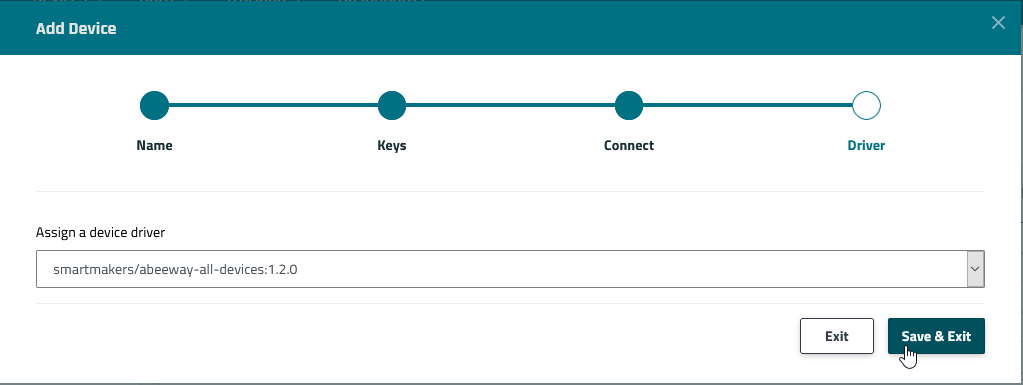
Step 6): Driver. Select the Device Driver.
-
Note: You can find the correct driver in the Device Drivers page. For details, see Managing device drivers.
Device Wizard, Driver
Step 7): Saving and Next Steps. Click Save & Exit to complete the device wizard and return to the Devices Overview page.
-
Next Steps:
-
Related Articles
Edit device settings
This section describes how a Device Owner can edit a thingsHub device name, driver, labels, and custom fields.
Note: Once established, a Device ID cannot be edited.
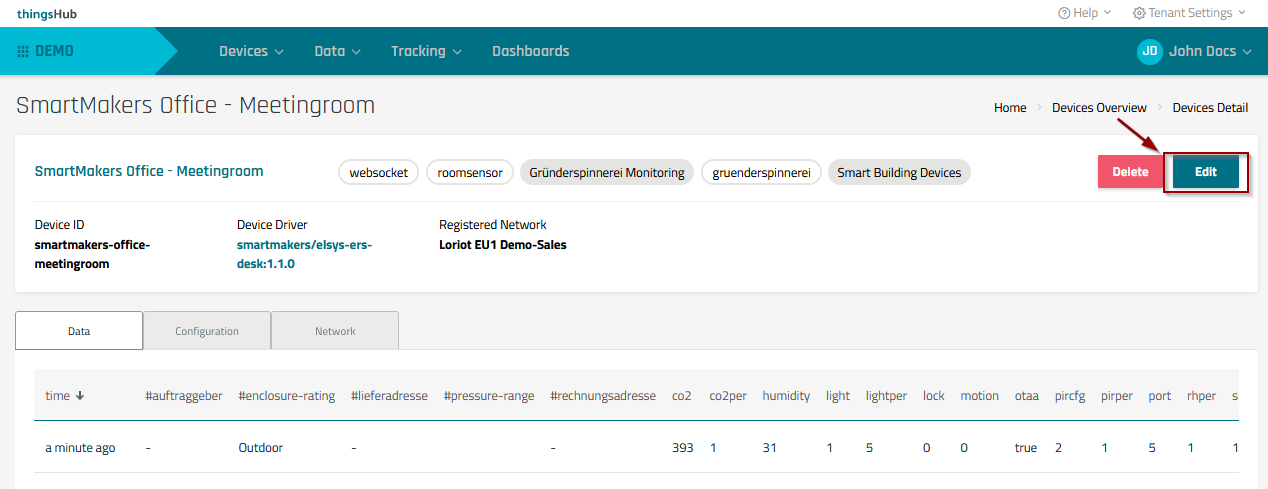
Step 1) Go to Devices > Overview and select the name or edit button.

Step 2) In the Devices Detail page, select the Edit button to open the Edit Device dialog.
Devices Detail page
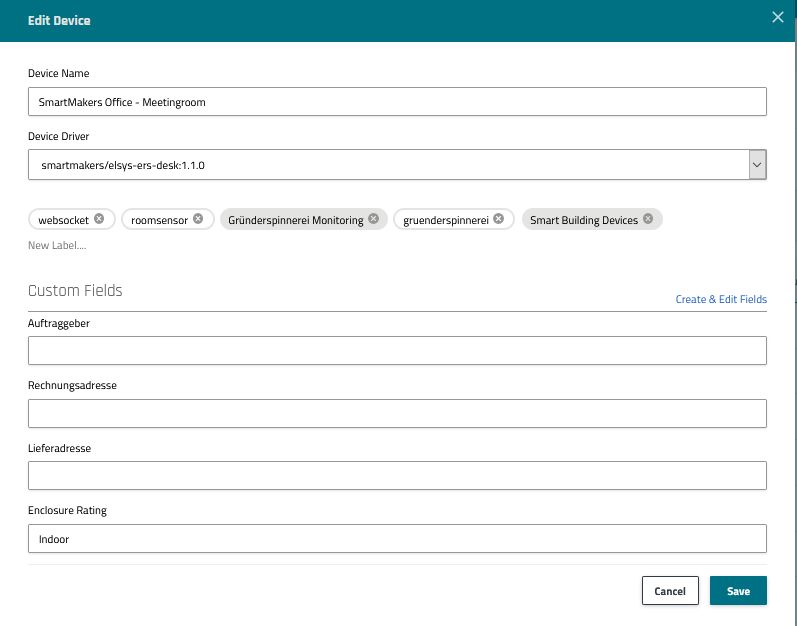
Step 3) In the Edit Device dialog, you can make changes to the below device settings. When finished, press the Save button to save changes and return to the Devices Detail page.
-
Device Name. Enter a device name unique to the tenant. Note: the device ID cannot be changed.
-
Device Driver. Software written to help facilitate and configure the device so that it interacts and functions properly within the thingsHub application. A valid device driver is necessary for the device to function. For more information, see Managing device drivers
-
Device Labels. Labels Metadata added to devices so that they can be grouped by a common characteristic, such as by device location or manufacturing process. Using labels to group and sort devices
-
To delete a label, select the X next to the label name.
-
To add a label, click in the New Label section to open the New Label dialog.

-
-
Custom Fields. Customizable metadata applied to the device, such as inventory numbers, external IDs, or street addresses. After defining a custom field in the tenant settings, other users can assigning values to these fields on the devices. For more information, see https://smartmakers.atlassian.net/wiki/pages/resumedraft.action?draftId=2097315862.
Edit Device dialog
Delete a device
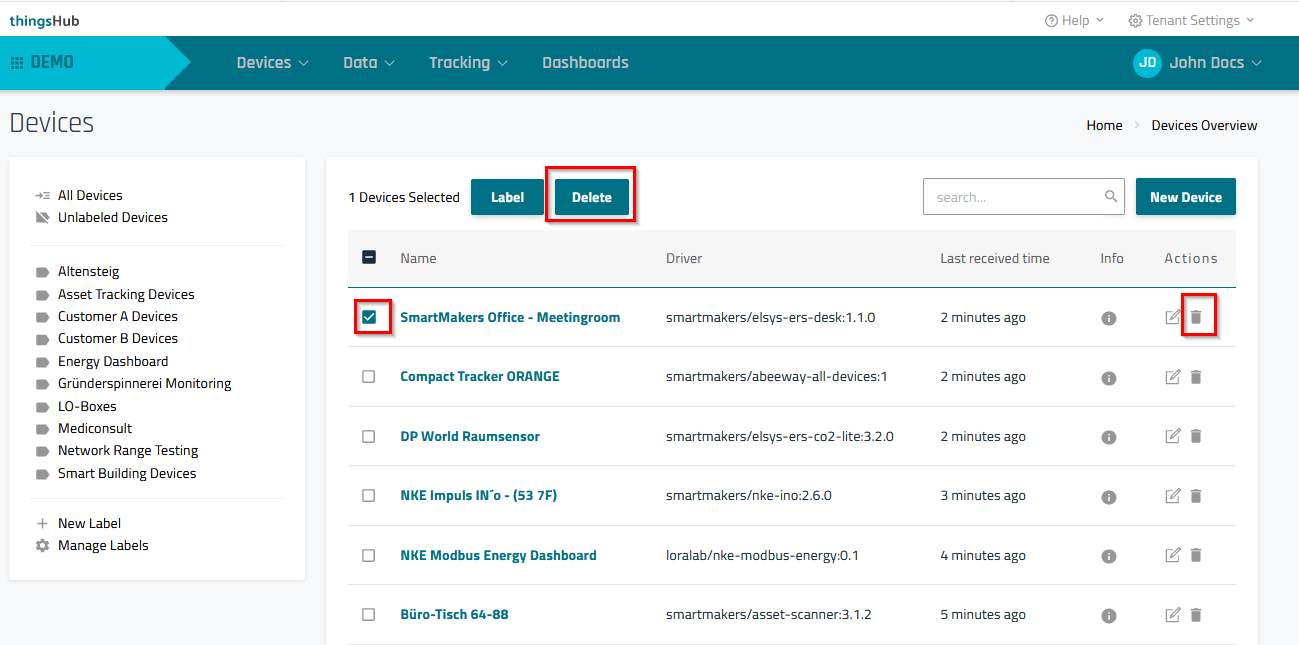
-
In the Devices Overview page, select the Delete button located in the row corresponding to the device to be deleted. Then select Ok to confirm the device deletion.
Alternatively, in the Device Details page, select the Delete button in the top-right corner of the screen. Then select Ok to confirm device deletion.
Forwarding device data to 3rd party systems
See Integrations
Related articles
Monitoring data from a single device | comment 2247557243
Using labels to group and sort devices
Managing device drivers | comment 2259386589
Setting up devices using Auto Activation