External MQTT broker
This article describes how to integrate the thingsHub tenant with an external MQTT broker.
Using the New Integration wizard to set up an external MQTT broker integration
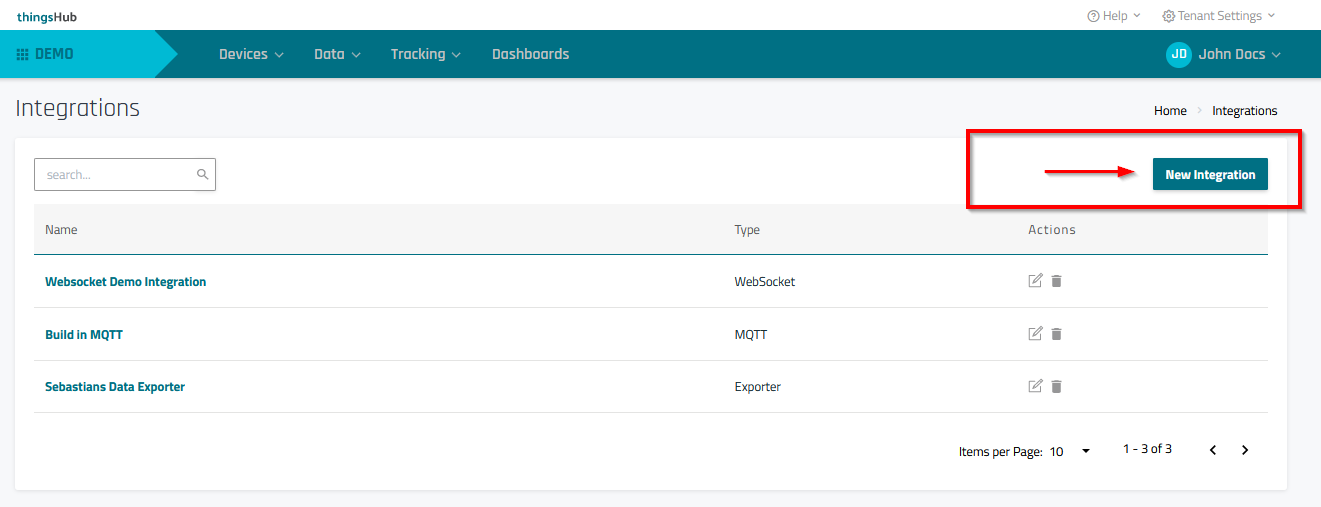
Step 1) Go to Data > Integrations and select the New Integration button.
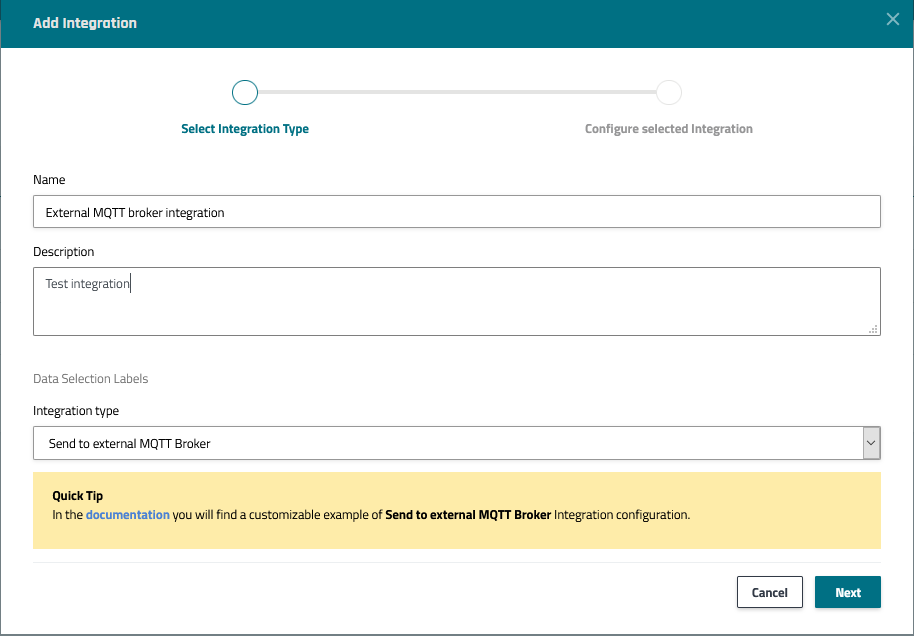
Step 2) In the Select Integration Type step of the Add Integration wizard, enter the configuration information as described in the below parameters table. Then press the Next button to continue to the next step, Configure selected Integration.
Parameter | Description |
|---|---|
Name | Enter a name for the integration. |
Description | Optional field used to describe the integration. |
Data Selection Label | Select labels that are assigned to the devices from which you would like acquire data. For more information on device labels, see Using labels to group and sort devices. |
Integration type | Select Send to external MQTT Broker |
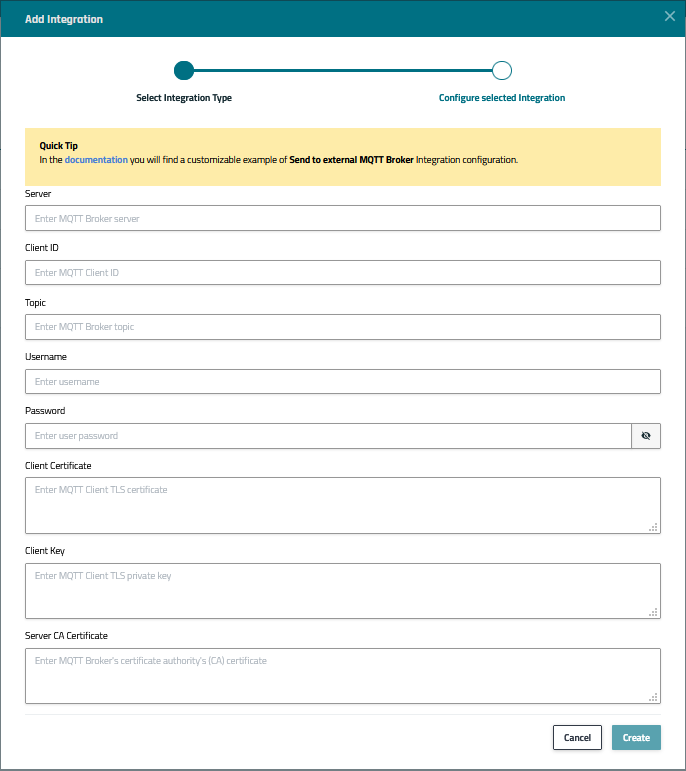
Step 3) In the Configure selected Integration step, enter the configuration information as described in the below parameters table. Then press the Create button to complete the process and return to the Integrations page.
Parameter | Description |
|---|---|
Server | URL address of the broker. Note that the URL must also contain the port. Example: 192.168.0.5:1883, mqtt.example.com:1883. |
Client ID | The ID used to identify the client on the broker. For more information, refer to the MQTT documentation. |
Topic | Destination topic for all published messages. The thingsHub will push all messages to the same topic and does not use sub-topics. |
Username | The username which the thingsHub should use to log-in to the MQTT broker. |
Password | The matching password for the above username. Both username and password should be provided by the MQTT broker’s operator. |
Client Certificate | The client TLS certificate. Client Certificate and Key are used by the thingsHub to authenticate itself with the MQTT broker. |
Client Key | The client TLS private key. Client certificate and key are commonly used alternatives to authentication using username and password. |
Server CA Certificate | The TLS certificate of the MQTT broker's CA authority. The thingsHub will trust the MQTT broker if it’s server certificate was signed (directly or indirectly) with this CA certificate. |
Templating
The MQTT client integration allows you to customize the message format to suit your needs. The syntax follows Golang's template package. This allows using a wide range of features, including conditionals and loops. In this templating dialect, double curly braces are used to indicate template fields, e.g {{ .Message.Device.Name }}. As common for Golang, variables are named with a leading capital letter, though all fields that are part of the driver schema are kept exactly as-is.
Note that templating can currently only be used via the thingsHub’s REST-API.
The following fields can be used:
Name | Description |
|---|---|
| The device ID |
| The name of the device |
| The device's list of labels |
| The updated state from the message |
| The update's timestamp (not necessarily the time stamp of the uplink). |
| The network server's ID of this device. This is most frequently the DevEUI, but might be different, e.g. The Things Network allows for arbitrary IDs. |
| The network connection ID, i.e. the thingsHub’s internal ID of the network connection through which the uplink was received. |
Template examples
A message can be in any text format, with JSON being the most commonly used.
Example 1
The following example illustrates how a template containing a device with a DevEUI of
0102030405060708and atemperaturefield in the data schema could transform an uplink into a simple JSON-based MQTT message.Given the following message coming from the thingsHub:
JS{ "temperature": 26.5, "humdity": 60 }Then the following template could be used for transformating the message:
JS{ "deveui": "{{ .Message.NetworkServer.Device }}", "value": "{{ .Message.Values.temperature }}" }The resulting message sent to the MQTT broker will then look like this:
JS{ "deveui": "0102030405060708", "value": "26.5" }
Sending data to the Azure IoT Hub
The thingsHub's MQTT integration can also be used to send data to the Azure IoT Hub. With this approach, the thingsHub will act as a single device on the IoT Hub, representing all of the attached (and labelled) IoT devices.
Option | Value |
|---|---|
Server | Hostname and port, e.g. "example.azure-devices.net:8883" |
ClientID | The client ID must be set to the name of the device. |
Topic | The topic must be set to "devices/<device-name>/messages/events/", e.g. "devices/test-device/messages/events/". |
CA Certificate | The CA certificate should be left empty. The MQTT broker of the Azure IoT Hub uses a public certificate which the thingsHub trusts already. |
Client Certificate | The client certificate in the PEM format including the "-----BEGIN CERTIFICATE------" and "------END CERTIFICATE------". "A client certificate for testing can be generated according to Azure's guide for self-signed certificates: https://github.com/Azure/azure-iot-sdk-c/blob/master/tools/CACertificates/CACertificateOverview.md |
Client Key | The private key which matches the client certificate in the PEM format. |
Username | Th username must be filled with "<full-hostname>/<device-name>/?api-version=2018-06-30", e.g. "example.azure-devices.net/test-device/?api-version=2018-06-30". |
Password | The password field should stay empty. Authentication is done with the TLS client certificate. |