Managing Fields
In ThingsHub, fields are used to store and organize data within Business Objects. You can view, create, modify, and delete custom fields as per your needs. This guide covers the essential actions for managing fields and provides instructions on how to customize them for your use case.
Viewing Field Information
Managing fields for Individual Business Objects
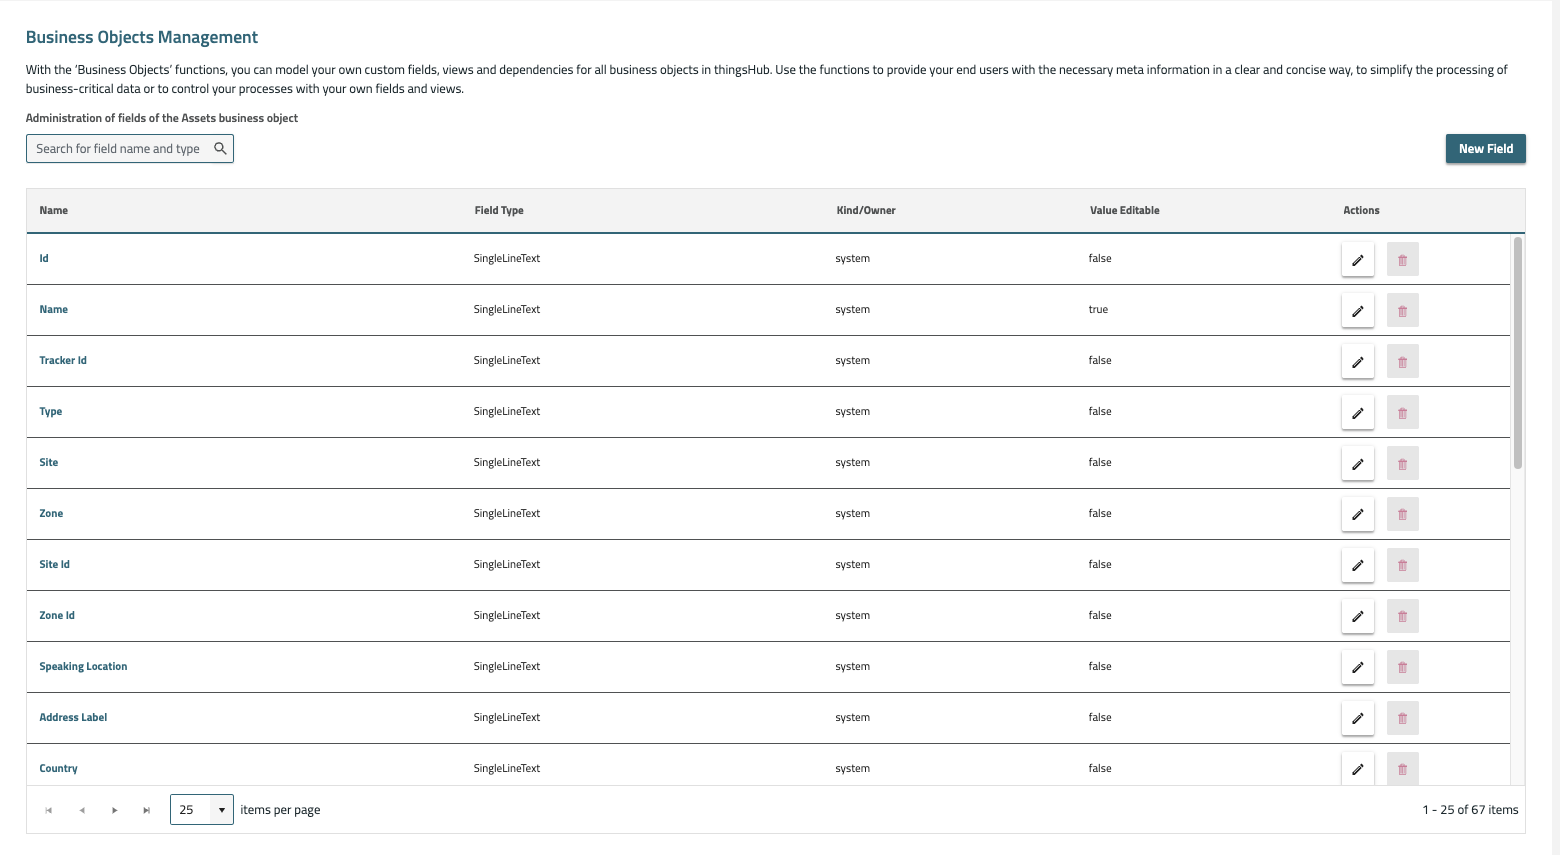
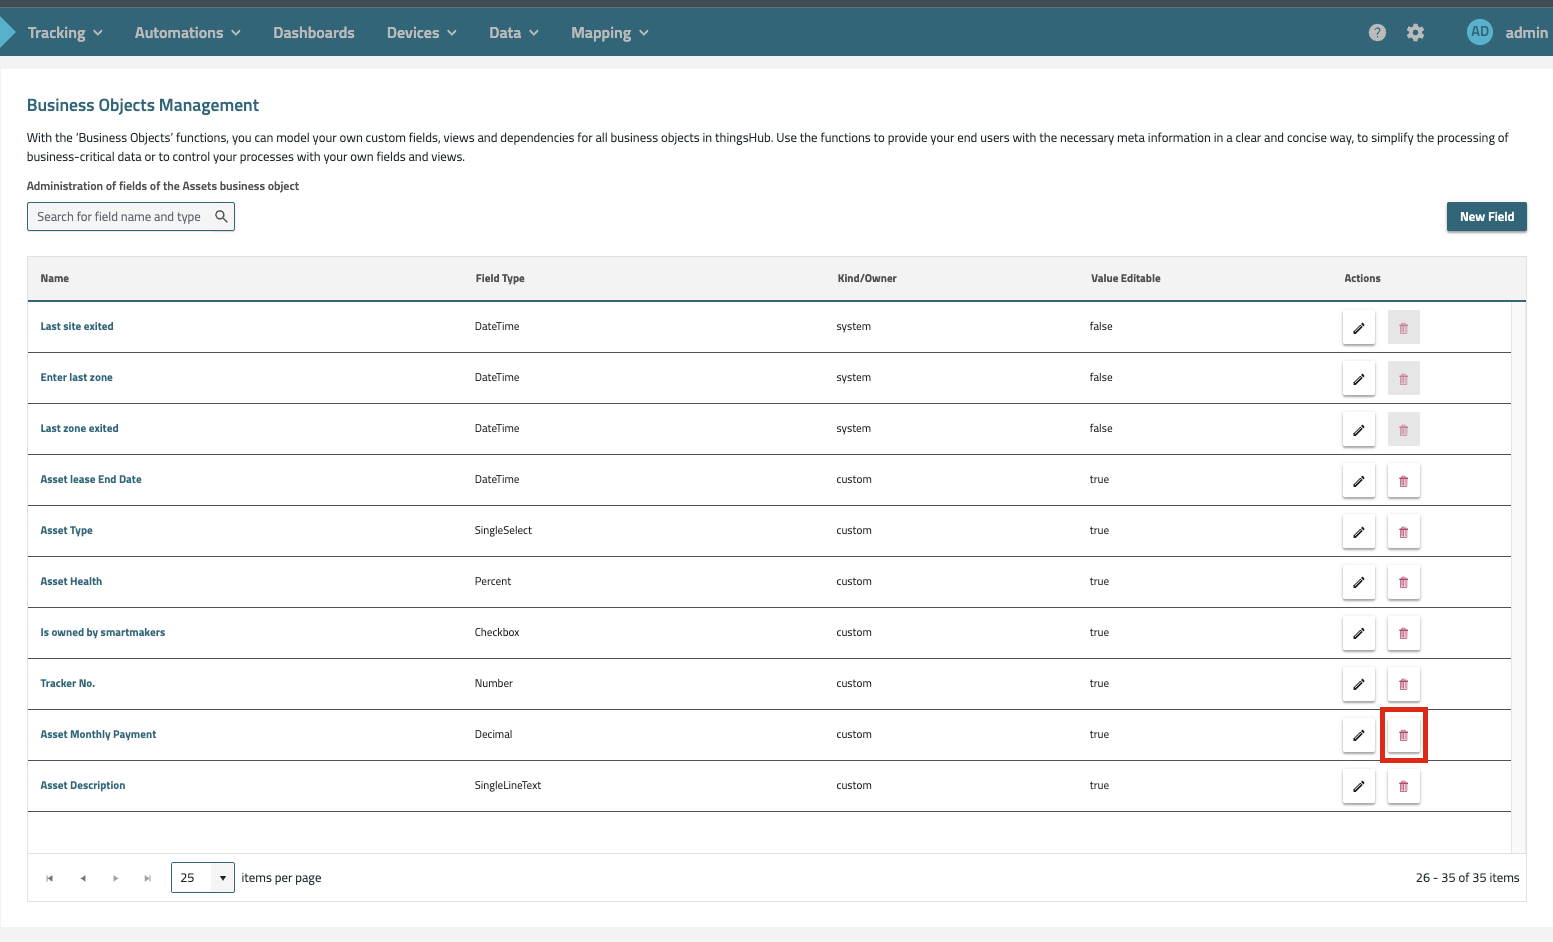
The Business Objects Management page provides a detailed overview of all fields within a Business Object. Each field is represented in a table, and the following information is displayed:
Field Name: The name assigned to the field.
Field Type: Specifies the type of data the field can store. ThingsHub supports various field types, such as text, number, date, and more. For a complete list of supported field types and their properties, refer to Supported Field Types
Kind/Owner: This indicates whether the field is a System Field or a Custom Field.
System Fields: These fields are created and managed by ThingsHub. They are used internally and cannot be modified or deleted by users.
Custom Fields: These fields are created by thingsHub users and can be edited, managed, or deleted at any time.
Creating Custom Fields
Creating custom fields allows you to tailor your Business Object to meet your specific data requirements. To create a custom field:
Click the "New Field" Button: This will open a sidebar where you can configure the new field.
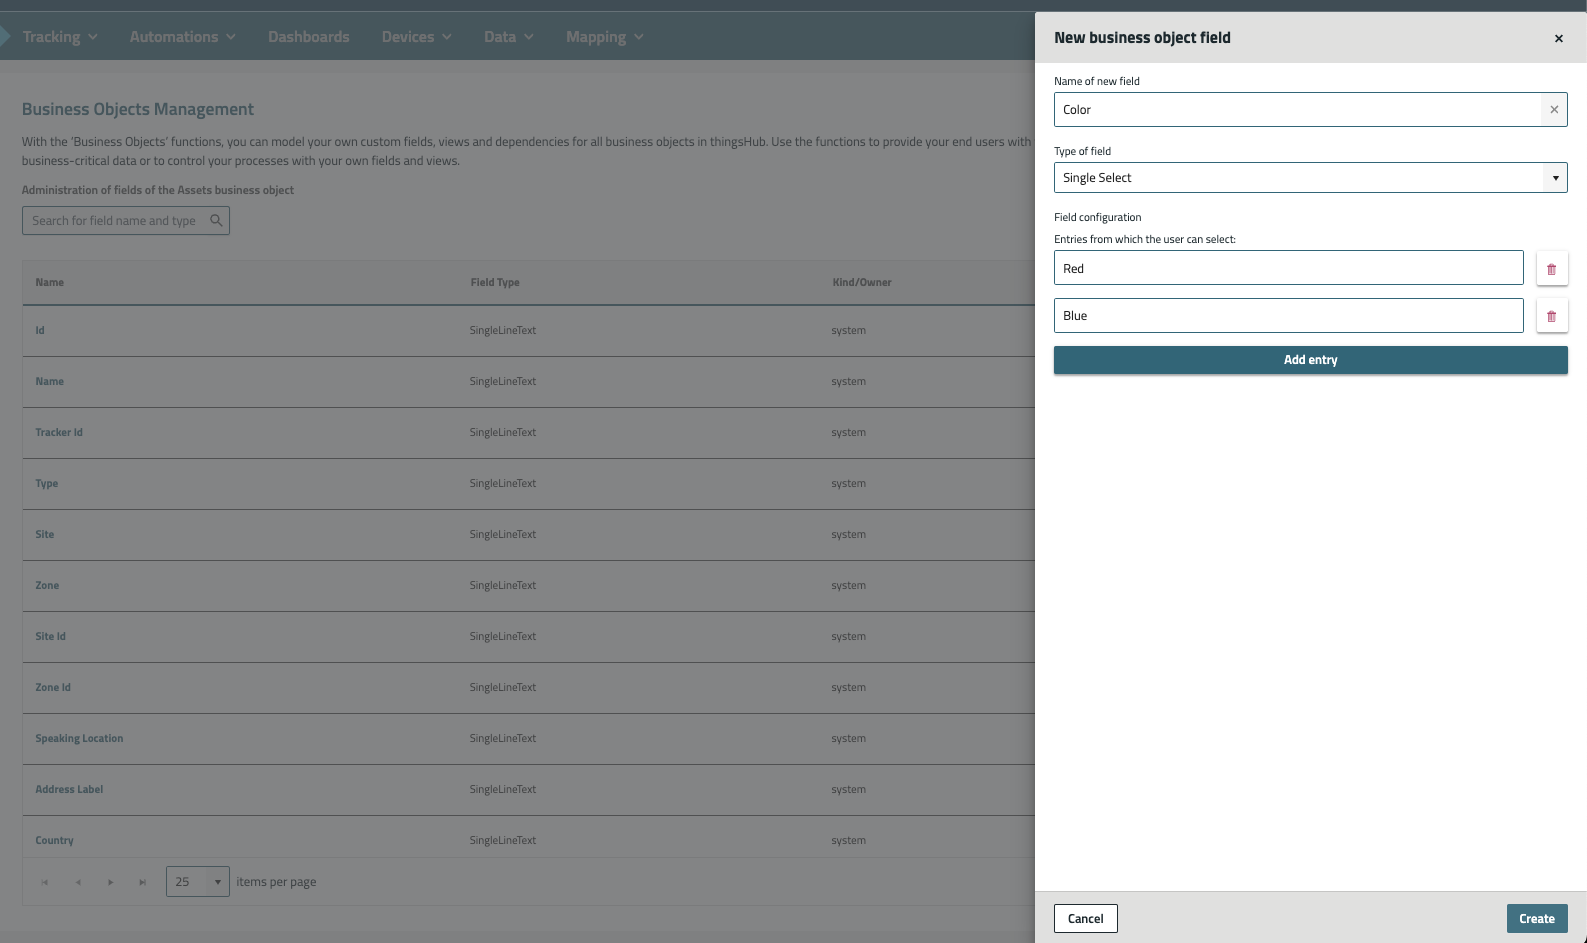
Enter Field Details:
Field Name: Provide a descriptive name for the field.
Field Type: Select the appropriate field type for your data. To see the available field types and their specific configurations, consult the Supported Field Types documentation.
Configure Field Settings: Depending on the selected field type, additional configuration options will be available.
For example, if you choose a "Decimal" field type, you can define the precision value for the decimal point.Create the Field: After entering the name and configuring the field settings, click Create. The custom field will be added to your Business Object.
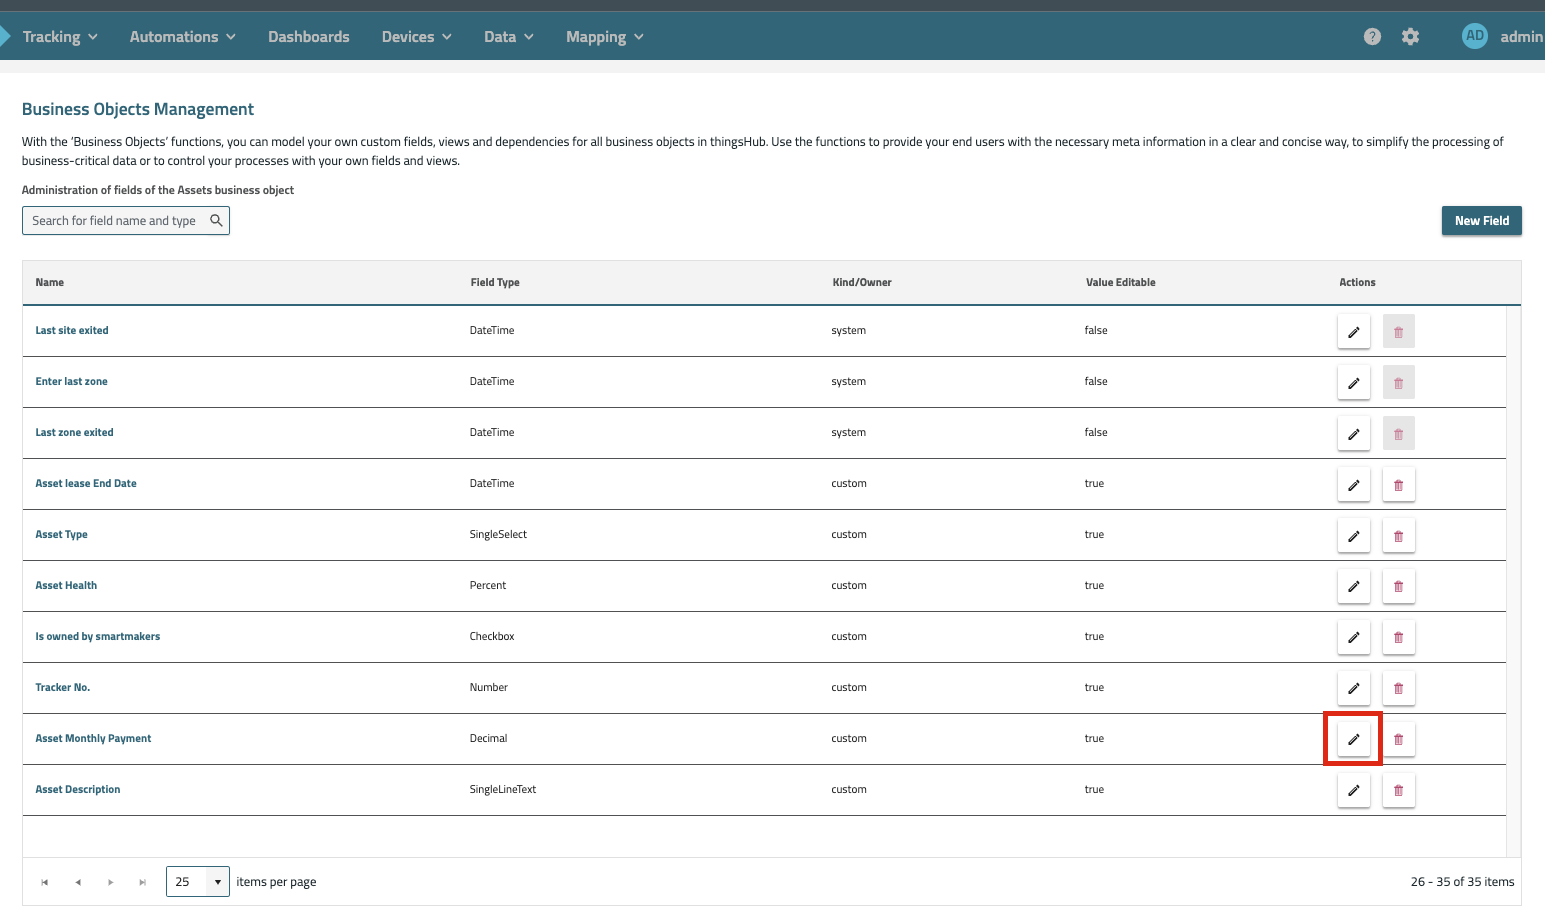
Modifying Custom Fields
Once a custom field has been created, you can modify its name and configuration. To modify a custom field:
Click the Edit Icon: In the Actions column of the field you want to modify, click the edit icon (pencil).
Update Field Information:
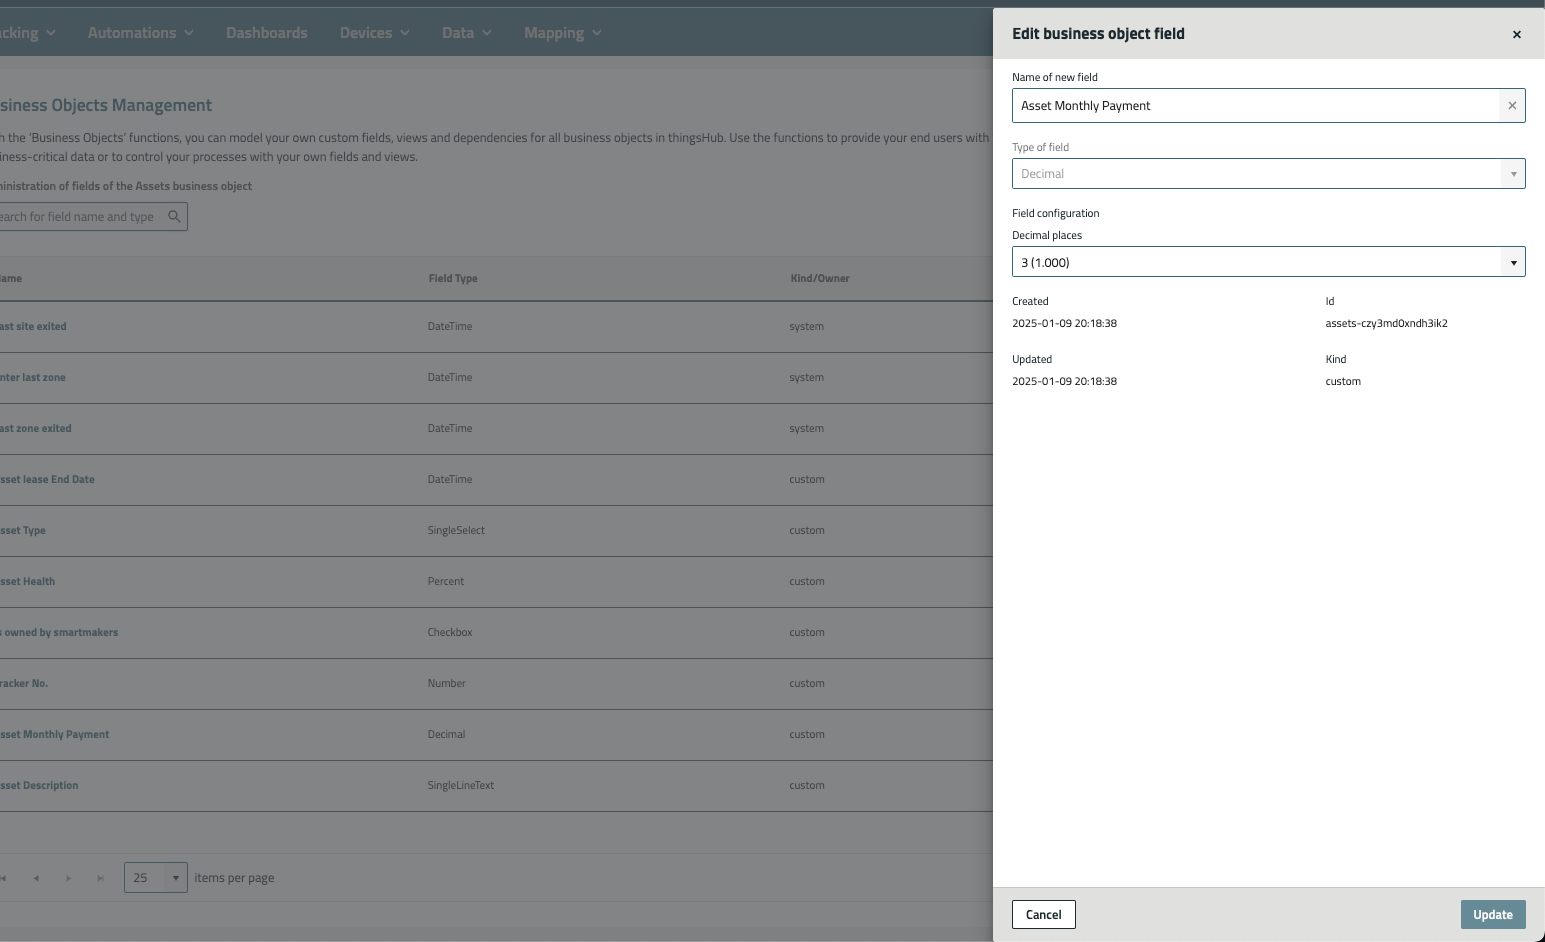
Updating the field
You can modify the Field Name.
You can also change the field's configuration settings depending on the type of field.
For example, you can adjust precision for a "Decimal" field.
To see the available field types and their specific configurations, consult the Supported Field Types documentation.You cannot modify a field’s type once set.
Save Changes: Once you've made the necessary changes, click Update to save your modifications.
Deleting a Custom Field
If a custom field is no longer needed, you can delete it.
Please note that only custom fields (not system fields) can be deleted. Deleting a custom field will permanently remove both the field and all data stored within it.
To delete a custom field:
Click the Delete Icon: In the Actions column of the field you want to delete, click the delete icon (trash bin).
Confirm Deletion: A confirmation dialog will appear. You will be asked to confirm if you want to delete the field.
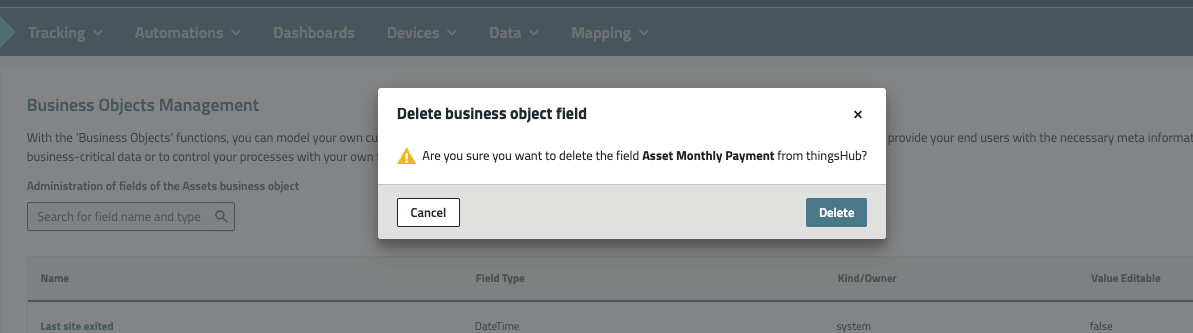
Delete the Field: Click Delete to confirm the action. The custom field, along with all data stored within it, will be permanently deleted.
Important: Deleting a custom field will remove the field from any views it is included in, and all data within the field will be lost permanently. Ensure that you back up any important data before proceeding.
Additional Resources
For a complete list of supported field types and their properties, visit Supported Field Types