Setting up the asset tracking infrastructure
This article describes how Asset Tracking Owners can set up and deploy the asset tracking infrastructure.
Overview
Asset tracking infrastructure equipment primarily consists of locators and gateways. Locators are IoT devices that detect the presence of asset tracking devices as they enter, exit, or remain in designated zones contained within a site. The locators communicate device location data to gateways, which are intermediary devices used to establish communications between IoT devices and the thingsHub platform via an IoT network.
Locators are installed on-ite and are in fixed positions; they include asset scanners and microlocators. Tracking devices are attached to assets and have mobile positions; they include asset trackers and asset tags.
Setting up the asset tracking infrastructure includes strategically installing asset locators in particular zones within a site.
Asset tracking infrastructure terminology
Asset Tag.
A small, lightweight tracking device that includes basic tracking functionality, but usually nothing more than that.
An asset tag announces its presence via BLE advertisements.
The device’s location is determined by the thingsHub with the help of Asset Scanners. The asset tag announces its presence to asset scanners, which have a fixed and known location.
Asset Tracker.
A tracking device that includes tracking functionality, but also advanced features such as shock detection and temperature monitoring.
The asset tag communicates its location data directly to the thingsHub via LoRaWAN network.
The asset scanner communicates the tracker location data directly to the thingsHub via a LoRaWAN network connection.
Locators.
Devices that are used to precisely locate tracking devices within an area of interest, such as a specific workstation or room in which an asset is located.
Locators create a circular area with a radius of 10m.
Locators include asset scanners and microlocators.
Microlocator. A type of Locator that is implemented as a BLE beacon. These are not directly connected via an IoT network to the thingsHub, but simply emit BLE advertisements to announce their position for further processing by Asset Trackers.
Asset Scanner.
An IoT device that receives signals from asset trackers.
It determines the precise position of each asset by combining knowledge of its fixed position and geolocation with the asset tracker's output signal strength.
The asset scanner communicates the tracker location data directly to the thingsHub via a LoRaWAN network connection.
(LoRaWAN) Gateway. A networking device that establishes communications between IoT devices and an IoT network, and ultimately the thingsHub.
Site. A geographically bounded area where assets can be located. Multiple sites can be defined in the thingsHub application. A site is composed of one or many small areas of interest called zones.
Zone. Small areas of interest that are contained within a site.
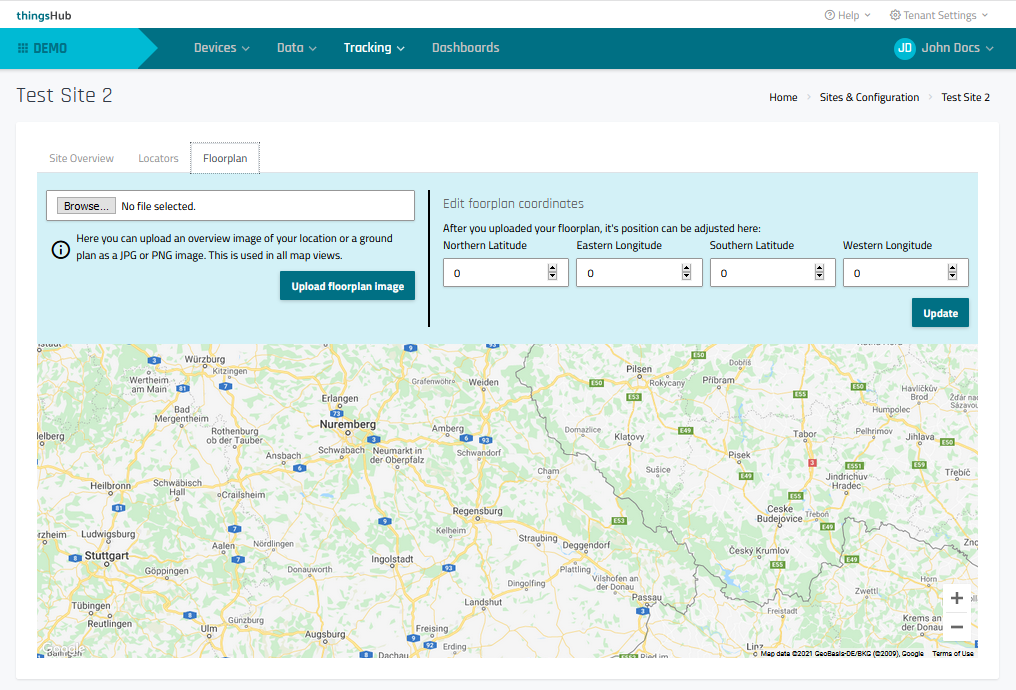
Floorplan. A top-down picture of a site that clearly indicates locations and possibly landmarks. A floorplan enables you to precisely track a device within a building or outdoor area. The floorplan can be displayed on the asset tracking map by uploading a JPG or PNG image of the floorplan and then entering its coordinate positions.
Process for setting up an asset tracking infrastructure
Determine the geolocation coordinates of the site, zone, & locators.
Register asset scanner devices in the thingsHub’s Device Management.
Create a new site in the thingsHub platform.
Install and deploy the physical locators at the site.
Step 1) Determine the center coordinates of the site, zones, & locators
Locators should be placed as needed to minimize coverage gaps and overlaps. For an ideal tracking performance, the locator layout should be designed jointly by SmartMakers and the end-user.
Determine and record the geolocation of the site center.
Determine and record the geolocation of each zone center.
Determine and record the geolocation of the asset scanners. Wherever feasible, asset scanners should be installed in an elevated position, such as on a lamp post. This will increase the radio communications capabilities of the BLE connections.
Notes:
You can determine geolocation coordinates by using a map, a GPS-capable phone, or a LoRaWAN field tester.
Asset scanners can detect assets within an approximate 10 to 80-meter diameter circular area.
Asset scanners should be placed roughly 20 meters apart, depending on the desired scanning resolution.
Step 2) Register asset scanners as new devices in the thingsHub platform
In the thingsHub platform, add asset scanners using the New Device wizard. For more information, see Adding, editing, & deleting devices .
Asset Scanners include the following requirements:
Include the label trackinghub.
Include the device driver that was entered by the Tenant Owner in the thingsHub configuration file.
Step 3) Create a new site in the thingsHub platform
Prerequisites
Gather the following information:
Geolocation data for the site, locators, and floorplan.
Locator device data.
For microlocators (asset tags), you will need to know the device MAC address.
For asset scanners, you will need to know the associated thingsHub device name that was created in Step 2) Register asset scanners as new devices in the thingsHub platform.
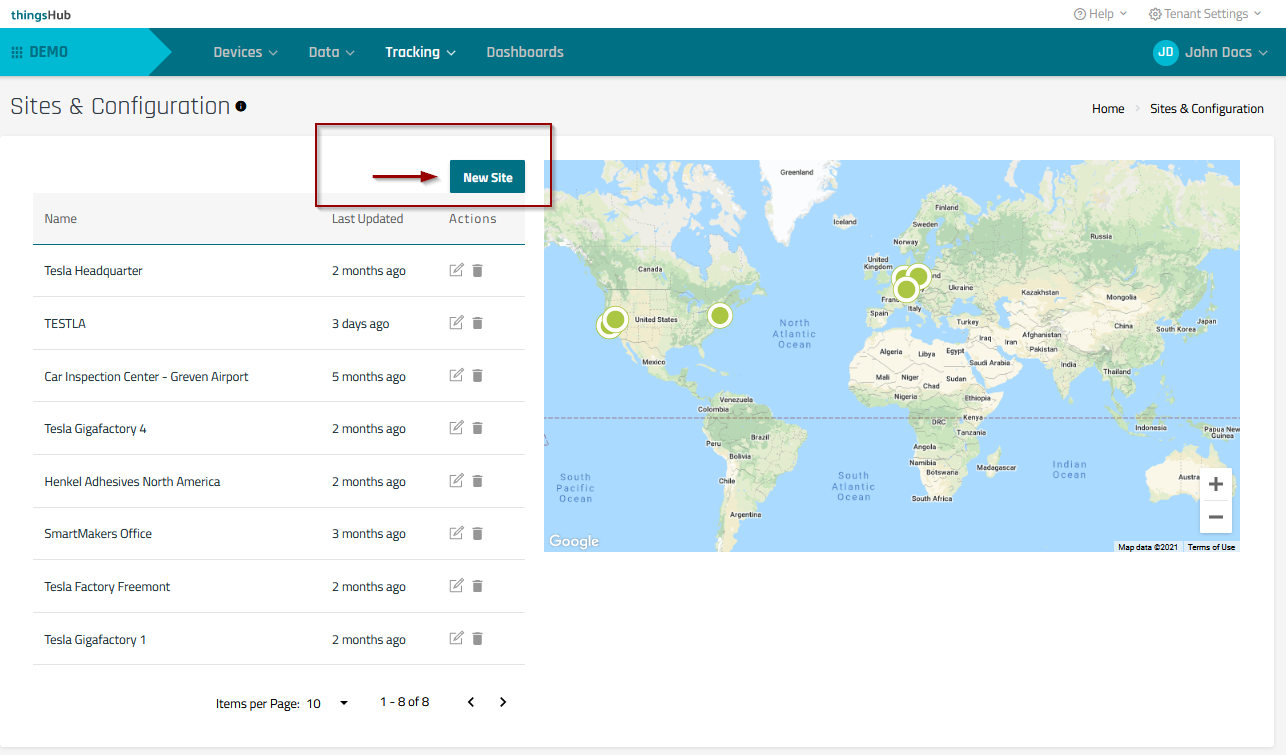
1) Go to Tracking > Sites & Configuration and select the New Site button.
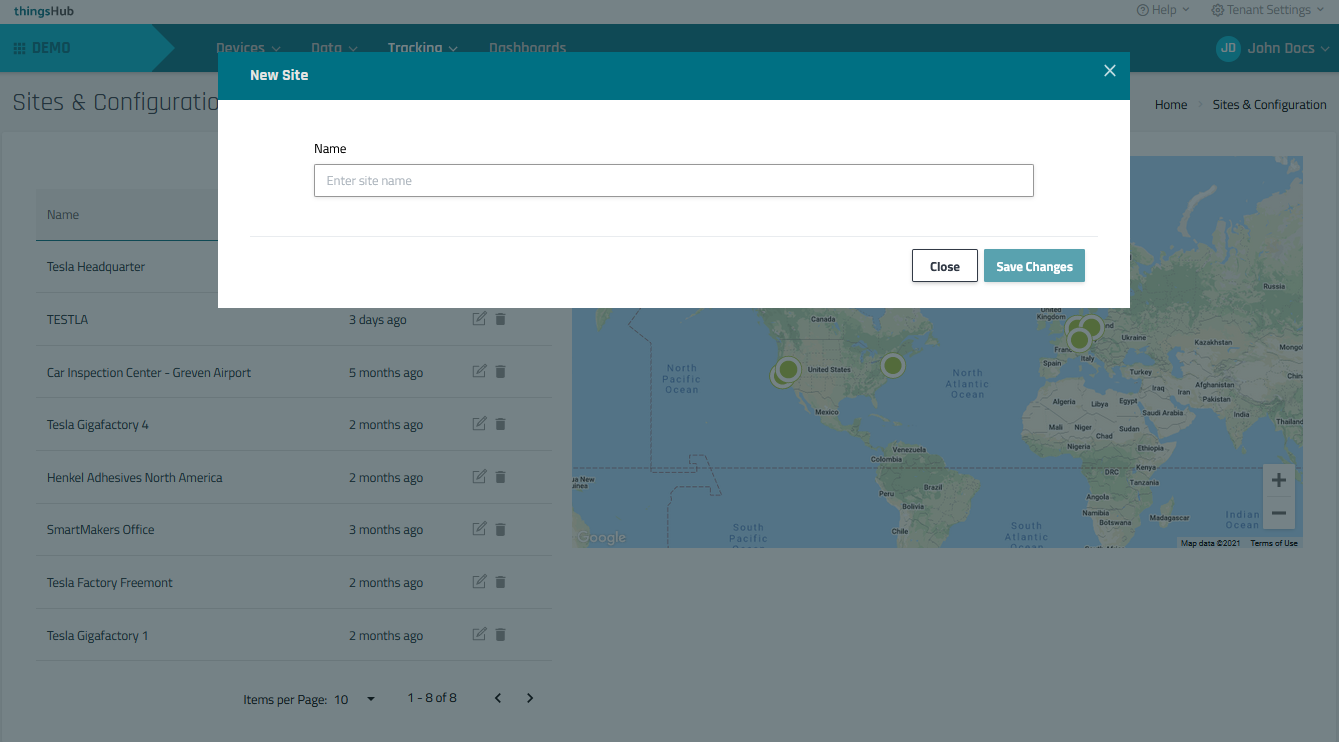
2) In the New Site dialog, enter the Site Name. Then press the Save Changes button to continue to the Site Overview tab.
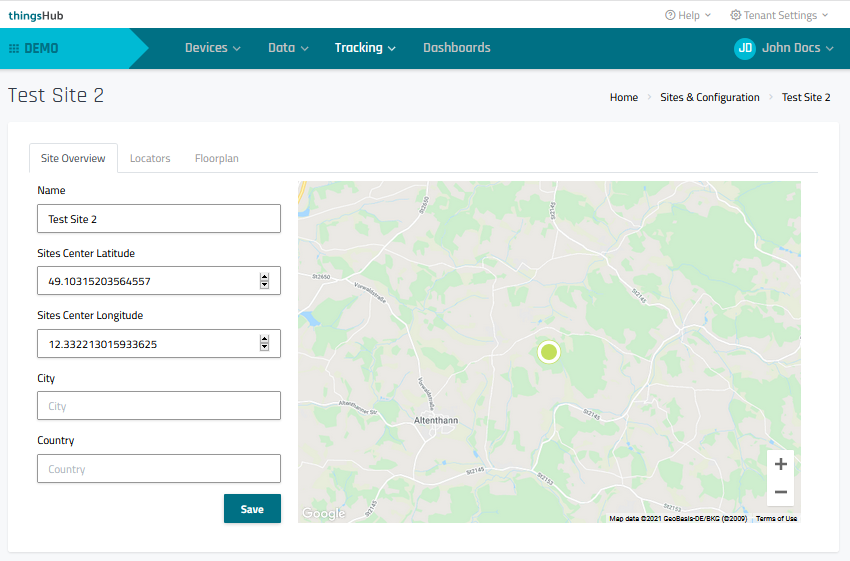
3) In the Site Overview tab, enter the site’s location details, including city, country, and the center latitude & longitude. You can enter coordinates using the fields or by clicking within the map.
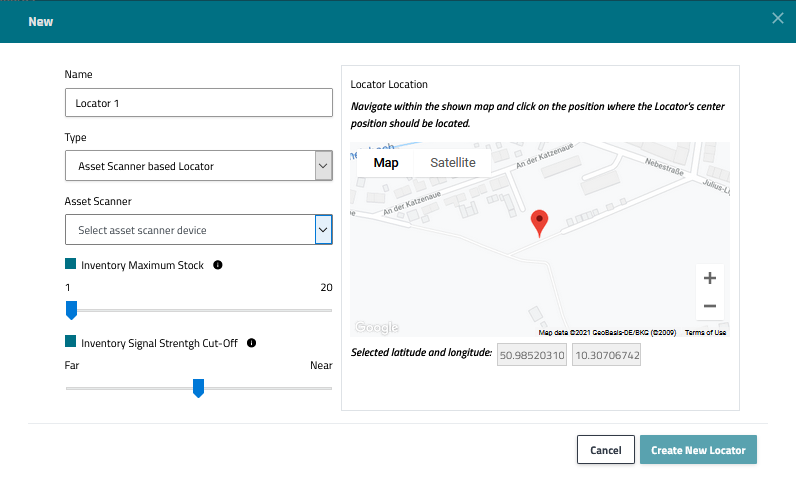
4) Add Locators. In the Locators tab, press the New Locator button to open the New Locator dialog. Then enter the below information and press the New Locator button.
Locator Location. Select within the map to establish the Locator’s geographic center position.
Name. Enter the Name for the locator.
Type. There are two types of locators:
Micro Locator. Enter the device MAC Address.
Asset Scanner. Select the registered asset scanning device from the asset scanner drop-down list.
Inventory Maximum Stock. (Optional) The maximum number of tracked Assets considered inventory.
Inventory Signal Strength Cut-off. (Optional) The minimum RSSI (received signal strength indicator) of an asset to be considered in the inventory. The maximum distance between the asset tracker and that is required for the asset to be considered as part of the inventory.
Select on a scale from Far to Near.
5) Add Site Floorplan (Optional). In the Floorplan tab, press the Browse button to upload and display a JPG or PNG image of the site floor plan. Then, position the four corners floorplan image using the latitude and longitude coordinate fields. The uploaded floor plan will be automatically sized and displayed in all map views.
Step 4) Install & deploy the physical infrastructure equipment.
Install the locators in the positions previously determined in Step 1) Determine the geolocation coordinates of the site, zones, & locators.
Coordinate with facility management when installing the asset tracking infrastructure hardware.