
The following tutorial applies to Tenant Owners who are performing a first-time device set-up. It demonstrates a complete end-to-end IoT device setup, from connecting a physical IoT device to thingsHub to monitoring and analyzing the received data.
Step 1) Login to the web user interface
Use one of the following supported web browsers to login to your thingsHub Tenant.
-
Google Chrome
-
Mozilla Firefox
-
Microsoft Edge

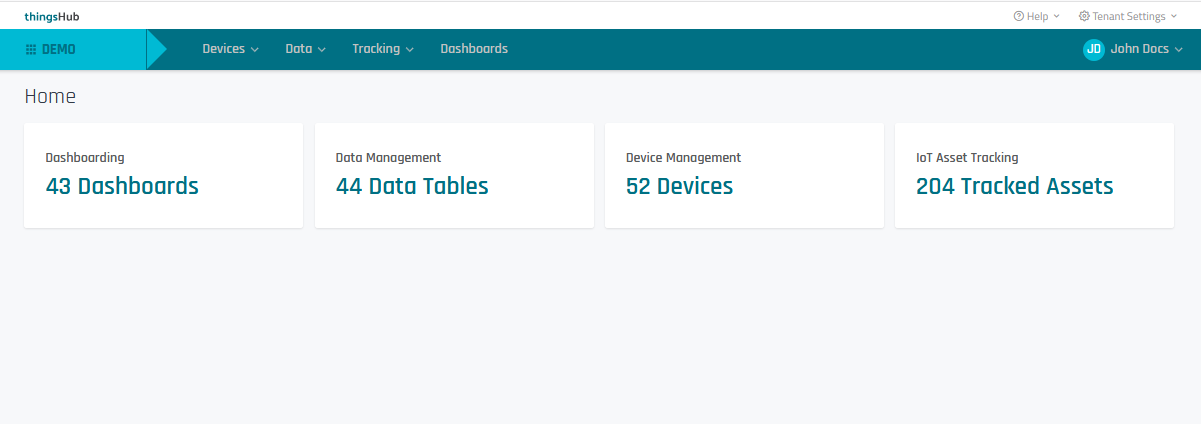
After logging into the thingsHub tenant, users assigned with the Tenant Owner user role will have access to the following homepage:
Step 2) Connect to an IoT Network
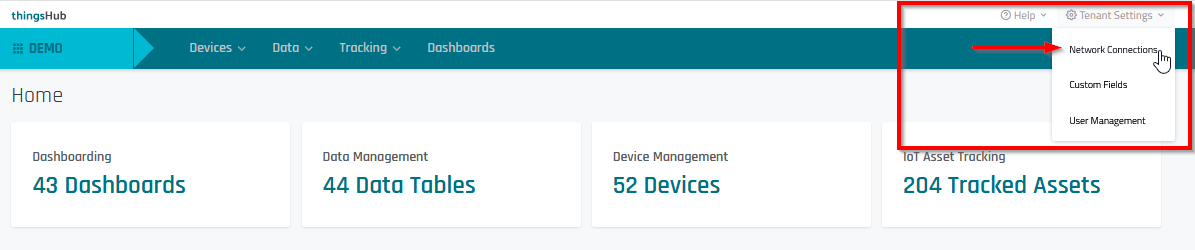
1. Go to Tenant Settings > Network Connections
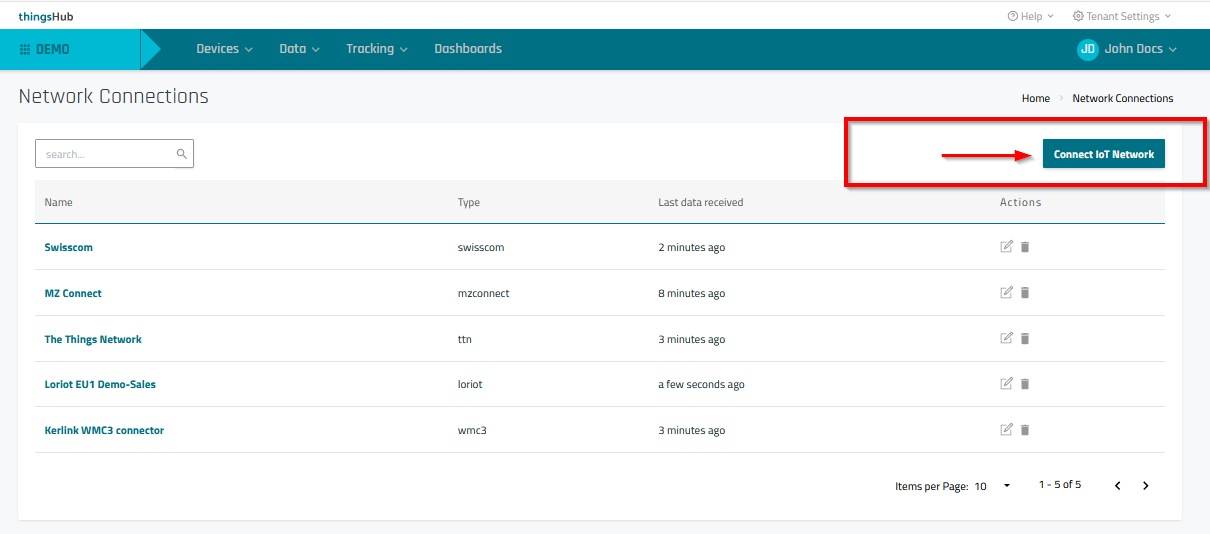
2. In the Network Connections page, select the Connect IoT Network button.
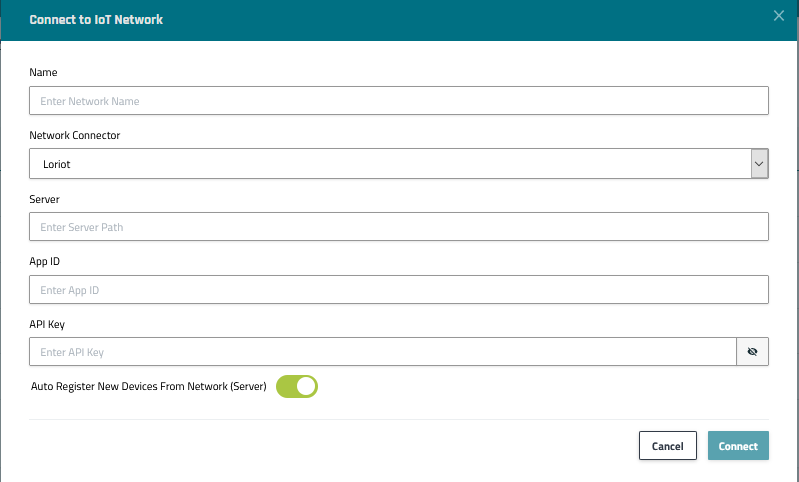
3. In the Connect to IoT Network dialog, fill in the required fields and then press the Connect button.
-
Note: Each connection type has different field requirements. The below example demonstrates the fields required to connect to a Loriot IoT Network. For detailed network configuration information, see IoT network connectors
Step 3) Add your device using the New Device Wizard.
1. Complete the following prerequisites:
-
Establish Network Registration. Ensure that the active Tenant has as an appropriate IoT connection.
-
Gather Required Device Information:
-
Device EUI (DevEUI). Locate this information in the product documentation or by asking the device vendor or manufacturer.
-
Application EUI (AppEUI). Locate this information in the product documentation or by asking the device vendor or manufacturer.
-
App Key. Locate this information in the product documentation or by asking the device vendor or manufacturer.
-
Device Driver. Locate this information in the Device Driver page. You can find the device by Searching by manufacturer, model, series, author, device name and more. See Managing device drivers for more information.
-
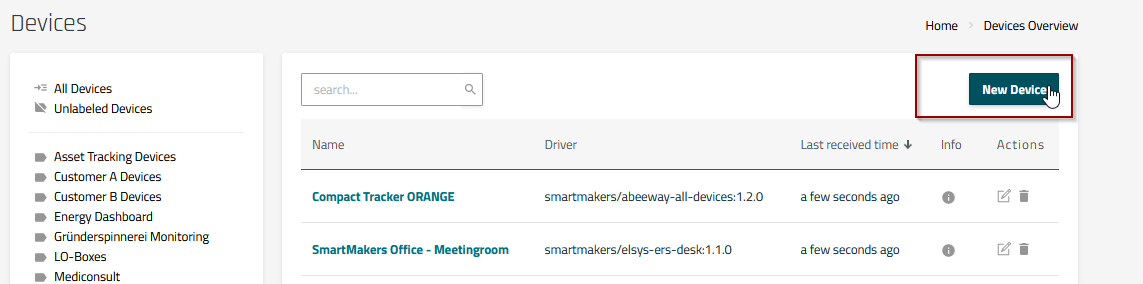
2. Start the New Devices wizard by selecting the New Devices button in the Devices Overview page.
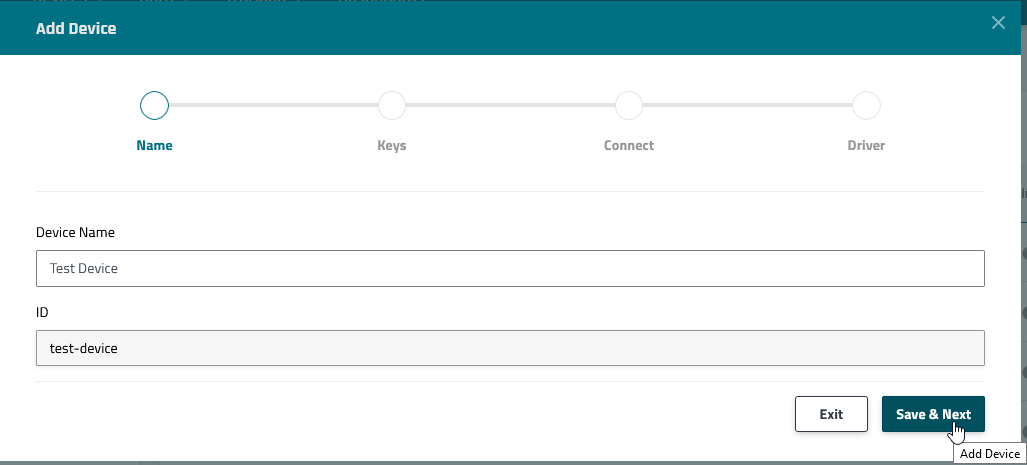
3. Name. Enter the Device Name and press the Save & Next button to continue.
-
Important notes regarding device naming:
-
It is highly recommended to usE the DevEUI as the device name--this will ensure that the device name is unique and adaptable to different installation locations.
-
The (Device) ID is created automatically, corresponding to the device name. This is a unique ID that cannot be changed later.
-
ThingsHub will warn you if it finds a duplicate device name.
-
Any data that is written into the wizard form will be saved immediately. This means that a device can be created in the device list even if you exit the wizard without saving.
-
Device Wizard, Name
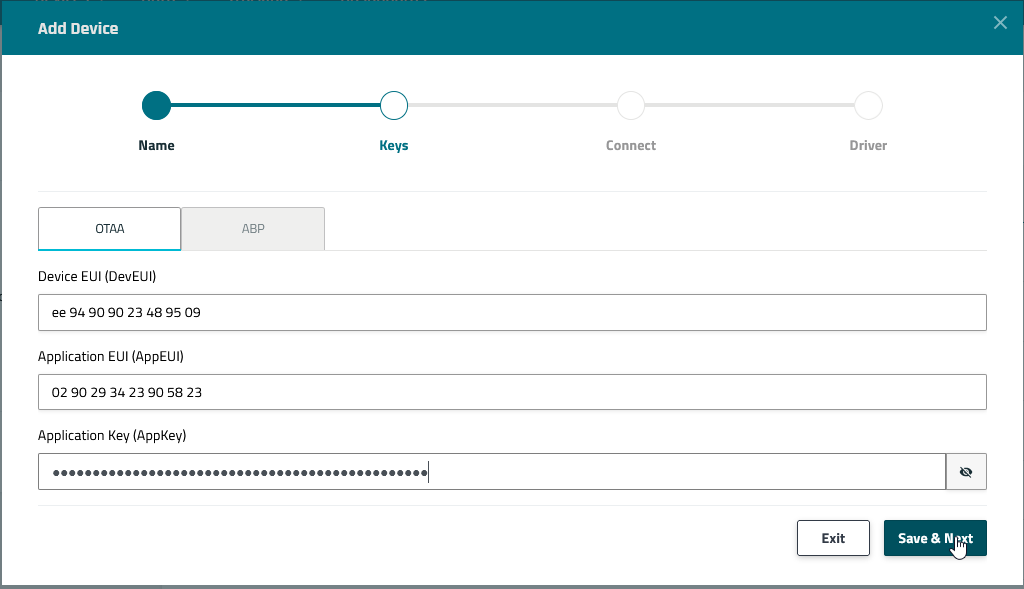
4. Keys. Enter the device OTAA Keys and press the Save & Next button to continue.
-
Notes:
-
To find device key information, consult the device documentation or request info from the device vendor or manufacturer.
-
It is important to keep the AppKey secured. This is because it is often hard-coded to the device and cannot be changed. Leaking the information can make the device permanently unsecured.
-
Device Wizard, Keys
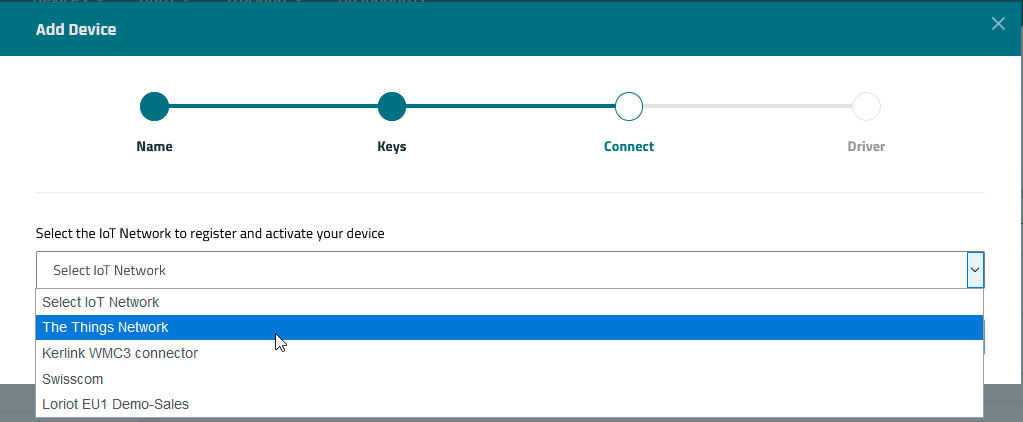
5. Connect. Select the IoT Network connector. The thingsHub will automatically register the new device on the selected network.
Device Wizard, Connect
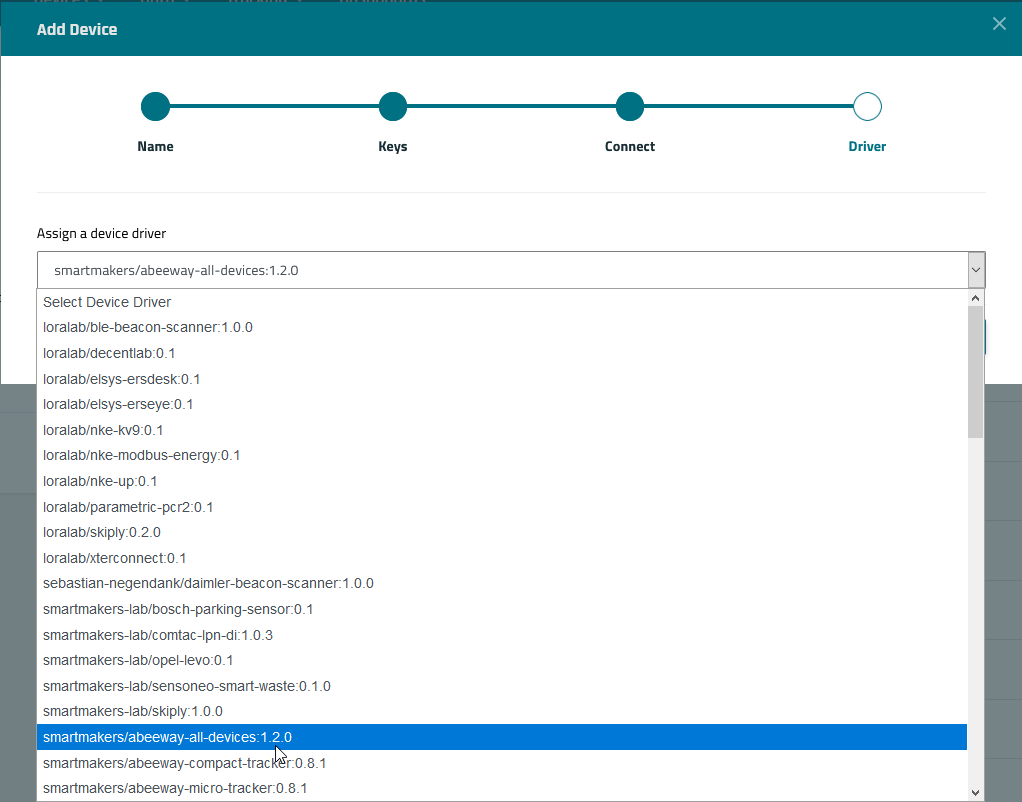
6. Driver. Select the Device Driver.
-
Note: You can find the correct driver in the Device Drivers page. For details, see Managing device drivers
Device Wizard, Driver
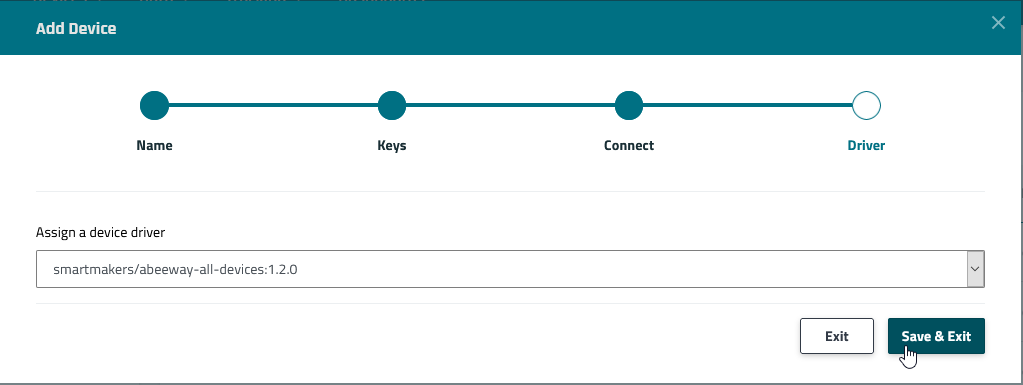
7. Saving and Next Steps. Press the Save & Exit button to complete the device wizard and return to the Devices Overview page.
Step 4) Turn on the device and receive data
Turn on the physical IoT device to start receiving its data. This data will be displayed and temporarily stored in the Data tab located in the Devices Detail page.
-
To view the received data, go to Devices > Overview and select the device to open its Device Details page.
Devices Overview page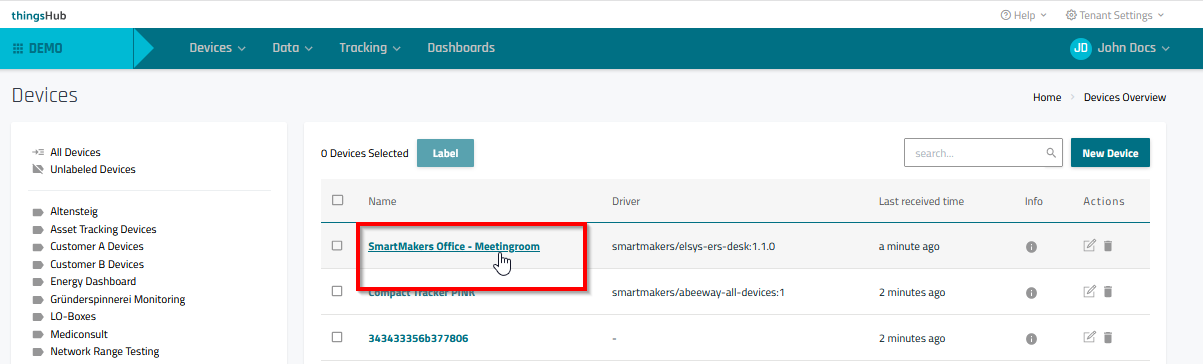
Devices Detail page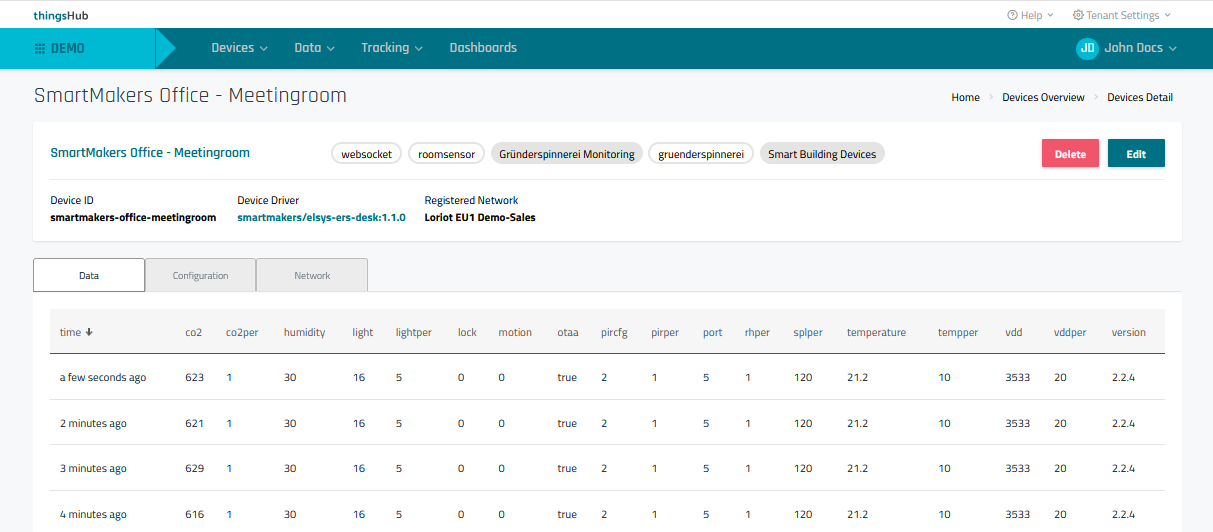
-
To analyze and monitor data from multiple devices with shared attributes (i.e., labels), as well as to enable long-term data storage, you will need to create a Data Table.